· 12 min read
How to Map Out Seating and Booths for Large Events
To map out seating and booths for a large event, start with the venue's approved capacity and a floor plan drawn to scale. Work out which spaces you can sell, how people will move between them and where the queues will go. Then build the seat chart and booth inventory from that plan.
An empty hall is very persuasive. There's room for another row, another exhibitor, maybe a bigger VIP area. Then the doors open, the bar queue reaches the main aisle and someone in your most expensive section discovers a pillar in front of their seat. Those extra sales suddenly look less clever.
A bad event layout and/or seating hurts and data backs it up, and you can see how much in our survey of 500 US event attendees, fielded in November 2025. Overcrowding frustrated 62.6% of respondents, long lines 57%, and poor sound or visibility 36.8%. A floor plan won't fix every service problem, but it can give your team a fighting chance.
Here's how to plan the room, from agreeing capacity with the venue to showing buyers exactly what they're paying for.
Step 1: Find out what you can actually sell
Ask the venue for the approved capacity with your stage, seating and booths in place. Its advertised capacity may be based on a standing event, where more of the floor is available for attendees.
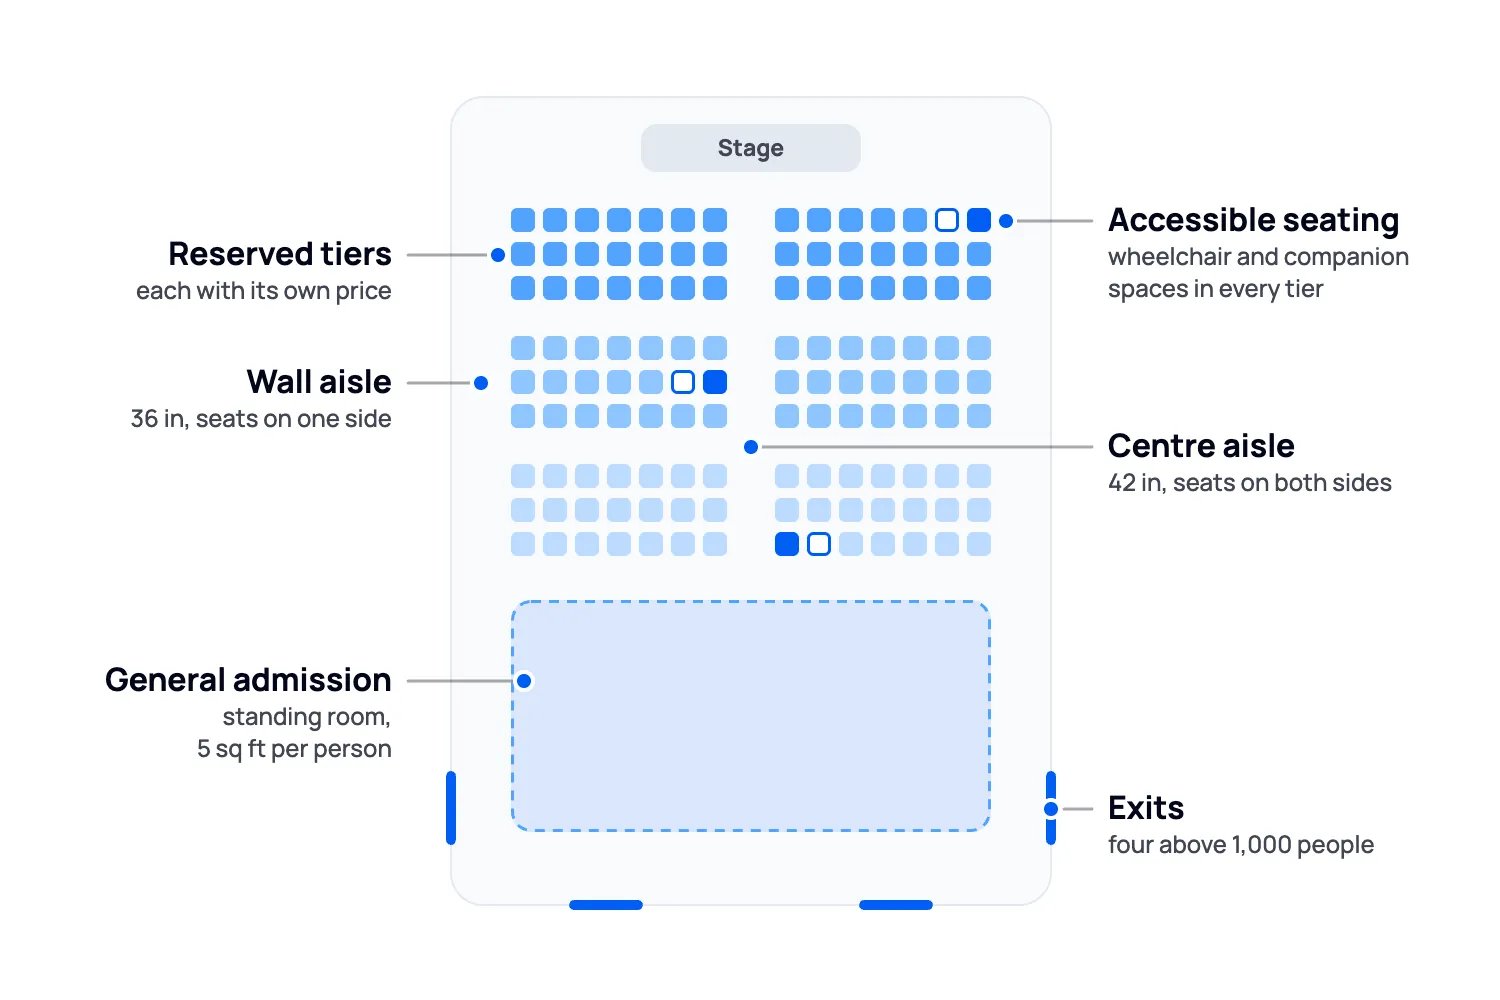
The US International Building Code shows why the format matters. Table 1004.5 uses these floor-area factors to calculate occupant load:
Standing space: 5 sq ft per person.
Movable chairs without tables: 7 sq ft per person.
Tables and chairs: 15 sq ft per person.
These use net floor area, the area people occupy excluding spaces such as corridors, stairs, restrooms and storage. Fixed seating is generally counted by seats. The code and edition adopted locally determine what applies.
That difference matters a fair bit to your event budget. Tables take up space you might otherwise sell as individual seats and so, yhey need to be prioritized strategically, through the ticket price, a hospitality package or another part of the offer.
Floor area is only part of the calculation. Exit capacity, aisle layout and the people working the event also matter. Staff and exhibitors occupy the room too. Have the venue and the relevant approving authority confirm the layout and total occupancy before you set ticket quantities.
Then look at arrival. A room can have enough space for everyone and still have a miserable queue outside. If most buyers arrive just before the headline act, check whether your entrances, security checks and ticket scanning can handle that rush.
Step 2: Give people a reason to pay for the better section
With capacity agreed, decide what each part of the room offers. Some buyers want to be close to the stage. Others would rather have a seat, a table with friends or a cheaper way in. A mix of reserved seating, standing areas and hospitality can serve those buyers, provided the venue can accommodate it.
There is evidence behind tiered pricing. In a 2009 study of more than 21,000 US concerts, economists Pascal Courty and Mario Pagliero estimated that multiple seating prices generated about 5% more revenue than a single price. The data covered 1992 to 2005, so treat it as support for the principle, not a forecast for your next show.
Start with two or three sections buyers can tell apart. Then set the prices around those differences. If the only benefit you can identify is that you've coloured the section gold, the offer needs work.
Check the experience from the seat itself. A spot can look wonderfully close to the stage on a diagram and still have a speaker stack blocking half the view. Before you label a section premium:
Sit at the back and edges of the section, at the height your attendees will sit. Include pillars, production desks and equipment in the check.
Ask your AV team to test the actual slides or video from the farthest viewing position. A screen that looks huge from the stage may be unreadable at the back.
Consider what happens when the people in front stand up. If the view disappears, work through the stage height, risers or screen placement before selling the seats.
Our concert stage guide covers stage layouts. Whatever you choose, the buyer should be able to understand why one section costs more than another.
Step 3: Make room for people to move
Draw the aisles and accessible routes before you fill the remaining space with chairs. Otherwise, you'll get attached to a seat count you can't keep. Your venue should confirm the aisle widths and row spacing required for the layout.
For orientation, the IBC chapter linked in Step 1 gives baseline minimums of 42 inches for a level aisle with seats on both sides, 36 inches with seats on one side, and 48 inches for a stepped aisle with seats on both sides. The number of people using a route can require more width. Row clearance also depends on row length and whether people can leave at one end or both.
Exhibition aisles have their own requirements. For example, Moscone Center's floor-plan rules generally require at least 10 ft between booth rows, with wider cross aisles in some layouts. Get your venue's rules before drawing a grid you'll have to tear apart later.
Accessible seating belongs in the first version of the plan. Under the 2010 ADA Standards, a fixed-seating assembly area with 10,000 seats needs at least 61 wheelchair spaces, each with a companion seat. The standards call for integrated, dispersed locations and comparable views, including over standing spectators where standing is expected.
US accessible ticket-sales rules also require access to every ticket price level. Think through the whole visit: getting to the space, sitting with a companion, seeing the show and reaching the facilities. Our accessibility checklist covers the wider venue.
Step 4: Build a booth floor exhibitors will want to return to
For conferences and expos, a numbered grid makes booth space easier to sell and manage. The IAEE's North American display guidelines use a common 10 ft by 10 ft inline booth. Larger footprints allow end-caps and islands, subject to the show's display rules. Mark the booth dimensions, open sides and any obstructions so exhibitors know what they're buying.
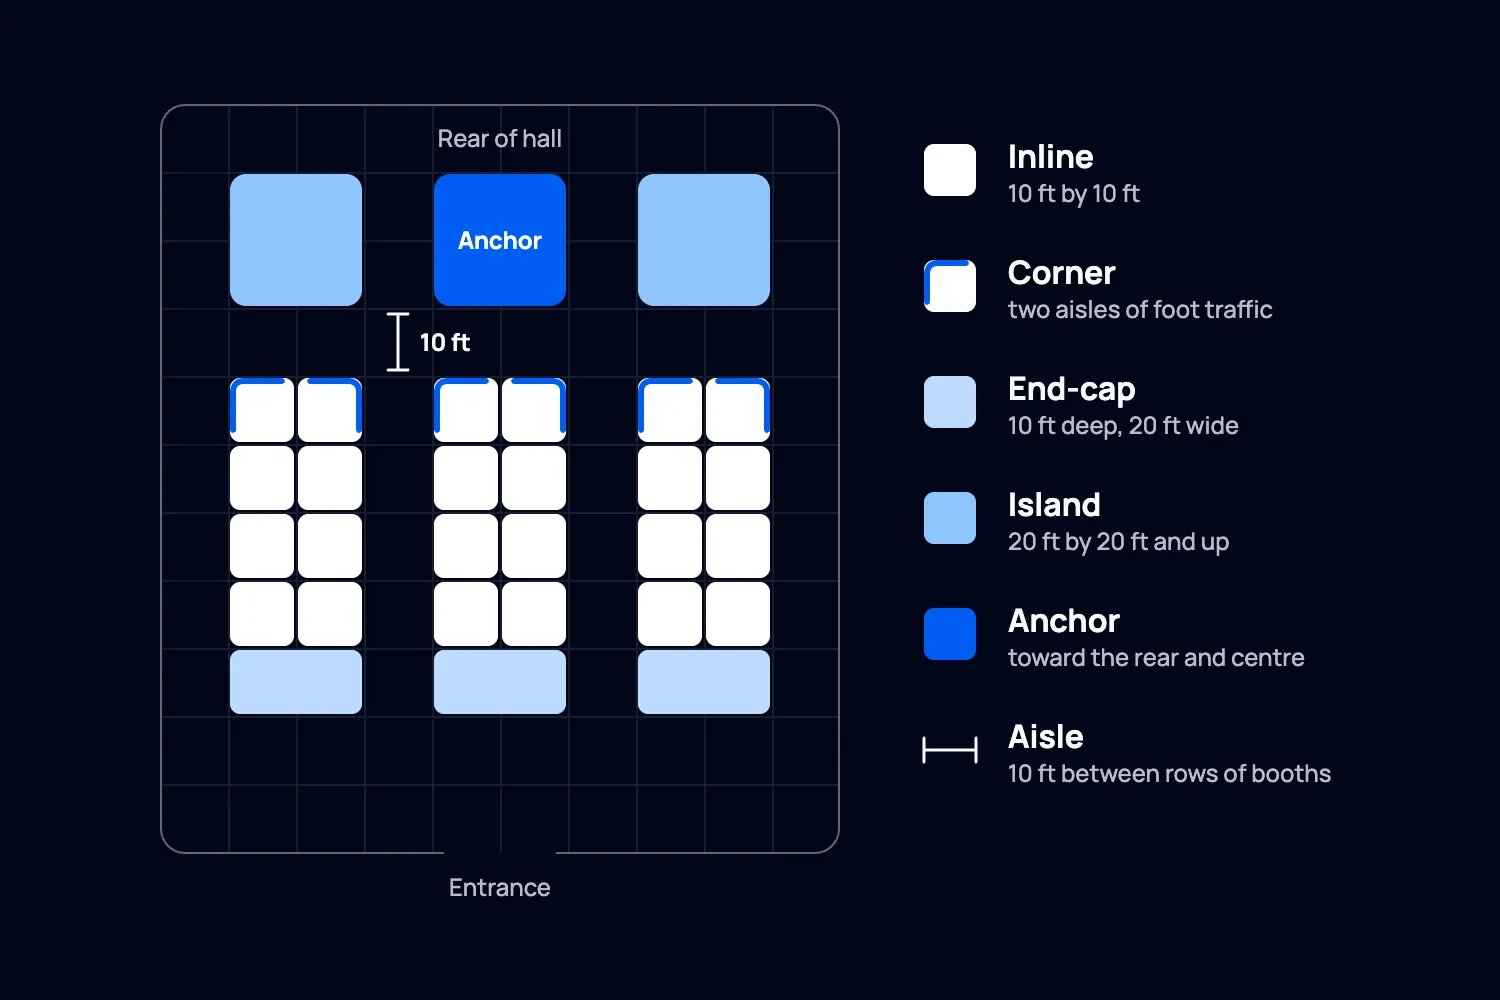
Position can justify a higher price. RSNA's published 2026 exhibit rates, checked in October 2026, list standard space at $41.25 per sq ft and a $700 charge for each assigned corner. Your prices will depend on your audience and demand, but the principle is useful: a corner offers exposure on two sides, and that is a benefit you can explain.
The harder job is making the rest of the floor worth buying. An exhibitor at the back still needs people to walk past. If every attraction sits beside the entrance, you've given attendees very little reason to reach them.
Trace a visitor's route through the hall before you sell the booths:
Place some destinations deeper in the hall. A demo stage, food area or major exhibitor can give visitors a reason to keep walking. Allow room for the crowd it attracts.
Leave breathing room inside the entrance. People stop to check the map, find colleagues and decide where to go.
Connect the aisles. Avoid rows that end at a blank wall with nothing to draw people down them.
Check the loading route as well as the visitor route. Exhibitors need to get their equipment in without an obstacle course.
Once the grid is agreed, give each booth a number and define what its price includes. Spell out power, furniture and any restrictions. "We thought that was included" is an avoidable conversation on build day.
You can sell booth space through Loopyah sponsorship packages. Give each package a price and quantity, then share the private page with exhibitors. They can pay by card or apply for your approval first. You assign the numbered booths yourself. For a specific booth that only one exhibitor can book, set the package quantity to one. The fee is 4.5% when a package sells, including card processing.
Send confirmed exhibitors their booth number, dimensions, access instructions and what's included. Our trade show checklist can help them prepare, but the details of your floor need to come from you.
Step 5: Draw the queue, not just the bar
A bar is easy to draw. A bar with a queue stretching past the toilets takes more thought. Run through the busy moments: doors opening, a session ending, the interval, the headline act finishing. Where do people head, and what happens when several groups arrive at once?
This affects what people spend as well as how they feel. If someone spends the interval waiting and gives up before reaching the bar, you've lost the sale. Adding another counter might help. It won't solve a queue that blocks the route to it.
The Western Australian event guidelines recommend keeping queues clear of thoroughfares and emergency access. Use that principle to review the busy areas with your operations team:
Draw space for the waiting people as well as the counter. Keep queues clear of aisles, exits and accessible routes.
Spread service points where the venue allows it. Putting every bar and food stall together concentrates the crowd in the same place.
Check how the line feeds the servers. A shared queue may work well for several counters, provided people can see where to go next.
Plan the stage-front area and barriers with the venue and your crowd-safety team. Leave staff the access they need.
Test ordering and payment. If paying is the slow part, tap-to-pay may help. If preparing the order is slow, another payment terminal won't fix it.
Put queue routes, signs and staff positions into the operations plan. A line drawn on your laptop still needs someone to manage it when the room fills.
Step 6: Let buyers understand the room before they pay
You've spent hours thinking about this layout. The buyer gives it a quick look on their phone. They need to find the stage, understand the sections and see whether they can sit with their friends.
In the attendee survey cited above, 30% said they had abandoned a ticket purchase because the seat map was confusing or they couldn't find good seats.
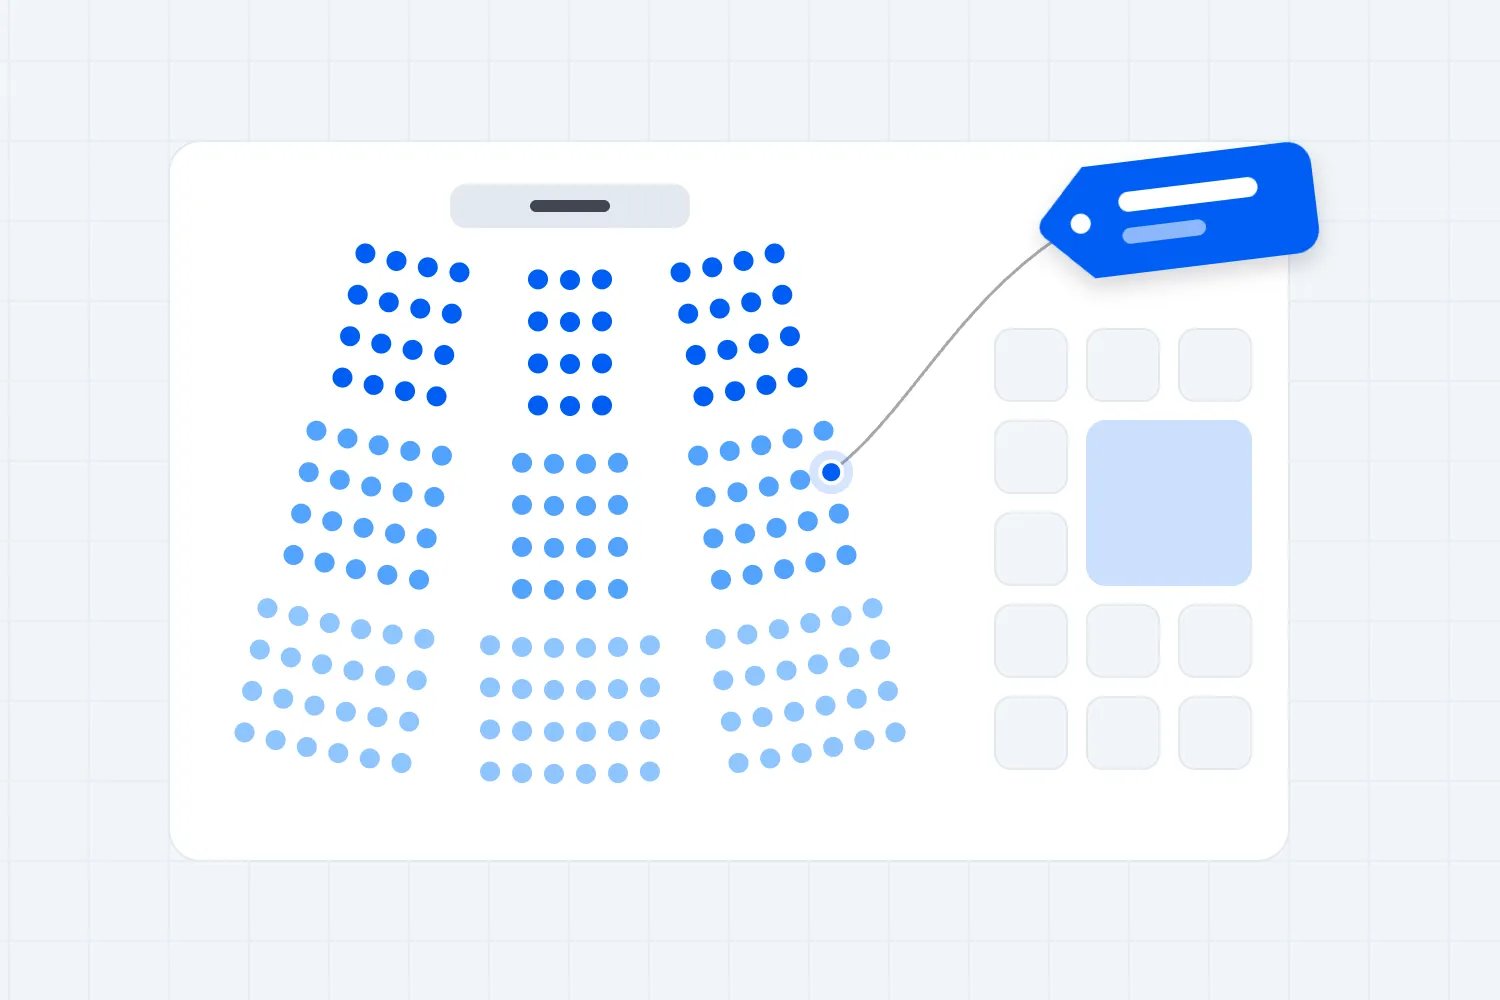
With Loopyah seat charts, you can draw rows, seats, tables and standing areas, then connect chart categories to ticket types with their own prices. Buyers choose their seats on their phones. Loopyah holds those seats during checkout and updates availability for everyone else.
Use the same section and row names on the map, ticket and venue signs. A buyer shouldn't arrive holding a ticket for "Premium B" and find that every sign points to the "West Stand".
Published charts are read-only, so agree the layout with the venue before publishing. Publishing is free; fees apply when paid tickets sell. Our seat-chart setup guide walks through the process.
Build a seat chart for your next eventBefore opening sales, try the purchase journey on a phone. Find a pair of seats, compare the price sections and check the accessible options. If you have to explain the map to someone beside you, give buyers clearer labels or information before asking them to use it alone.
When to make the decisions
Work backwards from your on-sale date and the venue's approval deadlines. Floor-plan software can help you draw to scale and share revisions, but a polished export still needs review.
For a large event, this is a useful order of work. Fit it into your wider logistics plan:
Before committing to the venue, check that the proposed format and capacity can support your budget. Get the floor-plan requirements and submission deadlines.
Before selling seats or booths, agree the layout through the venue's required review process. Include aisles, accessible spaces, service points and queue areas.
Before opening ticket sales, match the seat chart to the agreed plan and test the buyer's view. Number and price the booths before taking bookings.
By the venue's final deadline, submit the required version for approval. Moscone asks for floor plans at least 60 days before the event; use your venue's deadline.
Before doors open, walk the built room with the plan. Check signs, barriers, staff positions and anything suppliers have placed on the floor.
Keep one current, dated plan that your venue, production team and sales team can all identify. When something moves, check who it affects. Moving a booth on a drawing is easy. Calling the exhibitor who paid for that position is less enjoyable.
Before you sell the last bit of space
Ask whether the layout still works when people use it. Can a late arrival reach their seat? Can a wheelchair user see when the audience stands? Can someone leave the bar queue without stepping into another one? Does the exhibitor at the far end have a reason to expect visitors?
A good plan gives you places worth paying for and enough room to enjoy them. Get it reviewed early, make the buying choices clear and walk the room once it's built. If you have to remove a row to make the rest of the event work, remove the row.
For smaller layouts, see our event seating chart guide.

Author: By the Loopyah Content Team
The Loopyah Content Team shares expert insights, practical guides, and industry updates to help event organizers create unforgettable experiences and stay ahead in the event planning world.