Event Venues Guide: How to Choose And Design The Right Space
If you haven’t locked in your venue yet, hit pause and read this guide first — your future self will thank you.
Your venue is not just a backdrop. It’s the spine of your event and perhaps the most important aspect of your event.
It decides how people feel the moment they walk in, how easily they move, how long they stay, and how much they spend. It also quietly controls your stress levels, your profit margin, and your reviews the morning after.
In Loopyah’s Event Attendee Insights Report, event goers were brutally honest: 62.6% said overcrowding is a top negative experience, and 47.2% said event location is “very important” in their decision to attend. Translation: choose the wrong space or pack it badly, and you’ll feel it in sales, satisfaction, and long-term event brand loyalty.
Yet picking a venue can feel overwhelming. Too big, too small, too expensive, too many rules, not enough power, sketchy contracts… and you’re supposed to spot all of that before you sign?
This guide cuts through that noise. We’ll walk through core venue fundamentals, types of spaces and when to use them, a step-by-step selection framework, how to design your layout, and the tech, contracts, and marketing moves that actually matter.
By the end, you’ll know exactly what to look for, what to avoid, and how to turn any venue into a space people can’t wait to buy tickets for. You'll also walk away with a complete downloadable event checklist to use for upcoming events.
1. Introduction — Why Your Venue Choice Can Make or Break Your Event
Think about your last great event. You probably remember:
How easy it was (or wasn’t) to get there
Whether you could actually see/hear what you paid for
If you spent half your night in queues instead of enjoying the show
And when you went inside, was it too packed, too dimmed, too uncomfortable or just felt right
All of that is venue choice and venue design. Same content, different room, completely different outcome.
The good news: you don’t need a team of experts to nail this. You need a clear process, the right questions, and a layout that respects how humans actually move and behave.
2. The Core Elements of a Great Event Venue
Across concerts, conferences, trade shows, food festivals—great event venues share the same fundamentals. Nail these before you fall in love with the skyline view.
2.1. Location
Location is not just about the address. It’s about ease, safety, and how much effort you’re asking from your audience.
Remember: in our Event Attendee Insights Report, 47.2% of attendees said event location is “very important” when deciding to attend. If getting there is annoying, many people simply won’t. Interestingly, 50% of 35-44 year olds are willing to travel up to 2 hours for an event while only 40% of younger demographics are.
Questions to ask yourself:
How close is it to where your audience already lives, works, or hangs out?
Is there reliable public transport, rideshare access, and safe late-night options?
What’s parking really like at your actual start and end times?
How does the neighbourhood feel at night? Will people feel safe walking back to their car or train?
Don’t underestimate the “neighbourhood vibe” either. A gritty warehouse district might be perfect for an underground rave, less so for a fundraising gala with older donors.
Remote or “hidden gem” venues can absolutely win—if you own the full journey. That means clear travel info, shuttles if needed, generous lead times, and strong incentives (unique experience, scenery, exclusivity) that justify the extra effort.
2.2. Capacity & Flow
Capacity is more than a fire code number. There’s legal capacity, and then there’s “everyone can actually breathe, see, and move” capacity.
In our attendee study, 62.6% of respondents said overcrowding was a top negative experience at events. That’s the fastest way to turn a sold-out win into a PR problem.
When you assess a venue, look at:
Legal capacity vs. comfortable capacity (your real target). In many rooms, comfort is 70–85% of the posted maximum.
Ingress and egress: How many entrances and exits? How wide? How will queues form outside and inside?
Key friction points: bars, bathrooms, food, merch, registration. Can people queue without blocking main walkways?
Sketch basic flow on a floor plan before you commit. If you can’t draw clean lines for how people arrive, queue, enjoy, and leave, the space will fight you all night.
2.3. Venue Layout
Layout is where the magic—or the mess—happens. Same square metres, totally different experience depending on how you carve it up.
Think in zones:
Main action: stage, screen, runway, show floor, or central attraction
Support: bars, F&B, merch, registration, cloakroom, sponsor booths
VIP or premium: reserved seating, lounges, backstage meet-and-greets
Quiet / functional: staff areas, storage, green rooms, production control
Open-plan spaces are flexible and great for social energy but can be noisy and chaotic. Segmented spaces help you separate content types (keynote vs. networking vs. breakout), manage sound, and create premium zones.
Layout doesn’t stop at the room. It lives in your seat map too. In our report, 30% of ticket buyers said they abandoned checkout because the seat map was confusing or good seats were hard to find. That’s painful, avoidable lost revenue.
If you’re using reserved seating, invest time in a clear, accurate, mobile-friendly seat map that matches reality. Tools like Loopyah’s interactive seat maps (see our event seating chart feature) make it easy to visualise sections, price levels, and restricted views before your event even goes on sale.
2.4. Amenities & Essentials
The unsexy stuff often decides whether your event feels smooth or shambolic.
Check for:
Restrooms: Enough for peak times, clean, and distributed (not all in one corner).
Lighting: Dimmable options, stage lighting, and safe levels in aisles and exits.
Power: Sufficient circuits for AV, catering, vendors, and activations—without tripping breakers when the coffee machines kick in.
Wi‑Fi: Not just “yes, we have Wi‑Fi” but actual capacity for your attendee count and devices.
Backstage & storage: Green rooms, dressing rooms, secure storage for merch, gear, and personal items.
For anything content-heavy (conferences, hybrid events, big shows), confirm tech readiness:
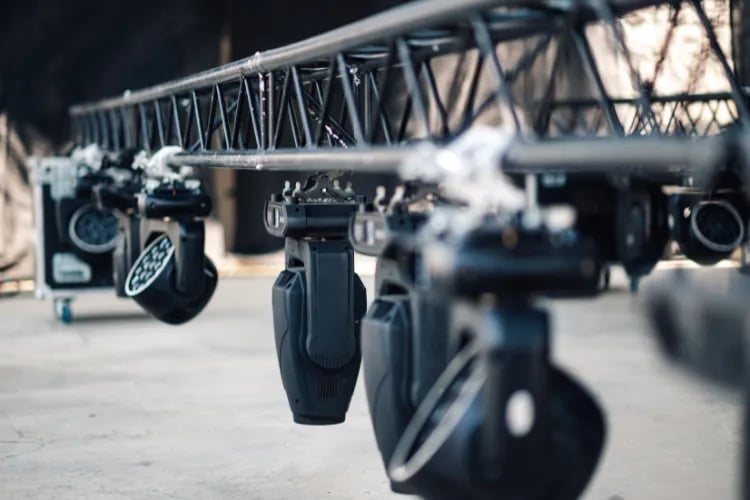
In-house AV inventory: mics, speakers, projectors, LED walls, mixing consoles, lighting rigs.
Rigging: Can you safely hang truss, screens, signage, and decor from the ceiling—and what does it cost?
Hybrid/streaming: Hard-wired internet, camera positions, and noise control for streaming areas.
2.5. Price & Hidden Costs
Sticker price is rarely the full price. Two venues with the same rental fee can land in totally different places once everything is added up.
When you get a quote, dig into:
Time windows: Exact access times for load-in, event, and load-out. Overtime rates after midnight or after a set hour.
Staffing: Required security, bar staff, techs, cleaning—are they bundled or billed separately? Any union labour minimums?
Exclusive vendors: Are you locked into their AV, catering, or ticketing partners, and what are the markups?
Power & utilities: Charges for extra power drops, internet lines, or HVAC outside normal hours.
Cleaning & damage: Post-event cleaning fees, waste disposal, and damage deposits.
Always compare venues on “total cost to deliver the event,” not just the rental line.
3. Types of Event Venues (With Pros, Cons & Ideal Use Cases)
Not every venue suits every event. Here’s how the main categories stack up and when they shine.

3.1. Hotels & Ballrooms
Pros:
Turnkey: Built-in AV, furniture, staging, F&B, and accommodation in one place.
Experienced staff: They know conferences, weddings, and galas inside-out.
Cons:
Cost: Rates, mandatory F&B minimums, and service charges can hit hard.
Restrictions: Preferred or exclusive vendors, decor limitations, limited flexibility on schedule.
Best for: Conferences, corporate meetings, galas, multi-day events where attendees stay on-site.
3.2. Convention & Exhibition Centres
Pros:
Scale: Huge open spaces with flexible configurations for booths, stages, and activations.
Logistics-ready: Loading docks, freight elevators, rigging grids, and professional in-house teams.
Cons:
Complexity: First-timers can drown in rules, union requirements, and service orders.
Cost structure: Everything is a line item—power drops, rigging, internet, cleaning, security, you name it.
Best for: Trade shows, expos, large conventions, public fairs, multi-stage festivals with sponsors and exhibitors.
3.3. Outdoor Venues
Pros:
Atmosphere: Natural light, fresh air, scenery—huge boost for vibe and perceived value.
Flexible capacity: Easier to scale up audience size than indoors, if safety and infrastructure are handled.
Cons:
Weather risk: Rain, wind, heat, cold, mud—every one of them can wreck the experience if you’re not ready.
Infrastructure: You may need to bring in power, staging, toilets, fencing, lights, and security from scratch.
Best for: Music festivals, markets, sports screenings, food & drink festivals, community events.
3.4. Theatres & Performing Arts Centres
Pros:
Great sightlines: Stages and seating designed exactly for viewing and listening.
Built-in tech: Proper lighting grids, sound systems, backstage areas, and dressing rooms.
Cons:
Rigid layout: Fixed seating, aisles, and stage location mean limited freedom for unusual formats or networking-heavy events.
Access: Older theatres can be tricky for accessibility and backstage logistics unless they’ve been updated.
Best for: Comedy, concerts, talks, film screenings, formal ceremonies, high-production shows.
3.5. Clubs, Bars & Music Venues
Pros:
Built-in vibe: Lights, sound, bar, and layout are already tuned for nightlife energy.
Central locations: Often in busy districts with lots of footfall and public transport.
Cons:
Noise restrictions: Neighbours and licensing rules cap your volume or curfew.
Capacity limits: Smaller footprints mean you must price tightly and manage crowds carefully.
Best for: Gigs, launch parties, club nights, brand activations, after-parties.
3.6. Studios, Warehouses & Industrial Spaces
Pros:
Blank canvas: High ceilings, open floor, raw textures. You can build almost anything inside.
Cool factor: Feels modern, edgy, and premium when designed well.
Cons:
Production-heavy: You may need to bring in everything—sound, lights, staging, decor, toilets, sometimes even heating/AC.
Acoustics: Big concrete boxes can sound awful without treatment.
Best for: Immersive experiences, art shows, brand activations, fashion, themed parties, film/photo shoots.
3.7. Alternative & Non-Traditional Spaces
These are your rooftops, coworking hubs, museums, galleries, sports stadia, historic buildings, churches, ships, and everything else that wasn’t built first for events.
The upside: novelty. Originality and uniqueness genuinely matter to a chunk of attendees, and a wild or unexpected setting can make your event feel like “the one you have to be at.”
The catch: you often trade convenience. More planning, more permits, more “we’ve never done that here before.” So budget time, budget money, and bring experienced production partners if you’re turning a non‑event space into a full event venue.
4. How to Choose the Right Venue (Step-by-Step Framework)
Here’s a simple process that keeps you sane and objective.
Step 1: Define the Purpose & Audience
Before you tour a single space, get clear on:
Why you’re running this event (revenue, community, lead gen, fundraising, brand, retention).
Format: concert, conference, workshop, expo, festival, market, hybrid experience, etc.
Audience profile: age range, accessibility needs, spending power, schedule (weekday vs. weekend, daytime vs. late-night).
If your crowd spans Gen Z to Boomers, you’ll want to think even more carefully about accessibility, comfort, and wayfinding. You can dive deeper into that in our guide on designing for multiple generations in events, Designing Events for Multiple Generations.
Your venue should make it easier—not harder—for people to achieve the goal of the event: hear the band, learn something, meet each other, discover products, or celebrate.
Step 2: Build Your Requirements List
Now turn that purpose into non‑negotiables and nice‑to‑haves.
Your requirements list should cover:
Capacity: Min/max headcount, seated vs. standing, GA vs. reserved seating.
Layout: Stage, screen, booths, networking spaces, backstage, green rooms, storage.
Staging: Stage size/height, rigging, wings, backstage access, loading dock requirements.
Access: Parking, public transport, step-free entry, elevators, accessible restrooms and routes.
Tech: AV, Wi‑Fi capacity, power needs, streaming, ticket scanning, POS systems.
Catering: In-house vs. external caterers, kitchen access, F&B minimums, dietary flexibility.
Treat this as your brief. If a venue cannot meet the must‑haves, walk away early and save your time.
Step 3: Budget — The Real Costs
Build your venue budget around total event delivery, not just rental. That includes:
Venue fees: Base rental, additional rooms, outdoor spaces, and any per-hour extensions.
Staffing: Security, medics, front-of-house, bar, cleaning, tech ops, ticketing/check-in teams.
Power & utilities: Extra power, internet, HVAC outside normal hours, generator hire if needed.
AV & production: Gear rental, rigging, operators, staging, decor, scenic builds, draping, sound treatment.
Cleaning & waste: Pre- and post-event cleaning, waste removal, recycling, restroom attendants for large crowds.
Insurance: General liability, event cancellation, weather insurance for outdoor events, plus vendor COIs.
Ask venues for a sample final invoice (de‑identified). It’s the clearest way to see what tends to appear as “extras” at the end.
Step 4: Compare Multiple Venues the Smart Way
Do not trust your memory. Once you’ve seen three or more venues, they blur together.
Create a simple comparison grid or spreadsheet with rows for:
Capacity & comfort level
Location & transport options
Layout & flexibility (can you switch formats if ticket demand surprises you?)
Tech & AV readiness
Accessibility & inclusivity features
Total estimated cost (all line items)
Negotiation tip: Once you’ve shortlisted two or three venues, share that you’re comparing options and ask where they have flexibility—rate, dates, minimums, or including some AV or rooms.
Red flags to watch:
Vague contracts with lots of “TBD” on costs, services, or staffing.
Slow or inconsistent communication during the sales process (it rarely improves later).
Strict vendor lists that force you into overpriced or underperforming suppliers.
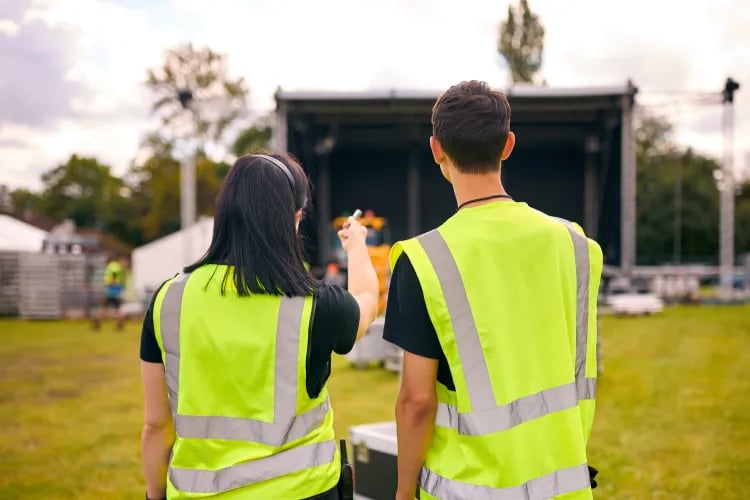
Step 5: Visit the Venue Like a Pro
On your site visit, you’re not just admiring the room. You’re stress-testing it.
Bring your floor plan ideas, your requirements list, and a “walkthrough route” that follows an attendee, a performer/speaker, and your staff.
Things to check:
Entrances & exits: How will queues form? Where are security checks and ticket scanning? What happens if it rains?
Sightlines: Stand or sit where attendees will be. Can you see the stage or screen clearly from every section, including accessible seating?
Sound: Clap, talk, and listen. Is there echo or dead zones? Where will speakers or arrays likely go?
Power & cabling: Count outlets, ask about circuits, and note safe cable routes that won’t trip anyone.
Ask the venue manager:
What’s the biggest mistake you’ve seen organisers make in this space?
What does a smooth event here usually look like in terms of schedule and staffing?
What extra costs tend to surprise organisers on their final bill?
Then document everything. Photos, quick videos, sketches. You’ll use this later when designing your layout and marketing the experience.
5. Designing Your Event Inside the Venue
Once you’ve locked the space, the real fun starts: turning an empty room (or field) into a seamless experience.
5.1. Venue Mapping & Layout
Start with a scaled floor plan. Plot your stage, entries, exits, bars, merch, restrooms, and any key attractions. Then overlay your seating or standing zones.
For reserved events, your seat map is both an operations tool and a marketing asset. Design it to:
Highlight premium seats with the best views and easiest access to amenities.
Clearly mark restricted-view seats and price them accordingly, instead of pretending they’re the same as front-and-centre.
Show accessible seating and companion seats as part of the main plan, not a side note.
If you’re building or updating maps regularly, check out our deeper dive on event seating charts. Pairing smart maps with tools like Loopyah’s interactive charts keeps your box office and your attendees happy.
5.2. Traffic Flow
A great layout lets people move without thinking about it. A bad one turns your event into a queue festival.
Map:
Entrances: Can you run separate lines for VIP, GA, and on-the-door sales? Is there space for bag checks and scanners without blocking the street?
Exits: People should be able to leave quickly and safely without crossing incoming queues.
Bars & food: Keep them away from narrow corridors and main doors. Give queues their own space to “snake” without clogging everything else.
Remember, overcrowding is the top complaint in our attendee data. Smart flow doesn’t just look good on a plan. It keeps your audience relaxed and spending instead of frustrated and stuck.
5.3. Stage & Sound Design
Your stage and sound setup should serve both the content and the comfort of your crowd.
Key principles:
Sightlines first: Avoid columns or low balconies blocking key sections. The ADA Standards for Accessible Design emphasise comparable lines of sight for accessible seating—good practice for everyone, not just compliance.
Match PA coverage to the room: Think in zones—front, middle, back, balconies. Nobody should have to choose between hearing properly and keeping their ears intact.
Done well, stage and sound design also let you create premium tiers: front rows, VIP booths, or tables with the best views and service. That’s margin you can reinvest into production quality.
5.4. Accessibility & Inclusivity
Accessibility is not optional. It’s a legal requirement in many regions, a moral baseline, and—practically—good business.
From our attendee research, a large share of ticket buyers say accessibility and convenience strongly influence whether they turn up. If people can’t get in, can’t move around, or can’t enjoy the content, they won’t be back.
Bake in:
Step-free routes: From arrival to seats, restrooms, and key activations. Test them yourself, not just on paper.
Accessible seating: Dispersed across price levels and views, with companion seats, not banished to the back corner.
Quiet zones: A space to decompress for neurodivergent attendees or anyone overwhelmed by crowds and noise.
Also plan how you’ll communicate this—on your event landing page, FAQs, and confirmation emails. If people have to dig for access info, you’ll lose them.
5.5. Branding the Space
Your venue is a 3D brand canvas. Use it.
Think beyond vinyl banners:
Lighting: Branded colours on walls and ceilings, gobos with logos, dramatic reveals for stage moments. See more ideas in our guide to event lighting.
Signage & wayfinding: Clear, on-brand signs that tell people where to go while quietly reinforcing your identity. We share tons of examples in event signage ideas.
Done right, branding doesn’t just make your photos look good—it also reduces confusion and keeps people flowing in the right direction.
6. Technology: What Every Modern Venue Must Support
Even the prettiest venue will fail you if the tech can’t keep up. At minimum, your space should support modern connectivity, ticketing, payments, and AV.
6.1. Wi‑Fi & Connectivity
Ask about both coverage and capacity:
How many concurrent devices can the network realistically handle?
Is there a dedicated SSID for production teams, ticket scanning, and POS systems—separate from attendee Wi‑Fi?
If you’re running cashless bars, on-site ticket sales, or interactive activations, build in redundancy: hard-wired lines where possible and a plan B if Wi‑Fi drops.
6.2. Ticketing Infrastructure
Smooth entry is where your ticketing platform and your venue either become best friends or mortal enemies.
Check that the venue can support:
Multiple scanning points with power and connectivity at each door or gate.
Clear, separated lanes for different ticket types (VIP, GA, guest list, on-the-door).
Ticket security matters too—our attendee data shows it’s one of the factors people consider before buying. Use QR-code ticketing with fraud checks, and make sure your scanners and staff can handle peak arrival surges. For more on this, we break things down in our guide to QR systems in QR code ticketing.
6.3. Contactless & On-Site Payments
Attendees now expect fast, tap-to-pay options for everything—tickets, drinks, food, and merch.
Confirm:
Power and connectivity at every POS location.
Clear plan for where latecomers can still buy tickets or upgrade without choking main entries.
Slow payment lines are silent profit killers. Design your floor plan and tech together so buying things always feels quick and easy.
6.4. AV Requirements
Scope AV from your goals backward:
What do attendees absolutely need to see, hear, and feel for this event to work?
Where will content be captured—for later, or live-streamed in real time?
Then confirm the venue can handle the power draw, rigging, and sightlines your design demands. Lock these details into your contract, not just an email thread.
7. Venue Contracts, Insurance & Legal Essentials
You don’t need to be a lawyer, but you can’t ignore this part. Your contract and insurance are what stand between you and a very expensive surprise if something goes wrong.
7.1. Key Contract Clauses
Look closely at:
Cancellation & refunds: Deadlines, sliding scales, and what happens if you need to move dates or downsize.
Force majeure: What counts as an “unforeseeable event,” and how does it affect fees on both sides?
Also check noise limits, curfews, and overrun charges. If your headline act is famous for running long, you don’t want to pay penalty rates because the encore hit midnight.
7.2. Licensing
Depending on your region and format, you may need:
Music licences for live and recorded music.
Alcohol licences for serving or selling drinks (sometimes separate for tasting vs. full pours).
Clarify who is responsible for which licence—the venue, your caterer, or you. Get it in writing.
7.3. Insurance
Most venues will require you—and your key vendors—to carry insurance. At minimum, that usually means general liability coverage with the venue named as additional insured.
For outdoor or higher-risk formats, consider:
Event cancellation or weather insurance to cover lost revenue or sunk costs.
Liquor liability if you’re serving alcohol and not covered by the venue or caterer’s policy.
“Think of your venue contract as half production plan, half disaster plan. You’ll barely notice it if everything goes right—but you’ll be grateful for every clause if something doesn’t.”
8. Marketing the Venue Experience (Not Just the Event)
People don’t buy abstract bullet points. They buy the feeling of being there. Your venue is your biggest visual asset—use it in your marketing like a star performer.
8.1. Show the Venue in Your Content
Short, exciting visuals of the venue—wide crowd shots, stage views, vibes at the bar—are gold. External research backs this: video content heavily influences buying decisions for most consumers, with many saying they purchase after watching a brand’s video, according to Wyzowl’s Video Marketing Statistics 2025.
Apply that to events:
Use real seat or standing view shots in your event landing page and ads.
Record a quick 30–60 second walkthrough of the space and post it to Reels, TikTok, and Shorts.
8.2. Leverage Social Discovery
Our Event Attendee Insights Report found that a strong majority of ticket buyers discover events through social media. Your venue’s look and feel is content fuel—especially if it’s distinctive.
Make the most of that by:
Co‑creating content with the venue: share each other’s posts, behind-the-scenes clips, and setup time lapses.
Making the venue “Instagrammable”: add one or two intentional photo moments that attendees will want to share.
8.3. Highlight Convenience & Layout
Don’t just show what’s on stage. Show how easy the experience will be:
Maps with clear entrance locations and transport links.
Photos from accessible seating, VIP areas, and bar queues during a typical event.
You’ve put in the work to choose a convenient, well-designed venue. Don’t hide that advantage.
8.4. Promote Early With Scarcity Cues
Our attendee research shows early-bird discounts, limited VIP access, and clear “only X seats left in this section” messages are powerful nudges for earlier purchases.
Combine smart scarcity with your seat map:
Show real-time availability by section on your ticketing page.
Create early-bird windows tied to specific areas (e.g., front-balcony promo for the first 100 buyers).
For more promo ideas, check out event marketing ideas—and build your messaging around the space you’ve worked so hard to secure.
9. Venue Mistakes That Kill Events
Some mistakes are annoying. These ones are event-killers. Avoid them at all costs.
9.1. Overcrowding
Pushing capacity to the legal limit might look good on a spreadsheet, but it’s misery in person. Aim for comfort, not maximum bodies per square metre.
9.2. Bad Sightlines
If people spend half the show craning their necks around columns or screens, they won’t remember the performance—they’ll remember the frustration.
9.3. Poor Acoustics
Echoey halls, muddy sound, or underpowered systems ruin both live shows and conferences. Always budget for proper sound design—especially in warehouses or big, reflective rooms.
9.4. Inflexible Layouts
Spaces that can’t be reconfigured force you to design your event around their limitations, not your audience’s needs. If you can’t tweak seating, stage placement, or flow at all, think hard before signing.
9.5. Lack of Accessibility
No lifts, no ramps, terrible accessible sightlines, inaccessible toilets—this is how you lose entire segments of your audience (and invite legal trouble).
9.6. Confusing Seat Maps
If people can’t tell what they’re buying, they’ll bail. Keep your maps simple, accurate, and honest about views and sections.
9.7. Underestimating Power or AV
Running out of power points, tripping breakers, or discovering too late that the ceiling can’t handle your rig is the stuff of production nightmares. Confirm specs before you commit.
9.8. No Weather Backup Plan
For outdoor events, “we’ll just hope it doesn’t rain” is not a plan. You need tents, poncho stock, backup dates, or a secondary indoor option depending on risk level.
9.9. Ignoring Attendee Flow
Beautiful decor doesn’t fix a layout where people constantly block each other. Walk the route yourself—from door to bar to restroom to stage—and remove friction ruthlessly.
9.10. Not Negotiating the Contract
Venue terms are almost never take‑it‑or‑leave‑it. If you don’t ask for changes on key clauses, minimums, or bundled services, you’re probably leaving money (and protection) on the table.
10. Examples: How the Right Venue Transforms an Event
Let’s make this concrete with a few short, real-world style scenarios.
Example 1: A Concert That Doubled VIP Sales
A mid-size indie promoter was running shows in a flat, GA-only club. They moved to a theatre-style venue with a small balcony and used interactive seat maps to create clear VIP zones: front rows plus balcony boxes with table service.
Same artist tier, similar capacity—but VIP sales more than doubled. Why? Attendees could instantly see the value of premium seats and choose them confidently on the map.
Example 2: A Conference That Saved 20% on AV
A tech conference shifted from a hotel ballroom with exclusive in-house AV to a convention centre that allowed outside suppliers. They brought in a trusted production partner, negotiated rigging and power in the venue contract, and cut total AV spend by around 20% while improving the look and feel of the show.
The lesson: venue rules around vendors can matter as much as base rental fees. Always compare the full ecosystem.
Example 3: A Market That Grew by Moving Neighbourhoods
A maker market struggled with a charming but awkward warehouse—limited parking, poor transit, and confusing entry. They moved to a community centre on a main bus line with obvious signage and much better accessibility.
Same number of stalls, same branding, same marketing budget. Attendance jumped, average dwell time went up, and vendors reported higher sales. People could just get there more easily and stay more comfortably.
11. Checklist: The Ultimate Event Venue Evaluation Sheet
Use this as your quick-hit checklist when shortlisting or doing site visits. Copy, paste, and adapt it to your next show.
Capacity — legal vs. comfortable; seated vs. standing
Layout — stage position, zones, pillars, ceiling height, balcony/tiers
Tech — in-house AV, rigging points, power, internet options, streaming readiness
Accessibility — step-free access, lifts, accessible restrooms, seating dispersion, quiet areas
Parking — on-site, nearby, costs, evening safety, signage to and from venue
Sound — acoustic quality, noise limits, neighbourhood constraints
Lighting — stage, house, exterior, flexibility to dim/colour
Wi‑Fi — coverage, capacity, separate networks for production/POS
Backstage — green rooms, dressing rooms, secure storage, crew rest areas
Load-in/out — vehicle access, loading dock, lift sizes, time restrictions
Insurance — required cover, additional insured wording, vendor COI deadlines
Price — base rental, bundled services, minimums, taxes, service charges
Hidden fees — overtime, power, internet, cleaning, security, damage deposits
Restrictions — decor rules, vendor lists, noise and curfew limits, branding policies
Date availability — hold policies, release deadlines, soft vs. hard holds
Local competition & demand — what else is happening the same day, and how does that affect traffic and suppliers?
12. Conclusion — Choose With Confidence
The right venue is not just a pretty room. It’s the backbone of your attendee experience, the guardrail on your risk, and a big chunk of your profit margin.
When you:
Match the space to your purpose and audience
Design for capacity, flow, and accessibility—not just aesthetics
Lock in the right tech, contracts, and insurance
—your venue stops being a headache and starts being a growth engine.
You’ve now got the framework, the questions, and the checklist. Use them. Be picky. Say no to spaces that don’t serve your attendees.
And when you’re ready to turn that dream layout into real tickets and real people in the room, platforms like Loopyah—powered by features such as interactive seat maps in our seat charts solution—make it much easier to go from plan to sold-out night.
Choose boldly, design smartly, and let your next venue do some of the hard work for you.
Author: By the Loopyah Content Team
The Loopyah Content Team shares expert insights, practical guides, and industry updates to help event organizers create unforgettable experiences and stay ahead in the event planning world.