Event Lighting Explained: How to Create the Perfect Atmosphere
If you only changed one production element at your next event, make it the lighting. Event lighting sets mood, guides attention, and quietly tells your story before a single word is spoken. The right mix of washes, accents, and color can make a ballroom intimate, a conference stage camera‑ready, and an outdoor plaza feel like a dreamscape. From small meetups to large‑scale festivals, strategic lighting is the lever that elevates an experience from functional to unforgettable.
In this guide, you’ll learn the fundamentals of event lighting, how to translate “vibe” into measurable specs, and practical steps to plan, budget, and execute your design—safely and on time. We’ll also cover common mistakes to avoid, when to DIY vs. hire a pro, and the latest trends shaping immersive environments.
Understanding the Basics of Event Lighting
Before you pick colors or fixtures, align your team on a few core terms. This will help you brief vendors, build an accurate RFP, and get the look you want without guesswork.
Lumens: The light output of a source (how much light it emits).
Illuminance (lux or foot‑candles): How much light lands on a surface. Typical targets: 100–200 lux for a lounge, 200–300 lux for general session seating, 400–600 lux for exhibits, and 800–1200 lux of key light on presenters for broadcast‑friendly stages.
Color temperature (CCT, in Kelvin): Warm whites (2700–3200K) feel cozy; neutral to cool whites (3500–5000K) feel alert and crisp. Use warmer light for receptions and cool/neutral light for conference content and demos.
Color quality (CRI vs. TM‑30): CRI is common, but TM‑30 adds depth with two metrics—Rf (fidelity) and Rg (gamut/saturation). For true‑to‑life skin tones and accurate brand colors, look for fixtures with high Rf (≥85–90) and an Rg around 100 (or a touch above for punch).
For a solid primer on these fundamentals, see the U.S. Department of Energy’s overview of lighting principles. Lighting basics explain lumen output, illuminance, and how color temperature affects perception.
Common fixture families you’ll encounter:
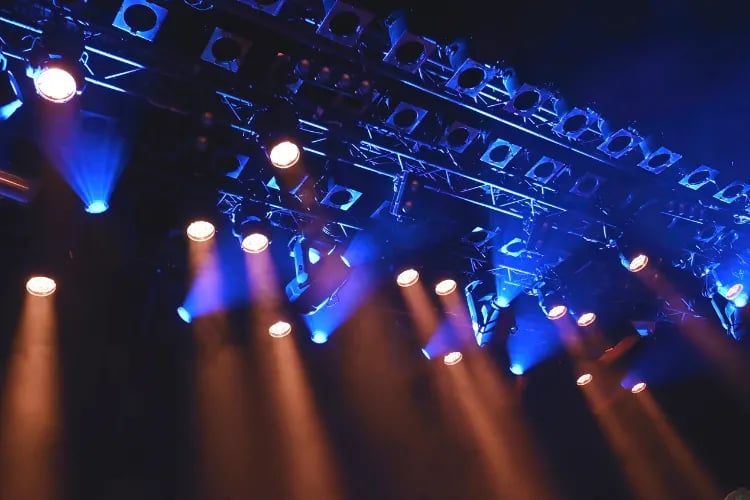
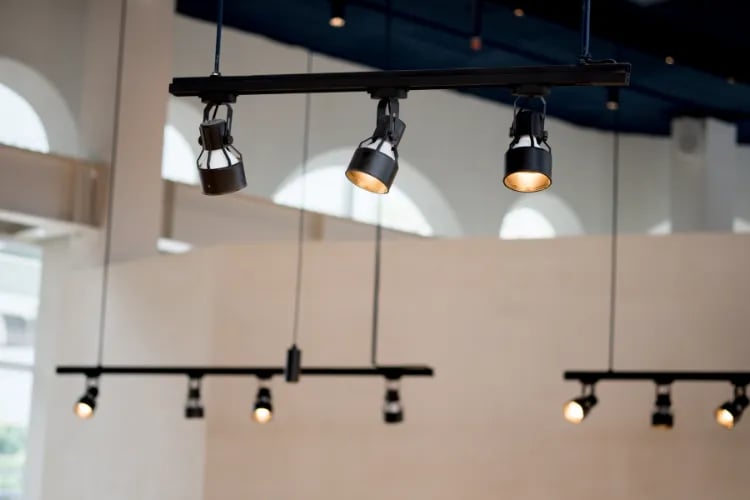
Wash lights: Wide, soft beams that create base ambience and even coverage (LED PARs, Fresnels, moving washes, LED bars).
Spotlights/profiles: Focused, shapeable beams for stages, signage, and product reveals (ellipsoidals, followspots, moving profiles).
Uplights: Fixtures placed at floor level to “paint” walls, columns, or drape—often battery‑powered RGB/RGBAW+UV LEDs for fast setups.
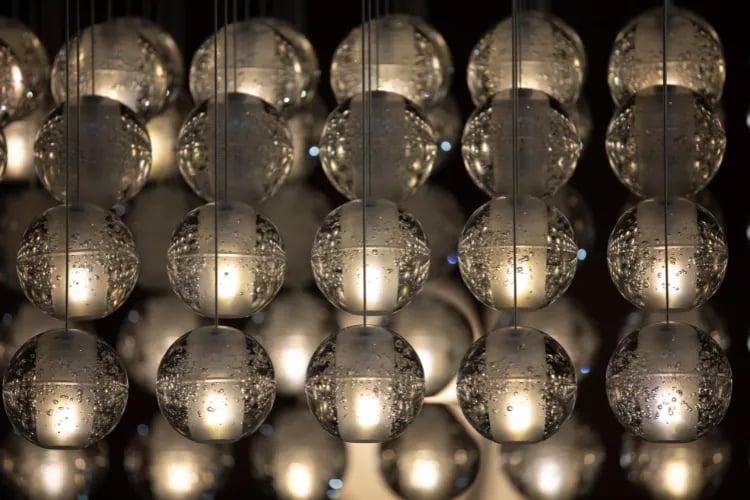
Practical lights: Lamps, chandeliers, neon, or decorative fixtures that add warmth and texture on camera.
Power and safety matter as much as looks. Temporary event wiring must be protected, properly rated, and removed when the event ends. Use GFCI protection on non‑permanent circuits used by personnel, protect cables from damage, and avoid running cords through doorways or across walkways without ramps or covers. OSHA’s rules for temporary wiring are the benchmark many venues and inspectors rely on.
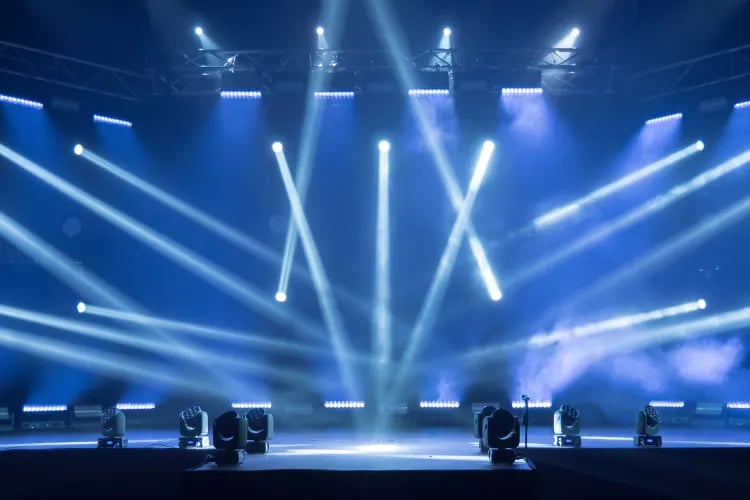
Types of Event Lighting Techniques
Four foundational techniques appear at nearly every event. Master these to shape depth, dimension, and focus without overspending.
Uplighting
Uplighting places fixtures at floor level to wash walls, drape, or columns. It can redefine architecture, tie the room to a brand palette, and add height and drama. Space fixtures 8–12 feet apart for continuous color; move closer on textured walls to accent detail.
For mixed‑use events, program a neutral base look for arrivals and shift to richer hues for the party.
Downlighting
Downlighting provides general coverage from above. Use it to keep faces readable and notes legible during content segments. Aim for a 45‑degree key light angle on presenters to minimize shadows.
For dinner events, keep downlight levels low and let accents do the heavy lifting to preserve mood.
Spotlighting
Spotlights carve out focus—keynotes, performers, product reveals, awards. Profiles (ellipsoidals) can be shuttered to a precise area; followspots are manually operated to track movement. Moving-head profiles add flexibility when you need multiple targets in one show without adding more fixtures.
Gobo projection
Gobos are stencils that shape light into patterns or logos. Use “breakup” gobos to add texture to a bland wall or floor, or custom gobos to project brand marks. It’s a high‑impact, relatively low‑cost way to change a room—especially paired with haze to reveal mid‑air beams during show moments.
Planning Your Event Lighting
Great looks happen on paper first. A strong plan prevents budget surprises and last‑minute compromises.
Assess the venue
Walk the site: ceiling height, rigging points and capacities, sightlines, ambient light (daylight, windows), available power (circuits, distro tie‑ins), and egress paths. Note surfaces you can safely light (brick, drape, foliage) and surfaces to avoid (highly reflective glass, sensitive art). Ask about haze and laser policies early.
Define the atmosphere
Write a short design brief that translates feeling into specs. Example: “We want a warm, elevated gala that photographs beautifully. Guests should feel welcome during arrivals (gold/amber tones, 200–300 lux), then energized for the live auction (dynamic color accent cues).” Attach mood boards and brand colors.
Create a lighting plan
Rig plot: Where fixtures hang or sit, their types, lenses, and focus areas.
Power one‑line: How loads distribute across circuits; maintain 80% of circuit capacity to avoid nuisance trips.
Control: DMX universes/addresses or sACN network plan, and any wireless DMX hops.
Cue list: Looks for walk‑in, walk‑out, scene changes, awards, activations, and contingency cues.
Camera check: White balance, skin tones, and dynamic range tested on your actual cameras under show looks.
If your production touches many teams, tie cues to the event run‑of‑show. For help structuring show flow, see our guide to building an event agenda.
Budget realistically
Align your AV/lighting RFP with the venue’s capabilities to avoid scope creep. Ask vendors to price: fixtures, distro, control, rigging, labor (load‑in, focus, show, strike), trucking, and permits. Request add/alt pricing for upgrades like wireless uplights or scenic projection so you can value‑engineer later without reinventing the plan.
Pro tip: Share a simple one‑page vision with two rig options (base and “plus”) and a not‑to‑exceed budget. That prompts smarter design choices and fewer surprises at invoice time.
For load‑in/out considerations like access routes and cable pathways, check our event logistics guide.
Choosing the Right Lighting Equipment
LEDs now dominate event lighting because they’re efficient, cool‑running, and highly controllable. Compared to tungsten or discharge sources, modern LED fixtures reduce power demand and heat, while offering precise color control and smooth dimming curves.
LED vs. traditional: LEDs sip energy and offer long lifetimes; legacy sources can still excel for ultra‑high CRI or specific optics but require more power and maintenance. Efficiency standards continue to rise, making LED the default choice for most events.
Wired vs. wireless control: Wired DMX or networked sACN is robust and predictable; wireless DMX is great for heritage venues and fast turns. Design wireless like radio: elevate antennas, maintain line‑of‑sight, scan for interference, and keep critical cues on wired when possible.
Color engines: RGB is good; RGBA, RGBW, or RGBAW+UV is better for smoother pastels, whites with high fidelity, and saturated punch. Consider fixtures with tunable white (2700–6500K) when camera work is a priority.
Rent vs. buy: Rent when needs vary, you want the latest tech, or storage/maintenance is a headache. Buy when utilization is high and you can support testing, charging, and repairs. A simple ROI test: if annual rental cost exceeds ~50–60% of the purchase price for two consecutive years, consider purchasing.
Example load planning: 24 battery uplights at 25W charge power each is 600W total; at 120V, that’s 5A—fine on a 20A circuit (keep under 80%, or 16A). A small stage wash of eight 150W LED profiles is 1200W (10A). Always add headroom for control gear, media servers, and scenic lighting.
Color and Mood: How to Use Lighting to Set the Tone
Color changes behavior. Warm tones (ambers, golds) increase comfort and make skin tones look great. Cooler whites feel crisp and focused. Highly saturated reds raise arousal but can increase tension if overused; greens can calm but skew skin tones on camera. Test color choices with people in the room and with your actual cameras—what feels “right” to the eye can clip or wash out on sensor.
Use TM‑30 Rf/Rg data to match brand palettes and maintain natural skin tones. A high Rf preserves color fidelity; slightly elevated Rg can add tasteful pop in scenic elements. For multi‑segment programs, modulate CCT across the event: warm for mingling, neutral for content, saturated accents for reveals or entertainment.
Sample palettes by event type:
Corporate conference: Neutral white 3800–4200K base; accents in deep teal + soft amber; stage backlight in cool white for separation; logo in a crisp white gobo.
Gala dinner: Warm white 3000–3200K base; champagne/rose uplights; pinspots on florals; gentle lavender haze for depth during awards.
Product launch: Neutral white for demos, saturated brand hues for reveals; fast accent cues tied to music; projection‑mapped hero moment on entry.
Music showcase: Low ambient with bold, contrasting washes (indigo + amber); tight backlights for silhouette; haze to reveal beams.
Because lighting affects how photographs look, coordinate with your shooter early. For practical tips on capturing your event, see our guide to event photography.
DIY vs. Hiring a Professional Lighting Designer
Some lighting is absolutely DIY‑friendly; other work should be left to certified pros, especially when rigging, temporary power, or complex networking enters the picture.
DIY sweet spots: Battery uplighting, simple stage washes for small rooms, pinspots for decor, and basic logo gobos—assuming you understand power loads, placement, and egress.
Hire a pro when: You have rigging overhead, temporary power distribution, broadcast lighting, complex cueing, projection mapping, or you’re in a venue with strict union and safety requirements.
How to vet: Ask for recent plots, a power one‑line, and cue sheets; request references; confirm insurance; and look for industry certifications (for example, ETCP Entertainment Electrician) as a competency benchmark. Good partners keep you safe, on time, and on budget.
Common Event Lighting Mistakes and How to Avoid Them
Most lighting missteps trace back to power planning, cable management, or skipping rehearsals. A little discipline saves a lot of pain.
Under‑estimating power: Add up fixture wattage, divide by voltage to get amps, and keep each circuit below 80% of its rating. Leave headroom for control gear and unexpected additions.
Poor cable management: Never run uncapped cables across walkways. Use cable ramps or secure overhead runs, and clearly mark any low‑light hazards. Coil slack neatly behind scenery—not under tables where feet find it.
Skipping GFCI on temporary circuits: Protect non‑permanent receptacles used by personnel; it’s safer and often required by code and venue policy.
Not testing on camera: Looks that feel great live can go flat on camera. Always do a camera rehearsal with your final cues and people in place.
For a deeper dive into planning the operational side—vendor load‑ins, access routes, and staff workflows—our event logistics checklist is a useful companion.
Latest Trends in Event Lighting
Attendees now expect more than pretty colors. Two macro‑trends—immersive storytelling and measurable sustainability—are reshaping designs from boardrooms to city blocks.
Interactive/immersive environments: Motion‑reactive lighting, pixel‑mapped LED walls, LED “tubes,” and light art invite participation. Projection mapping and scenic projection turn architecture into dynamic canvases for brand storytelling or public art.
Sustainable rigs: LED fixtures, networked controls, and thoughtful scheduling deliver impressive energy reductions without creative compromise. Fewer trucks, fewer dimmer racks, more flexibility.
Treat lighting as a narrative tool: your wash sets the scene, accents direct attention, and projection transports guests into the world your event is building.
Case in point: large public light festivals have transformed downtown districts into immersive galleries, driving tourism and community pride. On a smaller scale, hotels and libraries are installing 360° projection and smart controls to host plug‑and‑play immersive programs. Expect more events to adopt these tools—even for corporate sessions.
Mini Case Studies: Applying the Principles
1) Awards Gala, 600 guests. Goal: elegant, photogenic atmosphere with high‑energy moments.
Plan: 3000K house look with gold uplights; pinspots on centerpieces; textured gobo on walls; 900–1000 lux key light on stage; saturated brand accents (deep magenta + amber) for walk‑ups.
Result: Flattering skin tones, crisp camera images, and punchy reveals during award stings.
2) Product Launch, 1,200 attendees + livestream. Goal: exact brand color, camera‑perfect demos.
Plan: Neutral 4000K base for demos; TM‑30 targets Rf ≥ 90/Rg ≈ 100; custom glass gobo of logo; projection-mapped entry moment; wired sACN backbone with wireless DMX for fast scenic accents.
Result: Faithful brand color on camera, smooth cueing tied to music, and a hero reveal that trends on social.
3) Outdoor Community Night Market. Goal: safe, inviting pathways + Instagrammable ambience.
Plan: String lights for cozy ambient; battery uplights on trees; LED floods for vendor areas at 200–300 lux; cable ramps on crossings; GFCI protection on all temporary receptacles.
Result: Clear sightlines and distinct zones that feel safe and special, with minimal generator footprint.
Power and Safety Fundamentals (Don’t Skip This)
Temporary power is not a “set it and forget it” task. Plan distribution, protection, and cable paths from day one.
Circuit math: Total watts / volts = amps. Keep at or under 80% of breaker rating (e.g., 16A on a 20A circuit).
Cable runs: Use proper gauges for distance to reduce voltage drop; protect all floor runs with ramps; never pinch cables in doors.
Protection: Use GFCI for non‑permanent receptacles; weatherproof where needed; strain‑relief connections.
When you hire vendors, ask for a power one‑line and a confirmed load schedule. If you’re managing multiple suppliers (lighting, video, activations), coordinate load diversity so everyone isn’t peaking at once.
Your production plan can live alongside your registrations, comms, and vendor roster in Loopyah. If you’re not already using our tools, explore Loopyah’s event software to keep every department aligned.
Testing and Pre‑Show Checks
Schedule time for focus, programming, and camera rehearsals. Put people onstage for true skin‑tone tests, not just mannequins. Verify cue timing against your run‑of‑show and confirm a “look book” of presets for the operators.
Walk‑in/walk‑out looks with music
Backup cues if haze is restricted or a fixture fails
Camera white balance confirmations per segment
FAQs: Quick Answers to Common Lighting Questions
How many uplights do I need?
Measure your perimeter and plan one every 8–12 feet for continuous coverage. For tall walls (15’+), consider higher‑output fixtures or a second row for evenness.
What’s the best color temp for a keynote?
Neutral white around 3800–4200K reads crisp on camera while staying flattering. Combine with soft backlight for separation and gentle fill to reduce shadows.
Do I really need haze?
For beam effects with spots and movers, haze adds depth and drama. Always confirm venue policies and fire alarm sensitivities.
Conclusion: Make Light Your Most Strategic Design Choice
Lighting is the fastest way to shape mood, clarify focus, and make spaces feel intentional. Define the vibe you want, translate it into measurable specs (lux levels, CCT, TM‑30 targets), build your plan with power and safety in mind, and combine washes with selective accents and projection. Then test with people and cameras to lock in the look. That’s how you create the perfect atmosphere—consistently.
Want more inspiration? Explore our resources on event photography, event logistics, and building your event agenda to align every department around your show.
If you’re ready to plan smarter and showcase your brand in the best light, you can start organizing all your event ops with Loopyah. Visit our event software or talk with our team about how we support creators, producers, and venues.
Author: By the Loopyah Content Team
The Loopyah Content Team shares expert insights, practical guides, and industry updates to help event organizers create unforgettable experiences and stay ahead in the event planning world.