Trade Show Checklist: Everything You Need for a Successful Event
Trade shows are back in a big way—and they’re still one of the most effective channels for B2B discovery, relationship‑building, and in‑person product demos. Industry recovery has accelerated, with CEIR’s Q4 2024 Index posting the strongest activity since 2020 and cancellation rates at just 0.3%. Plan with confidence and benchmark your goals against 2019‑level performance. (Source: CEIR Q4 2024 Index)
If you’re exhibiting in the coming months, a thoughtful, end‑to‑end trade show checklist is your unfair advantage. It keeps your team aligned on why you’re going, what success looks like, how you’ll design and staff your booth, and exactly what happens before, during, and after the show.
In this guide, you’ll get a practical Trade Show Checklist built on current research and real‑world exhibitor playbooks. Use it to set measurable objectives, allocate budget, design a compliant and high‑impact booth, promote your presence, run tight on‑site operations, and convert leads quickly once the show closes.
Why You Need a Trade Show Checklist
A trade show checklist is more than just a packing list—it’s a strategic tool that ensures every part of your event plan is aligned, accountable, and executed on time. Without one, critical tasks can slip through the cracks: budget overruns, missed deadlines, forgotten materials, or unqualified leads. With one, you operate with clarity, coordination, and confidence.
Here’s why every exhibitor—first-timer or seasoned pro—needs a trade show checklist:
Stay Organized Across Teams: From marketing to sales to ops, everyone knows their responsibilities, timelines, and key deliverables.
Prevent Last-Minute Surprises: A proactive checklist helps you identify potential issues early—like shipping delays, booth compliance problems, or missing gear.
Hit Your Event Goals: A structured plan helps you set measurable objectives and keep your team focused on activities that drive ROI.
Improve Communication: With a central checklist, internal handoffs (e.g., lead follow-up, demo ownership) become seamless, even in high-pressure environments.
Reduce Stress: Trade shows are high-stakes and fast-paced. A checklist keeps you calm, focused, and in control—before, during, and after the event.
Whether you’re managing one show or a full event calendar, a well-built checklist creates consistency, repeatability, and better outcomes every time you exhibit.
Pre‑Show Planning: Build Your Strategy
Define Your Goals
Start by getting crystal clear on what success means for this specific event. Exhibitors consistently cite three core goals—lead generation, brand impact, and relationship management—so anchor your plan around 3–5 measurable objectives you can track in real time and post‑show.
Lead generation: e.g., 250 scanned badges, 100 marketing‑qualified leads (MQLs), 25 sales‑qualified opportunities (SQOs).
Brand awareness: e.g., 1,500 booth visitors, 500 social mentions, 3 press/analyst briefings.
Relationship management: e.g., 20 customer meetings, 10 partner check‑ins, 5 strategic introductions.
Turn those goals into SMART objectives and tie them to KPIs you’ll actually review. If you need a primer on which metrics matter most, visit our guide on event KPIs to choose leading and lagging indicators that map to revenue.
Write 3–5 objectives (lead, brand, relationships, press).
Define measurement windows: in‑show (daily), immediate post‑show (48 hours), and 90‑day pipeline/sales impact.
Set thresholds for success (green), watch (yellow), and act (red) so you can adjust on the fly.
Assign ownership: who tracks, who decides, who reports.
Pre‑build a one‑page scorecard everyone can read at a glance.
Budget Allocation
A reliable rule of thumb is to budget roughly three times your exhibit space fee for total show costs. Typical splits (your mileage may vary): space (~32%), design/build (~20%), show services (~14%), travel/entertainment (~18%), with shipping/drayage and promotion filling the balance. Lock your “space × 3” number early and protect the most visible items—design, flooring, AV—from late‑stage cuts.
Confirm space size, height restrictions, and hanging sign rules with the organizer; set your total budget accordingly.
Allocate by category and set “must‑have” vs. “nice‑to‑have.” Book early to capture discounts on space, hotels, and shipping.
Pre‑approve contingency (10–15%) for last‑minute electrical drops, rush print, extra labor, or union rules you can’t control.
Tip: Bundle shipping, drayage, and material handling in your budget review. Those line items can surprise you when freight arrives off‑target or crates require special handling.
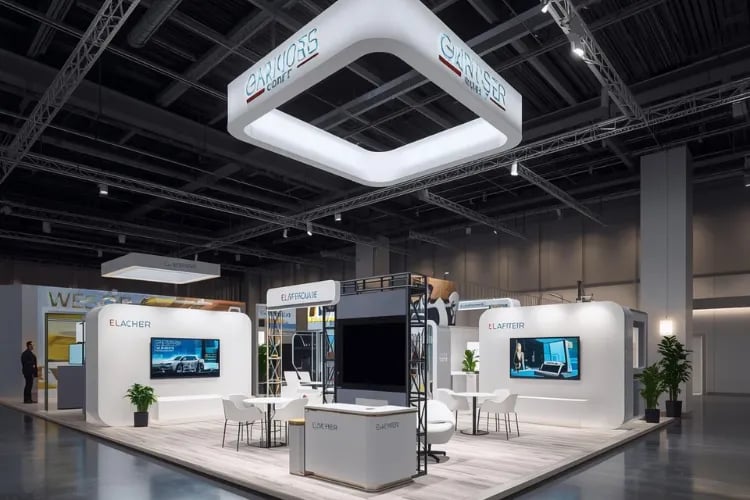
Booth Design and Logistics
Design for sightlines, code compliance, and traffic flow. Most shows follow IAEE display rules (e.g., linear booths typically allow 8’ back‑wall height and 4’ height in the front half, perimeter booths up to 12’, islands up to 16–20’ depending on show rules). Confirm height limits, line‑of‑sight, and hanging sign permissions before you sign off on the build. For power, coordinate safe temporary wiring and plan enough electrical drops at the right locations.
Layout: A clear path in and out, with demo stations along the perimeter and a “meeting core” that doesn’t block aisles.
Branding: Large, clean headers; lighting that highlights product; consistent colors and fonts; concise benefit‑driven messaging.
Storage and clutter control: Hidden cabinets, cable management, and a daily reset checklist to keep the booth spotless.
AV and demos: Screens at eye level; headsets/mics when ambient noise is high; quiet corners for high‑value conversations.
Compliance checklist to review with your exhibit house:
Booth height and setback rules approved in writing by show management.
Electrical plan with safe cable runs and enough drops to avoid daisy‑chaining power strips.
Hanging sign permits, rigging points, and weight limits confirmed (if applicable).
Marketing and Promotion
Pre‑show promotion drives booth traffic. Research shows pre‑event email to your house list is one of the most effective tactics—amplified by social proof, speaker/exhibitor promotion, and organizer tools like app listings and onsite branding. Build a short, tight plan that speaks to attendee intent: hands‑on demos, expert access, and new solution discovery.
6 weeks out: Publish a benefit‑driven landing page with your value proposition, booth number, and a “book a demo” form. Tease your launch or giveaway. Learn how to build high‑converting pages in our guide to event email marketing strategy for messaging and timing tips.
4 weeks out: Announce meetings calendar and VIP demos; invite target accounts to pre‑book. Coordinate with the organizer’s attendee promo schedule to compound reach.
2 weeks out: Short email + social series with clear CTAs (see, try, learn). Add speaker/executive names for credibility. Prepare press kits and embargoed briefings if you’re launching.
Show week: Daily social updates, live demos, influencer spotlights, and end‑of‑day recaps that drive walk‑ups and meeting requests.
Don’t forget show services: list your products in the event app, enable lead retrieval, and explore onsite branding (window clings, column wraps) if the budget allows.
Staff Training
Attendees say in‑person events are the most trusted source of information, and access to experts is a top driver of engagement. Train your team to lead with discovery, not pitches—asking good questions, mapping problems to solutions, and confirming next steps.
“In‑person events are the most trusted information source for attendees—and discovery and access to experts lead engagement.” (PCMA/Convene, 2024)
Role clarity: greeters, demo leads, note‑takers, and schedulers. Rotate to keep energy high.
Discovery questions: “What’s the one workflow you wish were 2× faster?” “What’s blocking adoption?” “How are you measured on this?”
Qualification and routing: define A/B/C tiers, designate SDR handoffs, and script meeting‑set CTAs.
Booth etiquette: no phones, no food in the booth, no huddles blocking the entrance, and always stand to greet.
What to Pack: Your Booth‑in‑a‑Box Trade Show Checklist
Marketing Materials
Pack materials that serve your objectives and support goal‑aligned conversations:
Business cards for every staffer plus QR codes linking to your product pages or calendar.
Brochures or one‑pagers: concise, skimmable, and aligned to buyer roles (operator, manager, exec). Add a “What to do next” box with a URL or QR.
Giveaways: choose items people will actually use and that tell your story. See our list of trade show giveaway ideas for proven, budget‑friendly options.
Technology and Equipment
Connectivity is strategy. Test your gear, prefer 5 GHz‑capable devices, and bring backups. If a hardline is mission‑critical, order it in advance and mark its drop on your floorplan.
Lead capture: show‑provided badge scanners, tablets/phones with your capture app, and a paper backup (just in case).
Demo devices: laptops/tablets with chargers, HDMI/USB‑C adapters, and screen‑share dongles; preloaded demo data and offline mode ready.
Power: labeled surge protectors, gaffer tape, grounded extensions, cable covers, and spare batteries/power banks.
Networking: 5 GHz hotspot as backup, SSIDs/passwords printed for team, and a pre‑tested VPN if you need secure access.
Essential Supplies
A standardized “calamity kit” keeps you self‑sufficient and calm:
First‑aid: bandages, antiseptic wipes, pain reliever, antihistamines, blister pads.
Tools: box cutter, multi‑tool, zip ties, scissors, Velcro, measuring tape, labeler, and extra pens/markers.
Cleaning: microfiber cloths, wipes, lint roller, hand sanitizer, paper towels, and trash bags.
Docs: printed booth plan, electrical order, shipping info, emergency contacts, staff schedule, and QR links to digital copies.
During the Show: Run a Tight On‑Site Operation
Booth Management
Most exhibitor manuals require booths to be staffed for all open hours and to avoid aisle blockages. Think like a retail storefront: clean, welcoming, and easy to enter. Keep the energy high with scheduled shifts and clear roles.

Open/close checklist: power on devices, restock print, tidy cables, sanitize surfaces, and reset giveaways.
Coverage plan: minimum two people on the floor at all times—greeter and demo lead—plus a floating scheduler.
Etiquette: stand to greet, avoid internal huddles, don’t block entrances, and step off‑booth for meals.
Lead Generation
Pre‑build a capture + qualification workflow and run it consistently. Don’t rely on ad‑hoc paper or memory—your future self will thank you during follow‑up.
Attract: clear, benefit‑driven header, live demos on the half‑hour, and a compelling CTA (e.g., “Scan to book a 15‑min audit”).
Qualify: 3 discovery questions to triage A/B/C tiers; tag by persona, use case, and time‑frame.
Capture: scan badge, confirm email/phone, and add a short note (“pain: data silos; wants pilot in Q3”).
Commit: set the next step on the spot (meeting invite sent, demo scheduled, trial started). Print a mini‑calendar QR to make it frictionless.
Nurture in‑show: send a short same‑day email or SMS recap so your brand stays top‑of‑mind overnight.
Pro tip: Keep a running whiteboard tally of “meetings set,” “qualified demos,” and “hot accounts” to motivate the team and adjust tactics daily.
Networking
Replace generic “stop by our booth” invites with purposeful meet‑ups. Attendees value curated conversations with peers facing similar challenges and access to experts.
Host micro‑sessions: 10‑minute chalk talks every hour on a specific topic, promoted via the event app and social posts.
Attend relevant sessions and ask smart questions that invite post‑panel conversations.
Plan partner walks: introduce customers to ecosystem partners to strengthen your value story and co‑sell opportunities.
Post‑Show Follow‑Up: Turn Conversations Into Revenue
Lead Follow‑Up
Speed‑to‑lead is everything. Aim to send personalized follow‑ups within 24–48 hours. Route leads into your CRM with notes, tags, and the agreed next step so sales can act immediately.
Tiered outreach: same‑day for A‑leads, 24 hours for B‑leads, and a nurturer sequence for C‑leads.
Personalize: reference the conversation, restate the problem you heard, and confirm the next step with a calendar link.
Automate where it helps: use templated emails and triggers—without losing the human touch. If you’re using Loopyah, our email attendee features help you build segmented, on‑brand follow‑ups in minutes.
Measure Results
With marketing budgets under scrutiny, you need a clear scorecard to defend spend and secure next year’s investment. Track conversion‑centric KPIs against your pre‑show targets and compare to prior years and 2019 baselines.
Volume: total scans, visitors, demos run, meetings set.
Quality: percent qualified, ICP fit, decision‑maker involvement, intent signals (timeline, budget, urgency).
Velocity: time from scan to first meeting, meeting to opportunity, opportunity to close.
Impact: pipeline value attributed to the show, net new logos, expansion revenue, and win rate vs. non‑event sourced deals.
When you present results, include a one‑page narrative: what we aimed to do, what we achieved, and what we’ll do differently next time.
Debrief and Feedback
Hold a structured debrief while the experience is fresh. Invite sales, marketing, product, and operations. Capture “start/stop/continue” and update your playbook immediately.
Start: tactics to trial at the next show (e.g., micro‑sessions, earlier VIP outreach).
Stop: low‑value tasks (e.g., generic swag that didn’t move, long demo loops).
Continue: proven winners (e.g., qualification script, shift rotation, pre‑booked meetings).
Trade Show Checklist: The Master List (Condensed)
Use this condensed checklist as your final pass the week before the event. Duplicate it for each show and add event‑specific rules and timelines.
Objectives and KPIs set; scorecard built; ownership assigned; daily huddles scheduled.
Budget approved (“space × 3”); contracts signed; contingencies earmarked; early bird discounts captured.
Booth design finalized; IAEE rules checked; electrical plan marked; rigging/hanging signs approved; freight booked with labels and photos.
Pre‑show marketing scheduled: landing page live; email sequence queued; social calendar and influencer partners aligned with organizer channels.
Press/analyst: embargo briefings booked, media kits prepared, quotes and visuals approved.
Staffing: roles, scripts, discovery questions, qualification tiers, schedule, dress code, booth etiquette, and daily goals posted backstage.
Tech: lead scanners, tablets, demo laptops, chargers, adapters, power strips, extensions, 5 GHz hotspot, and offline demo mode tested.
Materials: business cards, brochures/one‑pagers, signage, QR codes, and tiered giveaways packed and labeled.
Calamity kit: first‑aid, tools, cleaning, spare cables, printed docs, and emergency contacts in one accessible bin.
On‑site ops: daily open/close checklist, shift rotation, meeting scheduler running, and whiteboard tracking hot accounts.
Follow‑up: segmented templates prebuilt; CRM routing rules ready; first wave scheduled for 24–48 hours post‑show; nurture series queued.
Certificates of insurance submitted (if required); liability waivers and international compliance documentation prepared.
Lead capture workflows reviewed for GDPR/CCPA compliance; consent signage or checkboxes confirmed and paper backup forms printed.
VIP and target account meetings confirmed with invites sent; internal executive briefing docs created and partner walk-throughs scheduled.
Team briefing document shared with talking points, schedules, and contacts; emergency contact list circulated and daily recap channel set up.
Contingency plans in place for weather, shipping, and staffing; extra booth attire packed as backup.
Post-show ROI reporting template prepared; CRM updated with attribution fields; debrief meeting scheduled and calendar invite sent.
Sustainability plan finalized: recycling, digital-first materials, and eco-conscious giveaways confirmed.
Trade Show Checklist Template (Free Download)
Planning a trade show involves dozens of moving parts—logistics, marketing, staffing, technology, follow-up—and it’s easy to miss something without a structured approach. That’s why we’ve created a comprehensive, editable trade show checklist template you can download and customize for every event.
This free resource is designed to help you stay on track from pre-show planning to post-show follow-up. Whether you're exhibiting at your first event or managing a multi-show calendar, the template gives your team a clear roadmap to execute with precision.
The checklist is built on real exhibitor workflows and includes all the essential phases: goal-setting, budget tracking, booth design, promotion, on-site execution, lead capture, and post-show outreach. You can duplicate it per show, tailor it to different event types, and continuously improve it based on your team’s feedback.
Download the template, make it your own, and streamline your trade show execution from start to finish.
Download ChecklistHow to Customize Your Trade Show Checklist by Industry
Not all trade shows—or industries—operate the same way. A one-size-fits-all checklist can miss key details that matter in your specific vertical. Customizing your trade show checklist by industry ensures your team is prepared for the unique requirements, expectations, and opportunities that each market presents.
For example, tech companies may need to prioritize live demos, Wi-Fi reliability, and press briefings, while manufacturers might focus on freight logistics, compliance certifications, and product handling. Healthcare and pharma exhibitors must account for regulatory considerations, secure data collection, and detailed documentation.
Here’s how to tailor your checklist for industry relevance:
Adjust booth layout and messaging to match attendee expectations (e.g., hands-on demos for industrial shows vs. consultative spaces for financial services).
Include sector-specific regulations, such as HIPAA compliance, CE marking, or export/import requirements.
Align giveaways and printed materials with audience preferences—technical spec sheets for engineers, ROI-focused one-pagers for CFOs.
Factor in buyer behavior unique to your industry—long sales cycles, multi-stakeholder decision-making, or regulatory gatekeeping.
How to Audit and Improve Your Trade Show Checklist After Each Event
Your trade show checklist should evolve with every event. The best teams treat it as a living document—refining it based on what worked, what didn’t, and what could be improved. A structured post-show audit ensures you capture these lessons while they’re still fresh and turn every experience into a smarter, more effective future playbook.
Here’s how to run a high-impact checklist audit:
Start by gathering feedback from all key stakeholders—sales, marketing, ops, product, and leadership. Use a “Start / Stop / Continue” format to quickly identify what to add, remove, or keep in the checklist. Then compare actual outcomes against pre-show goals to see where planning fell short or exceeded expectations.
Look for patterns: Were there consistent delays? Missed deadlines? Budget overages? Did lead follow-up get delayed? Were materials or equipment missing? Use these insights to update the checklist with new tasks, clearer timelines, or additional safeguards.
Document the changes directly in your checklist template and version it for each event. Over time, this process builds a high-performance system that gets smarter with every show—reducing ramp-up time, avoiding repeat mistakes, and driving better results across your entire event calendar.
Conclusion
A great trade show isn’t an accident—it’s the outcome of clear goals, smart budgeting, a compliant and engaging booth, targeted pre‑show promotion, disciplined on‑site execution, and fast, personalized follow‑up. Use this Trade Show Checklist to keep every stakeholder aligned and to turn show floor conversations into measurable pipeline and revenue.
Keep iterating: after each show, update your checklist with what to start, stop, and continue. Over time, your playbook will become a compounding asset—shortening ramp time for new staff, improving ROI, and giving leadership the confidence to invest in bigger footprints and bolder ideas.
Want help building the digital backbone for your checklist—registration, email outreach, scanning, and attendee communications? Explore Loopyah’s tools to streamline your next show.
Launch Your Next EventAuthor: By the Loopyah Content Team
The Loopyah Content Team shares expert insights, practical guides, and industry updates to help event organizers create unforgettable experiences and stay ahead in the event planning world.