· 16 min read
How to Switch Ticketing Platforms for Your Events
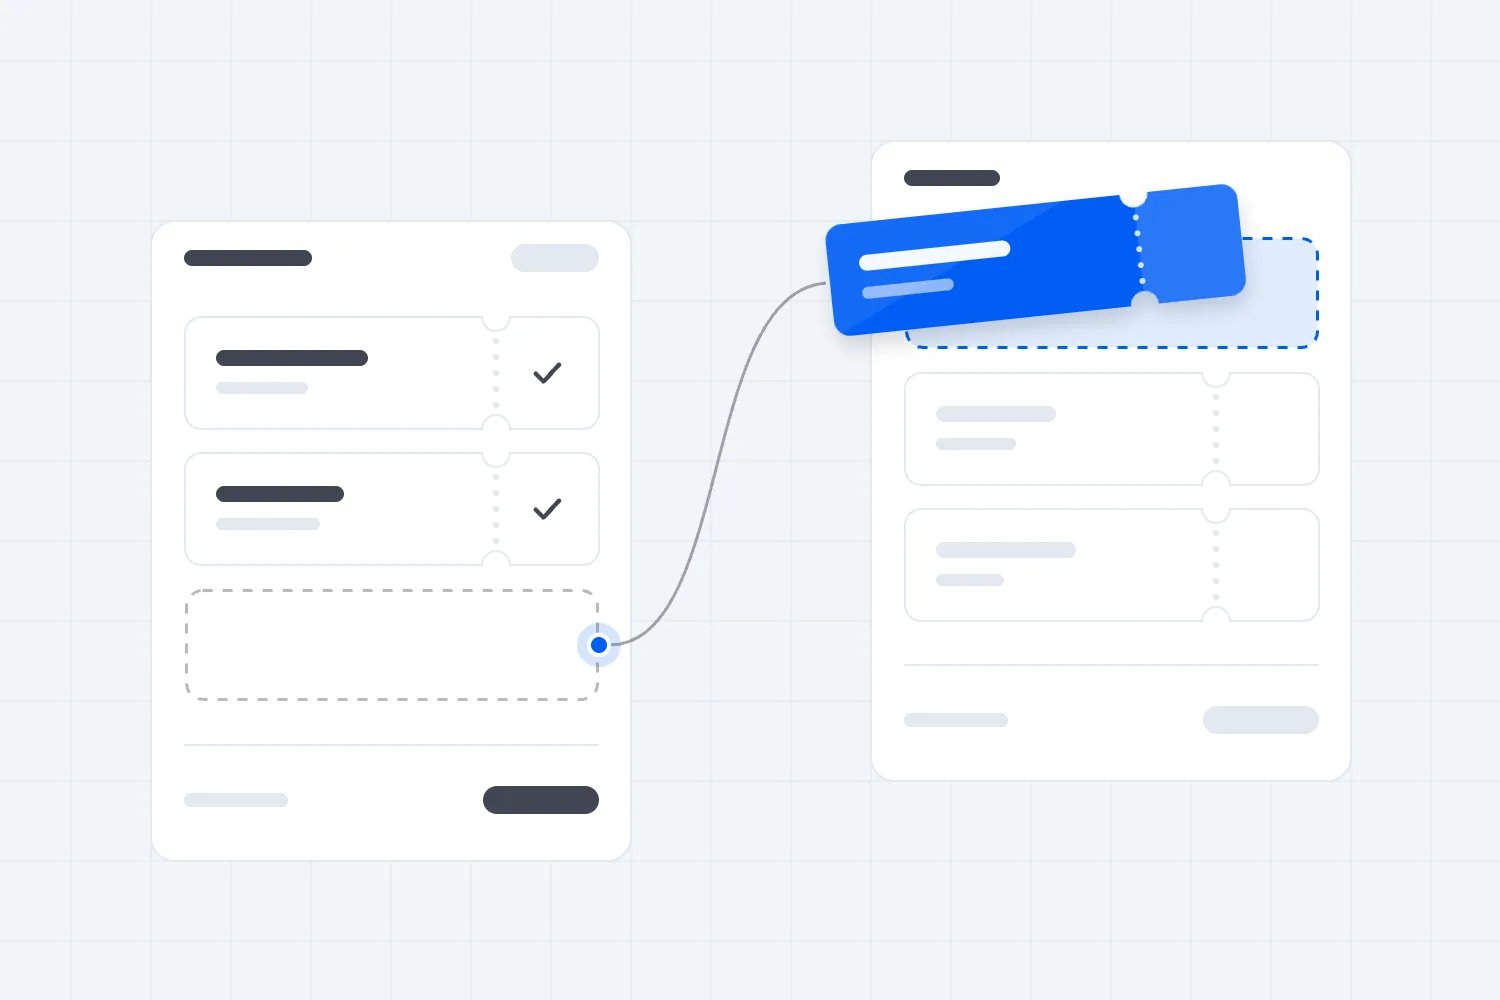
The easiest way to switch ticketing platforms is to keep events with tickets already sold on the current platform and sell your next event on the new one. Bring your contacts across with their existing email opt-ins, check outstanding payouts, and test buying and scanning tickets before announcing the move.
You should be able to tell the audience you've already built about your next event. That means importing more than a list of email addresses. You need to bring across who agreed to receive your marketing and who unsubscribed, with those choices still attached to the right person.
Be clear about what you want the switch to fix. If it's fees, compare the total cost on the tickets you actually sell. If it's cash flow, check whether payouts arrive before your supplier deposits are due. Otherwise you can do all this work and still have the same problem.
This guide covers exporting and importing your contacts, getting the next event ready to sell, and finishing the work that remains on the old platform.
What moves with you and what stays behind
Check what your current provider lets you download and what the new one can import. Your event details, contacts and financial records may need separate exports.
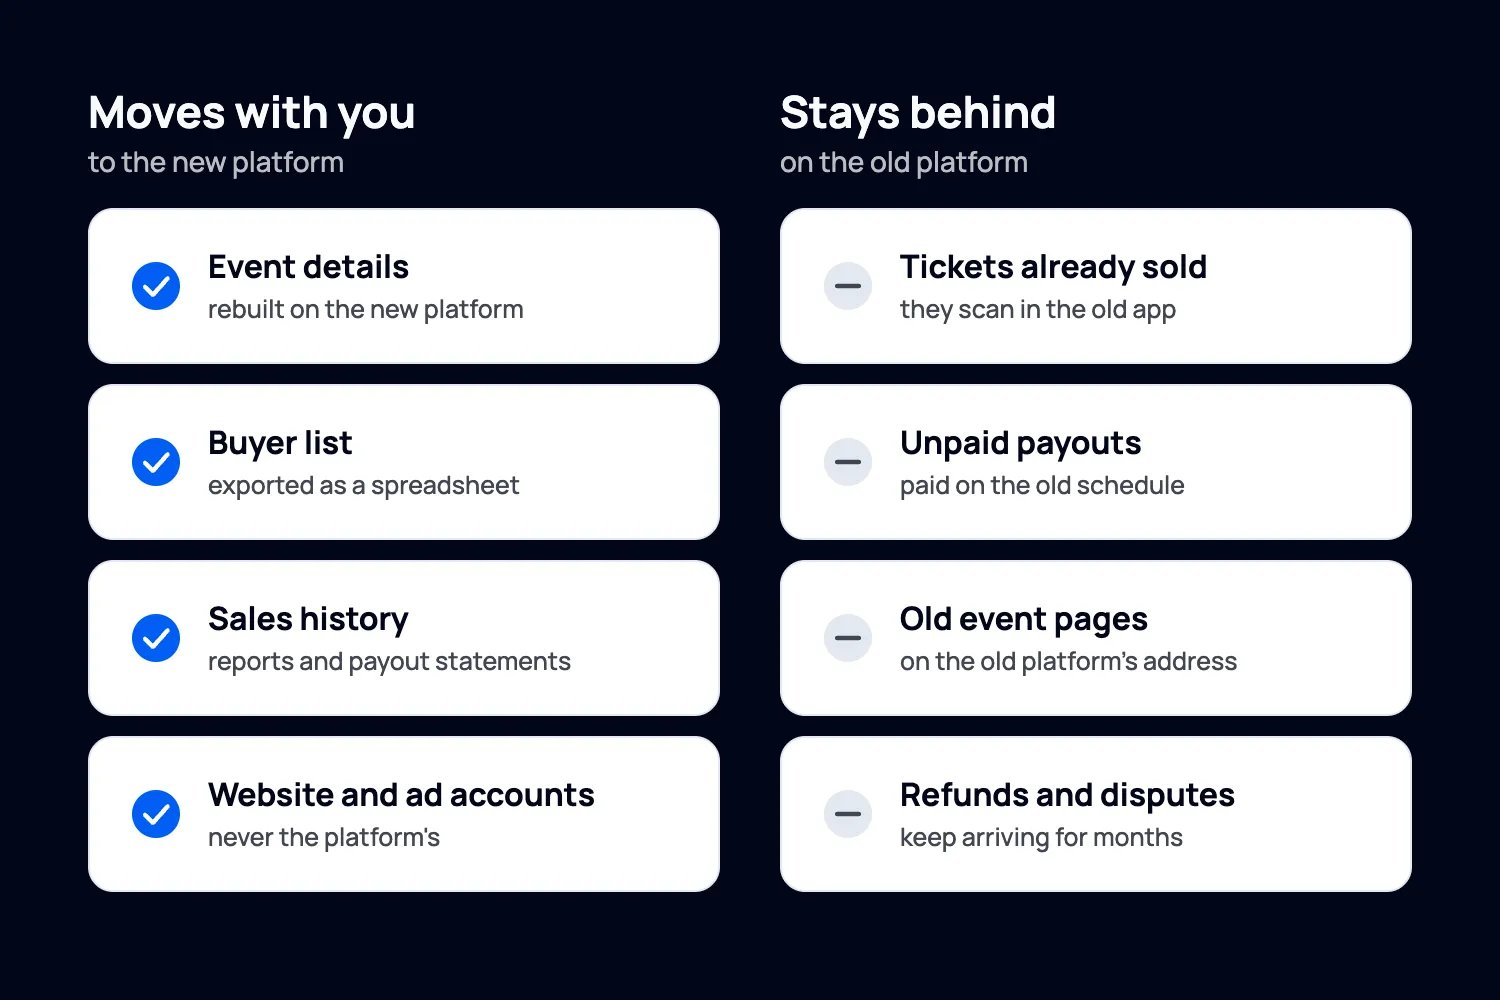
What you can usually take with you:
Your contacts and their email preferences, including existing opt-ins and unsubscribes.
Event descriptions, dates, ticket names, prices and FAQs.
Order reports, sales reports and payout statements for your accounts.
Your own website, social accounts, ad accounts and email domain. You'll update their links and connections.
What usually still needs the old platform:
Existing tickets and their QR codes. Keep using the original check-in system unless both providers have agreed how to move them.
Outstanding payouts, money the platform is holding back and any money you owe it.
Old event pages, platform followers and reviews that cannot be transferred.
Refunds and payment disputes relating to the old sales.
Keep a copy of past orders even if the new platform only imports contact details. Importing names and emails doesn't make the old tickets work in the new app.
Step 1: Choose the first event you'll move
Before choosing when to start ticket sales, check that the new platform handles the things you use: contact imports with email opt-ins, reserved seating, ticket bundles, promo codes, refunds and staff access. Ask to see anything you're unsure about before committing to the move.
Choose an event that hasn't sold tickets yet. For a weekly or monthly series, use the next date that isn't on sale.
Keep selling and checking tickets on the current platform for the events already there.
Check your agreement for notice periods, exclusivity and any money the provider paid you in advance that you still owe.
Allow time for payment-account approval, contact imports and testing before announcing when tickets will go on sale.
If you need to move an event that's already selling, ask both providers how they'll handle existing tickets, refunds and check-in before changing anything. Don't assume importing a guest list will make the old QR codes scan in the new app.
Step 2: Export your contacts, opt-ins and sales records
Download your contacts while you still have full account access. Look for their email addresses and marketing preferences, including the records of who opted in and who unsubscribed. Some platforms put those in a separate report from the orders, so don't assume one download contains everything.
Save these files somewhere your team controls:
Contacts with their names, email addresses and marketing preferences. Keep any available record of when and how they opted in.
The unsubscribe list, if it is exported separately.
Order and attendee reports, including ticket types, quantities, amounts paid, fees and refunds.
Sales and payout statements for your accounts.
Event descriptions, promo-code settings, seating plans and FAQs you'll reuse.
Compare the number of exported orders with the order count in the old platform, then compare tickets with tickets. One order can contain several tickets. Check a group booking and a refunded order as well as the sales and payout totals.
Open the contact file and check a few people whose email preferences you know. Can you identify someone who opted in and someone who unsubscribed? If those choices are missing, get the separate export or ask the old provider for help before importing the list.
Keep an untouched copy of each export. Use a separate copy to prepare the import, so you can recover the original details if names, email addresses or preferences end up in the wrong place.
Step 3: Import your contacts with their email opt-ins
Bring the audience you've already built into the new platform before announcing your next event. If someone agreed to hear from you about future events, keep that opt-in with their contact details so you can continue emailing them. Keep unsubscribes too, so those people stay off your marketing emails.
Loopyah's contact importer accepts CSV files with up to 50,000 rows at a time. You can choose which columns contain names, email addresses and other details, and import contacts with their individual marketing permissions. This lets you continue using your existing list instead of asking everyone to sign up again.
Prepare and import the contact list
Check the file before uploading it. You need email addresses, names where available, and the records showing each person's marketing choice. If the old platform exports opt-ins or unsubscribes separately, keep those files together.
Upload the CSV and match the columns to the right contact details. For example, make sure the email column becomes the email address, not a note or custom field.
Bring across each person's existing opt-in status. Don't mark a mixed list as entirely subscribed. Someone who bought a ticket but never agreed to marketing should not become subscribed during the move.
Check the import results. Loopyah provides a report of rows that couldn't be imported. Fix those entries and review them before trying again.
If the same email address appears in several exports, check the person's latest recorded choice. An older opt-in shouldn't overwrite a later unsubscribe. Keep the evidence of when and how they agreed to marketing, even if some of it needs to remain in your original export.
Check the list before sending your first email
Open a few imported contacts whose preferences you know. Someone who opted in should still be opted in. Someone who unsubscribed should still be excluded from marketing. An address with no recorded opt-in should not have gained one.
If the new platform can't store your old unsubscribe list, keep it separately and check future imports against it. Simply leaving those addresses out of today's upload won't stop someone adding them again next month.
Once you've checked the list, you can email your opted-in contacts from Loopyah about the next event. As new people buy tickets, Loopyah adds them to your contacts with their marketing permission. When someone unsubscribes, Loopyah stops sending them promotional emails.
Keep updates about tickets people have already bought separate from marketing emails. A ticket holder may need a change-of-time notice even if they don't want promotions for future events.
In the US, the FTC's CAN-SPAM guidance requires opt-outs to be honoured within 10 business days. In Australia, ACMA requires consent for commercial electronic messages and says a purchase alone isn't enough to infer it. Keep the permission the person actually gave you and follow the rules that apply to your audience.
Bring your contacts to LoopyahStep 4: Check the money still owed by the old platform
List the outstanding balance for each event and when you expect it to reach your bank. Starting to sell tickets on the new platform won't release money held by the old one.
If you're switching from Eventbrite, its published payout schedule starts processing payouts three days after the event ends by default. US bank transfers can then take up to five business days. Eligible payouts before the event still leave 20% of net sales in reserve. These details were checked on 4 October 2026; confirm the schedule shown in your own account.
Compare payout dates before relying on ticket income for venue or talent deposits. Our Eventbrite comparison includes the differences with Loopyah. When planning payments to suppliers, allow for any money the platform will hold back and the time a bank transfer takes.
Keep access for refunds and disputes too. Stripe explains that cardholders typically have 120 days to dispute a payment, but longer windows exist. For event tickets, the clock generally starts on the event date, and a dispute can take months to resolve after it's filed.
Step 5: Set up the event and test buying tickets
Start the identity and bank checks early. While those are being processed, get the event ready:
Recreate the event with ticket types, prices, quantities, discounts, seating and the refund policy.
Choose whether you or the buyer pays the fees, then check the total price.
Give each team member the access they need.
Once paid ticket sales are enabled, buy two test tickets in separate orders on your phone. Use one to check that it scans once and is rejected if scanned again. Refund the unused second ticket, then check that it no longer scans as valid.
Check what happens when someone buys a ticket and needs help:
Does the final total match the price you advertised, including fees?
Can buyers use the payment methods your audience expects?
Does the confirmation arrive with the right event, date and ticket details?
Can staff scan the ticket and find the booking by name?
After you refund the unused ticket, does the order show the refund and does the scanner reject it?
Keep a record of the test orders and any fees. Fix problems before directing buyers to the new page. You should be able to buy at the right price, receive the ticket and have staff check it successfully.
These checks affect sales. In our November 2025 survey of 500 US attendees, 48% said unexpected checkout fees had made them abandon a ticket purchase in the previous 12 months. Another 17.8% selected required account creation or login problems.
On Loopyah, you can paste an existing event-page link to create a draft with event details filled in. Review those details, add ticket types and check the settings before publishing. This helps rebuild the event; it doesn't transfer old orders or make existing tickets valid on Loopyah.
Buyers can check out as guests on Loopyah, and you choose whether to pay the booking fee or pass it on. Check that the event page and checkout show the same total price.
Step 6: Update your ticket links and ads
Go through the places where people find tickets and update the links for the event you're moving:
Website ticket buttons and embedded checkouts.
Social bios, link-in-bio pages and Facebook event listings.
Email templates, footers and scheduled campaigns.
QR codes on posters, flyers and table cards.
Venue listings, local event guides and promoter links.
Live ads and any scheduled ads.
Keep links to events still selling on the old platform working. If this month's show is there and next month's is on the new platform, your website should take buyers to the correct page for each date.
An old provider's event page may not let you redirect visitors to the new one. For future campaigns, linking to the events page on your own website makes changes easier. Check printed QR codes too. Updating your Instagram bio won't change where a poster sends people.
Check your sales reports and ad tracking as well as the links. The old platform's connection to your ad accounts may not report purchases made on the new platform. Allow time for reports to update, then check that they show the right event, currency and amount paid.
Loopyah's AI Ads Manager sets up ticket-sale tracking for its campaigns when you connect your ad accounts. Our guide to running ads and tracking ticket sales explains the setup. Check that the campaign is connected to the correct event before paying to run the ads.
Loopyah also provides an event checkout you can add to your website. Test it on a phone, along with the links in your emails and social profiles. Each should open the correct event and let someone complete a purchase.
Step 7: Tell buyers what changed and show staff how to check tickets
When you announce ticket sales, name the event and include its new ticket link. If another date still uses the old platform, explain which tickets are affected. Buyers need to know where to book and whether the tickets they already hold are still valid.
A simple line can do the job: "Tickets for our next show are now on Loopyah. Already booked for this month's show? Keep your existing ticket. It's still valid."
Use the platform and event names that apply to your switch. Send the announcement to the contacts whose opt-ins you brought across and checked in Step 3.
Show the staff checking tickets which app and event to open on each date. If the old show is still happening this Saturday, make sure everyone knows to use the old app for it.
Install the app and check each person's login before event day.
Practise scanning a valid ticket, trying it again and finding a booking by name.
Decide who helps when someone brings a ticket for the wrong date or a ticket that has been refunded.
Check the internet connection at the entrance and whether the app works without it. Write down what staff should do if the connection fails, and practise that too.
Loopyah lets staff check tickets without full admin access. They can scan tickets on their phones and search for a buyer by name. Our check-in app comparison covers other features to consider.
A six-week switch, start to finish
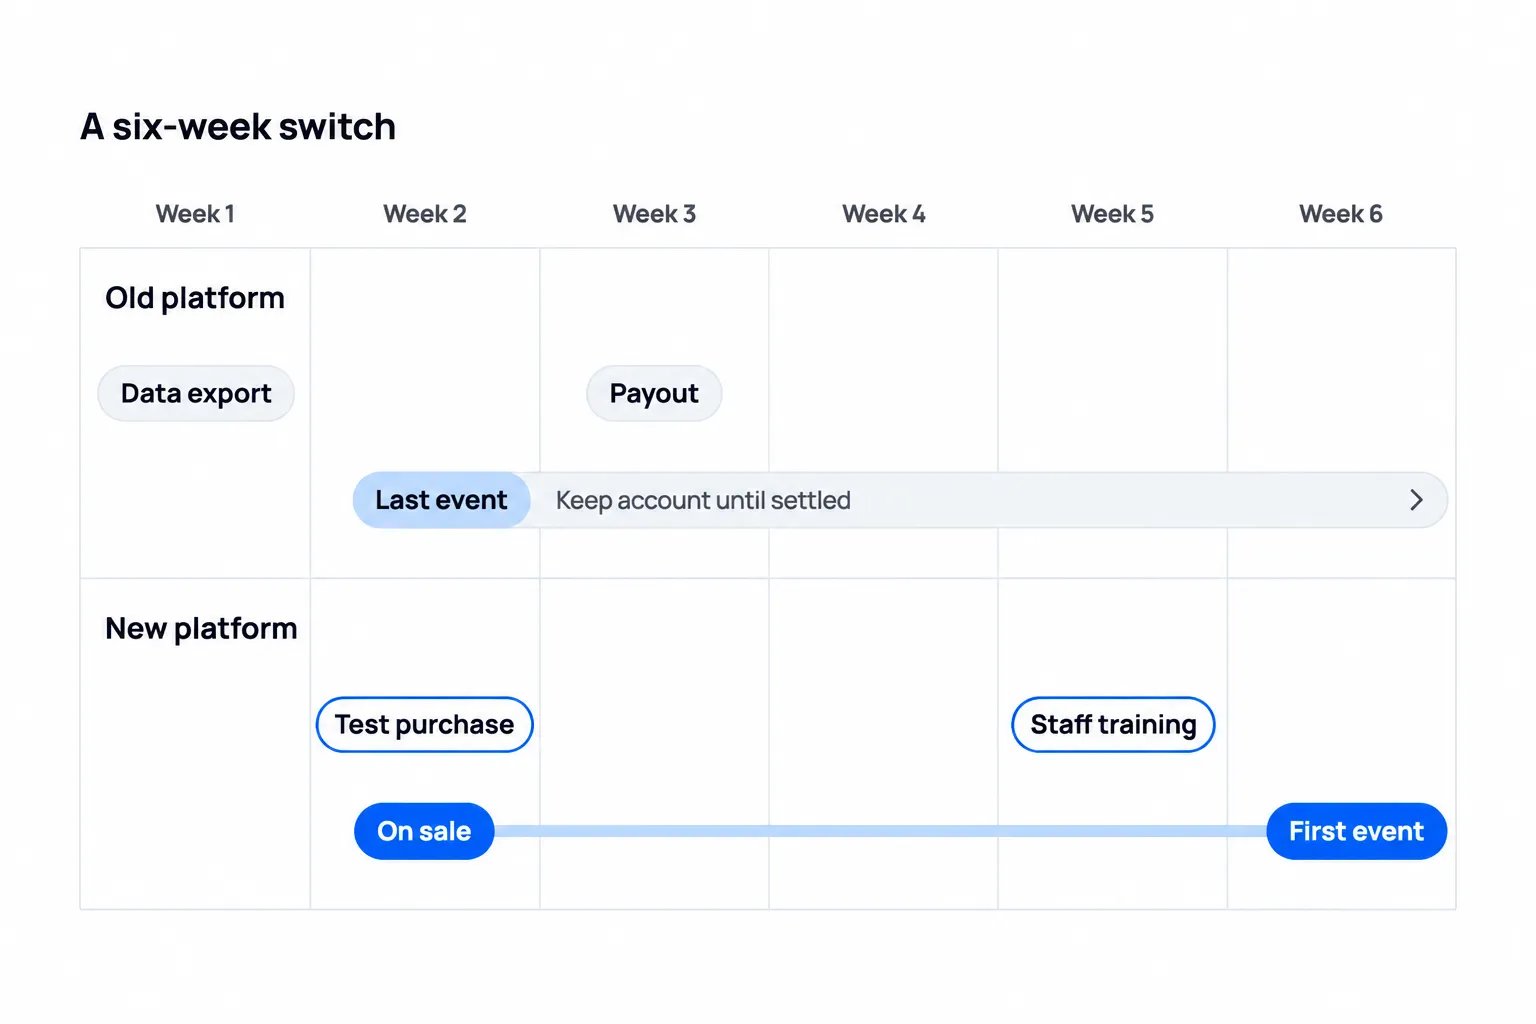
Suppose you run a monthly club night. This month's show already has 300 tickets sold on the old platform. Next month's hasn't gone on sale. This example assumes account approval and testing finish in time:
Week 1. Start identity and bank checks. Export contacts with their opt-ins and unsubscribes, plus order and payout records. Check the files and set up next month's event.
Week 2, Tuesday. Import your contacts and check that their email preferences are correct. Once payments are approved, test buying, scanning and refunding tickets. Add your staff.
Week 2, Thursday. Start selling next month's tickets. Update its links and email the contacts who opted in. Keep this month's ticket link available.
Week 2, Saturday. Run this month's show using the old platform and its ticket-scanning app.
Week 3. Check that the old payout is being processed on the expected date. When the money reaches your bank depends on the provider and payment method.
Week 5. Practise checking tickets with your staff on the new app.
Week 6, Saturday. Run the first show on the new platform.
After the old show. Keep checking for unpaid balances, refunds and disputes. Ask the provider when you can close the account.
Adjust these dates to fit your events. If payment approval, the contact import or ticket testing takes longer, finish that work before announcing the next event. Keep access to the old account for as long as payouts, refunds or disputes still need attention.
Check the switch is worth the work
Use your actual ticket sales to compare costs. Include the time your team will spend moving contacts, setting up events and learning the new system.
Compare the same number of tickets at each price, in the same currency. Include card processing, subscriptions and any other services you need.
Check who pays the fees. If buyers pay them, a lower fee reduces their checkout total rather than directly increasing your income.
Compare payout dates with the dates your venue and suppliers need to be paid.
Include the work of moving, testing and training your staff. Check that the new platform solves the problem that made you want to leave.
For a US organizer running a US event, Loopyah's published ticketing rate is $1.15 plus 4.75% per paid ticket, including card processing. At a $40 ticket price, that's $3.05 per ticket, or $6,100 for 2,000 tickets in a year. Confirm the rate for your country and payment methods.
Suppose your current provider charges $8,000 for those same sales, and you pay the fees yourself. You would save $1,900 a year on fees. If the move takes $600 of staff time, that leaves $1,300 in the first year before other cost differences. Use your own statements and staff costs for this calculation.
Loopyah processes eligible payouts on Mondays. After 90% of an event's sales have been paid out, the remaining balance is released the day after the event starts. Orders still within their refund window wait until it closes, and bank processing adds time. Check these terms against the dates you need to pay suppliers.
Paid ticket sales are currently available to organizers in Australia and the United States. Confirm that your business is eligible before rebuilding an event.
If the saving is small and your current provider handles payouts, checkout and buyer records well, staying may be the better decision. Switch when the improvement is worth the work, whether that's lower costs, money arriving sooner or a buying process your audience can use without help.
For a comparison with your current provider:
Before you start selling on the new platform
Your existing contacts should be in the new platform with their email preferences recorded correctly, ready for you to announce the next event to the people who opted in. You should also have tested ticket purchases, delivery, scanning and refunds, and checked that your links point to the right event.
Give someone responsibility for the old account until you've received the remaining payouts and dealt with refunds and disputes.
Once you're ready to sell, focus on getting those contacts to your next event. Our guide to selling more event tickets covers what to do next.

Author: By the Loopyah Content Team
The Loopyah Content Team shares expert insights, practical guides, and industry updates to help event organizers create unforgettable experiences and stay ahead in the event planning world.