· 27 min read
How to run a paid needle-felting workshop
You've made a felt animal that people love, and now they're asking whether you teach. A workshop sounds straightforward. Buy some wool, book a room and show everyone how you made it. Then you start planning the lesson and realise how much you do without thinking about it. You know when the wool needs more work. You know why a needle feels wrong. Your beginners don't have that judgement yet.
To run a paid needle-felting workshop, choose a small project you've tested with beginners, provide suitable tools and a proper working surface, and build the session around supervised practice. Work out what the class costs, including preparation and individual help, before deciding the ticket price or how many places to sell. The project needs to fit the teaching time you can actually provide.
I'd start with one simple sculpted object and a clearly described adult beginner group. A detailed animal with separate legs, wire supports and tiny facial features gives you far more to teach, even when it looks small in a photograph. Your first workshop needs to leave people understanding the basic process and able to recognise what to do next.
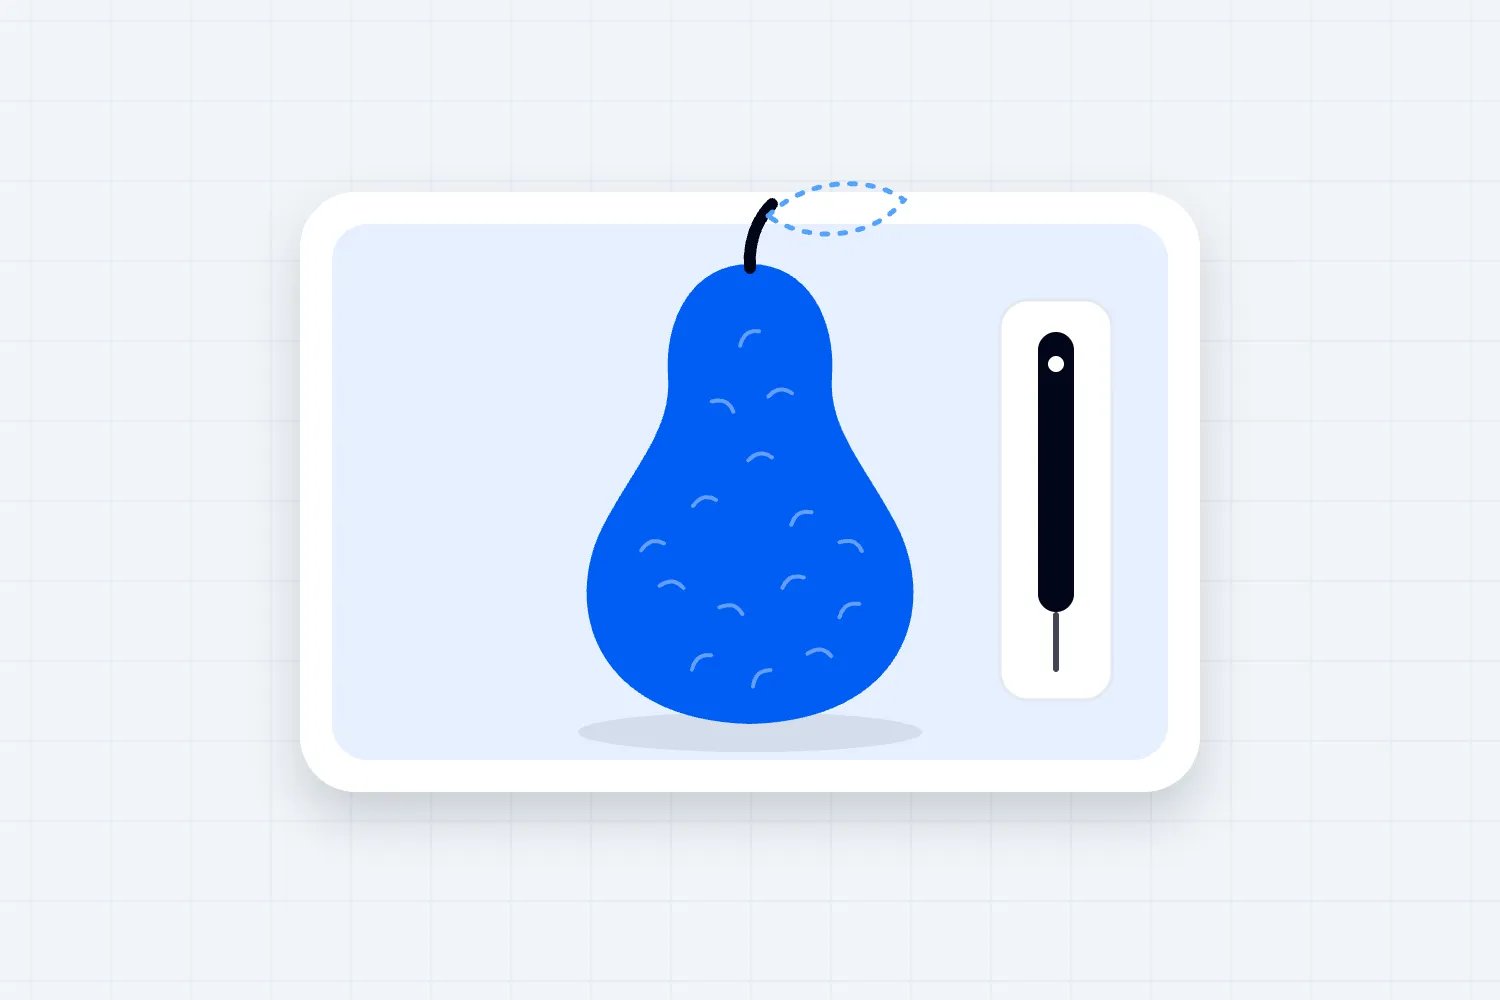
We'll use an invented example throughout: a three-hour adult class making a small wool pear, with eight public places, an instructor and a teaching assistant. The timings, quantities and USD costs are planning examples, not industry benchmarks, a safe staffing ratio or a recommended ticket price. You'd test and cost your own version before putting it on sale.
If you're still deciding how the wider event should work, our guide to organising a paid workshop covers the general process. Here, the important decisions are specific to felting: how wool becomes a stable shape, where beginners need help, how you handle sharp needles and what a credible finished-project promise looks like.
Decide what a beginner is buying
The first thing you want to do is describe the lesson without assuming the buyer already understands felting. Someone may have seen a video of a tiny wool dog and have no idea how long it took to make. They could reasonably think the class will produce something equally detailed unless your page explains the difference.
For this example, the offer is an introduction to shaping wool with a felting needle. Participants practise building and firming a simple form, turning it to work different sides, and adding a small amount of surface colour. The pear is the project used to teach those movements. A lifelike fruit collection, miniature animal or professional finish isn't part of the promise.
Needle felting uses a special needle to catch and work fibres together. Ashford's beginner needle-felting instructions explain that more complex forms can begin with simple shapes, including a cylinder or rolled ball. That makes a basic rounded object a sensible starting point to test, although the source doesn't establish how long your class will need.
Separate the core outcome from decoration. In our pear lesson, the essential work is forming a body that holds together and understanding how to change its shape. A small leaf is an optional extension after the instructor checks the basic form. Participants should be able to complete the advertised core lesson without adding the leaf.
That distinction helps you handle different speeds without creating two unrelated classes. Someone who reaches a firm, recognisable body early can refine its surface. Someone who needs longer to coordinate the movement still works towards the central outcome. Neither person has been sold a place in an advanced sculpture course.
Be equally specific about the audience. This example is an adult class for people with no needle-felting experience. It assumes participants will handle sharp tools under instruction, with any required adjustments discussed beforehand. A parent asking to bring a child needs a separate answer. You shouldn't turn an adult session into a family workshop by changing a line on the booking page.
Choose a project you can teach, then rehearse it
Your own making time is a poor basis for the public schedule. You might form the pear while talking, spot an uneven patch immediately and correct it without stopping. A learner has to understand each movement, try it, inspect the result and decide whether it worked. That's where much of the lesson happens.
Make a plain version of the project using exactly the wool, needle, holder and working pad you intend to supply. Write down the stages. Include the actions you normally skip explaining, such as moving loose wool out of the working area before turning the piece. If the written sequence depends on an experienced person's judgement, identify where the instructor will teach that judgement.
Next, rehearse with a genuine beginner. Ask them to use your instructions and materials while the instructor observes. Stop unsafe handling immediately. For ordinary learning difficulties, watch briefly before helping so you can identify what's confusing. Notice whether they can tell the difference between a loose form and one that's ready for the next step, and whether they understand where their hands should be before the needle moves.
The rehearsal should test the public promise as well as the technique. If the learner finishes the body but cannot attach the decoration within the time, you have a choice. Simplify the decoration, allow more time or sell the body as the main outcome. Quietly doing the difficult part for them won't tell you whether your teaching plan works.
Prepare samples at several stages. A loose starting form, a partly firmed body and a finished plain pear let people compare what they're making with the next useful stage. Describe those samples honestly. They're teaching aids made beforehand, rather than evidence that every beginner will finish an identical object during the class.
Ask the instructor to show a recoverable mistake too. An uneven body can demonstrate how to inspect a shape and add wool where needed. Keep the correction within the beginner method. You don't need a spectacular rescue that introduces more techniques than the original project.
I'd avoid wire supports, glued fittings and small bought-in eyes in this first lesson. Each adds preparation, handling decisions or another process to explain. You can introduce them in a later, properly planned offer. A simple project gives you time to watch whether people understand the core movement.
Match the wool and equipment to the lesson
Buy materials for the tested project, rather than choosing whatever gives you the cheapest cost per bag. Wool that behaves differently from the rehearsal sample can change the lesson. The instructor may need to demonstrate a different amount of work, and learners may struggle to understand why their piece isn't matching the example.
Ask your supplier and instructor to agree the fibre specification, the suitable needle and the working surface as one combination. Ashford identifies its Corriedale sliver in the beginner guide, but that isn't a reason to assume every wool, colour or needle will behave identically. Keep the actual product information with your purchasing record and test substitutions before packing them.
For our invented kit plan, each participant receives 12 grams of core wool, 4 grams of covering colour, 2 grams for a small accent and 2 grams for practice. That's 20 grams per person. These quantities are illustrative purchasing assumptions; the instructor would establish them by weighing what beginners actually use in rehearsal.
Eight participant allocations therefore require 160 grams. Suppose you also budget 40 grams of shared spare wool, bringing the batch requirement to 200 grams. Record the colours separately. Having 200 grams in total doesn't help if too little of it is the covering colour everyone needs. A spare bag should solve a likely shortage, rather than just increase the headline weight.
Pack practice wool separately from the main project amount. Otherwise, a participant may use a large part of their covering colour while learning the movement and discover the shortage halfway through shaping. Portioning materials also helps the instructor see whether the project needs more wool or whether a learner has moved to the next stage too early.
Check every working pad for suitability with the chosen tool, including its condition and depth. Provide a stable table, a suitable holder or tool where required, and a defined place to park the needle. A household cushion or folded garment isn't an automatic substitute for equipment the manufacturer specifies.
Clover's pen-style felting tool instructions tell users to punch lightly, work in the centre of the mat, avoid striking its bottom and withdraw at the same angle used for insertion. Those are instructions for that product. Read the instructions for the equipment you actually buy and have the instructor build the demonstration around them.
Decide what attendees keep. In this example, they take home the wool project, remaining allocated wool, a project guide and a protective box. Needles, holders and pads are loan equipment collected before departure. State that clearly before booking. Our guide to including workshop materials in the ticket explains how to make that distinction without surprising buyers with extra charges.
Plan needle handling before you plan the atmosphere
Needle felting can look gentle and sociable. The tool still has a sharp point, and the instructor needs to know what participants are doing with it. You can create a relaxed class while giving clear, consistent instructions about handling. Calling the evening calming shouldn't lead you to skip the practical demonstration.
Have a competent instructor assess the actual activity, participants, tools and room. Their plan should cover issuing equipment, demonstrating its use, observing practice, changing needles, pausing work, collecting tools and dealing with an incident. This article isn't a substitute for that assessment or the instructions supplied with the equipment.
Before anybody starts, show how to keep hands out of the needle's path, support the work on the specified pad and put the tool into its agreed safe position when pausing. Demonstrate turning the work with the needle stopped and clear. The learner should be able to copy the sequence slowly before being encouraged to continue independently.
Don't describe finger protection as making punctures impossible. If your instructor selects it, check fit and compatibility with the task and explain its limits. It supports the handling method the instructor teaches. It doesn't replace observation or make it sensible to work with fingers directly under the needle.
Keep replacement needles under staff control. If a needle bends, breaks or behaves unexpectedly, the participant stops and calls the instructor. Plan how staff isolate the work area, account for the damaged tool and fragments, and arrange safe disposal under the requirements that apply locally. Don't let the class continue around an unaccounted-for sharp fragment.
Agree the incident response with the venue, including who provides first aid, who contacts help and who manages the rest of the room. Staff need to know where supplies and emergency information are. An injury shouldn't leave the assistant improvising while the instructor tries to keep teaching.
Great Britain's Health and Safety Executive's event management guidance covers competent staff, appropriate supervision, information about risks and checking that controls work. Its jurisdiction is Great Britain. Use the requirements relevant to your location, and make sure your own arrangements cover preparation and clearing as well as the public lesson.
For this first adult beginner offer, I'd keep alcohol out of the workshop and refreshments away from active workstations. That's a delivery choice for the example. It makes the handling instructions easier to follow and avoids introducing a spill or impaired attention into a session built around sharp tools. A different format needs its own assessment, staffing and clear buyer information.
Set capacity around the help people need
Eight places is a choice in our example, not a number you can copy as a safe limit. Your ticket capacity depends on the room, activity, participants, instructor and support available. A tutor who makes excellent sculptures may still need practice explaining the movements to several beginners at once.
Rehearse the first demonstration from the learner's position. Can everyone see the needle entering and leaving the wool? Can they see where the other hand rests? A camera can help only if its angle, focus and screen make those actions clearer. A close-up obscured by the instructor's hand doesn't solve the problem.
After the demonstration, watch what people do. Ask each learner to show the movement and explain when they would stop for help. A general question about whether everyone understands won't show you who is pushing too hard, working near the edge of the pad or trying to turn the wool while the needle is still in it.
The teaching assistant needs to understand the same method. In our class, they help participants repeat agreed beginner steps, watch for handling problems and alert the instructor when a demonstration needs repeating. They don't introduce a different technique because it happens to work for them. Both teachers rehearse the project and their responsibilities before the public session.
An assistant who is checking arrivals or making drinks isn't simultaneously watching every workstation. Make the work assignments realistic. If another person is needed for entry, refreshments or venue duties, count and cost that role separately. Don't build the lesson around support that disappears whenever somebody knocks on the door.
Think through simultaneous problems. If one participant needs sustained help and another reports a broken needle, can staff respond while the remaining people continue appropriately? If the answer is unclear in rehearsal, reduce places, change the activity or add competent support. Increasing sales shouldn't depend on assuming nobody will need attention at the same time.
Our guide to mixing abilities in a paid workshop explores the wider teaching choice. For this lesson, keep the beginner promise narrow. An experienced felter bringing a complicated unfinished animal is asking for a different service, even if there's physically another chair in the room.
Prepare for the points where beginners get stuck
A useful teaching plan says what staff will do when the first explanation doesn't work. Before the class, ask the instructor to identify the likely difficulties with this particular pear and prepare a sample for each. That makes individual help more specific than telling someone to keep going until the piece looks right.
One learner may have a form that still feels loose when the next demonstration starts. The instructor needs to inspect it and explain what ready means for this project. They might ask the learner to continue the current stage while the assistant supports them. Adding the covering colour early just to stay with the timetable can hide a problem that becomes harder to explain later.
Another participant may have a shape that is firm but uneven. Compare it with the plain teaching sample and let the learner identify the area they want to change. The teacher can demonstrate a small correction on a separate sample before the participant attempts it. That preserves the learning opportunity. Taking the object away and returning a corrected pear may be quick, but it doesn't show the buyer how to recognise or address the same problem again.
Someone else may press harder because progress seems slow. That's a handling issue to stop and assess, rather than a reason to encourage faster work. The instructor should check the tool, material and movement against the instructions for the equipment. If the combination isn't working as rehearsed, replace or change it appropriately instead of asking the learner to force it.
Give the assistant a clear boundary for each response. They can repeat an agreed explanation and help a learner compare stages. They should call the instructor when the problem falls outside the method they've rehearsed, or when equipment needs attention. A consistent explanation is more useful than receiving contradictory advice from two confident people.
Also plan a dignified way to pause. A participant may need a break, decide the activity isn't for them or prefer to watch a demonstration before trying again. Explain where tools go and how they can rejoin the lesson with support. Don't turn their progress into a public comparison with the fastest person in the room.
Record these difficulties during delivery without interrupting individual help. A few brief notes afterwards can tell you whether the same instruction failed repeatedly or one particular kit caused trouble. Use that evidence to revise the next lesson. It gives you something concrete to improve beyond the broad impression that the class felt busy.
Choose a room that lets people see and work
Visit the space with the actual project, materials and demonstration arrangement. A café table that looks generous when empty may become cramped once people have a pad, loose wool, instructions and a box for their work. You need room for the activity and for the instructor to reach someone without disturbing neighbouring tools.
Check the lighting at the time the class will run. Dark wool can be hard to inspect under lighting that feels attractive for an evening event. Ask a learner to compare the sample stages from their seat. If they can't see the shape or follow the tool movement, change the light, material choice or demonstration position before selling the atmosphere.
Provide somewhere for bags and coats that keeps movement routes clear. Agree where drinks go, where spare materials are stored and how staff move equipment. Keep the loan-tool return point separate from the informal area where people might gather for a final conversation or photograph.
In the example, eight participants plus two teachers means ten people before venue staff, an agreed support person or anyone else is counted. That's headcount arithmetic. The venue still needs to confirm the permitted use, layout, access and occupancy under the rules that apply there. A teaching limit and a building capacity are different decisions.
The HSE's venue and site design guidance, for Great Britain, explains that the activity, audience, workforce and circulation affect venue planning. It also calls for clear responsibilities where control is shared. Agree who handles the building, routes, emergencies and room handback rather than assuming the hire fee settles those duties.
Ask buyers to contact you about access requirements, then discuss the actual task. Someone may need a different seating position, clearer instructions, a closer demonstration or another way to stabilise the work. Don't infer what they can do from a label or promise an adjustment before the instructor has checked it with them.
Keep accurate wool and equipment information available too. A buyer asking about fibre sensitivity or tool use needs a factual answer and a conversation about possible alternatives. Don't call the material hypoallergenic or substitute another fibre without testing whether the project and teaching still work. Our event accessibility checklist can support the wider visit, while the instructor assesses the specific lesson.
Price the preparation and the support
Wool might be a small part of your budget. The class still needs someone to test the project, portion materials, prepare samples, teach, clear the space and answer the promised follow-up questions. If those hours disappear from the calculation, the event can look profitable while the people delivering it work for too little.
Start with actual quotes and the agreed work. The US Small Business Administration's business planning guidance distinguishes fixed and variable costs and explains a basic break-even calculation. For a workshop, use that approach to separate costs that stay the same within your planned capacity from costs that increase with each participant.
Here are the invented fixed costs for our eight-place session:
Instructor preparation, rehearsal, teaching and agreed follow-up: $180.
Teaching assistant preparation, delivery and clearing: $90.
Venue hire covering setup, public time and handback: $90.
Organiser administration, purchasing and kit packing: $80.
Shared spare wool, promotion, reusable equipment and business overhead: $40.
Those amounts total $480. The fictional participant cost is $14 each, covering allocated wool, printed instructions, a box and consumable needle provision. The fixed allowance includes the 40 grams of shared spare wool and the allocated use of reusable pads and holders. Participant wool is covered by the $14 packs, so those supplies aren't charged twice. Replace every amount with your own costed specification and working hours.
Suppose each full-price booking leaves $84 in retained ticket income after the payment charges and sales taxes assumed in this example. That's the business's retained income, rather than a suggested advertised price. Nonrecoverable purchase taxes are included in the costs. The calculation includes paid organiser time and shared overhead, but excludes borrowing costs and business income tax. No bookings are refunded in these scenarios.
Each paid participant therefore provides $70 towards the fixed costs, because $84 minus $14 is $70. Six paid participants leave a $60 loss. Seven produce a $10 surplus. Eight produce an $80 surplus. Seven is the first whole number of paid bookings that covers the included costs, but it leaves almost no room for a problem.
At eight paid places, retained income is $672. Participant costs total $112, and fixed costs are $480. That leaves $80 after the work and expenses listed here. Ask whether that amount is enough for the uncertainty you carry. The answer depends on your business, rather than a universal rule that any positive number makes an event worth repeating.
Check what changes the result before opening sales
A small class can be sensitive to one apparently modest decision. Suppose rehearsal shows that the project needs another $60 of paid preparation. Fixed costs become $540. At eight paid places, the original $80 surplus falls to $20. At seven, the workshop loses $50. The teaching improvement may be necessary, but the price still has to support it.
A complimentary place has its own effect. Seven paid attendees and one free attendee provide $588 in retained income. All eight still use materials, so participant costs remain $112. Subtract those and the original $480 fixed costs and the result is a $4 loss. A free place might serve a clear purpose, but it isn't an eighth sale.
Discounts need a separate scenario. If all eight attend and two discounts each reduce retained income by $10, the original $80 surplus falls to $60. That's different from the complimentary-place example. Keep alternative decisions separate so you can see what caused the change and avoid accidentally adding incompatible assumptions together.
Our paid workshop pricing guide goes further into selecting a price and minimum bookings. For this class, first ask whether buyers will pay for the actual lesson and support. If they won't, revisit the project, venue or cost structure. Removing the assistant to make the arithmetic positive requires a fresh assessment of whether you can deliver the class you intend to sell.
Check cash separately from profit. Suppose you buy all eight $14 participant packs before sales and pay a $45 venue deposit. That's $157 for those two payments before any ticket proceeds arrive. Shared spare wool and any other advance purchases must be funded as well. The deposit is part of the $90 venue hire, rather than an extra cost. Other payments, refund exposure and a reserve may increase the money you need available.
If only six people attend, the two unused packs may remain usable. Record their condition and future use separately from the materials consumed in that session. The cash has still been spent. Don't count the same unopened pack as a full expense again when you use it later, or pretend today's purchase never happened because another event might need it.
Set the booking decision date around commitments you can still change. Read the venue and instructor terms, identify when balances become payable and establish your responsibilities to buyers. If sales are below the level you need, make the decision using those commitments and the terms already communicated. A late discount or an extra chair won't automatically fix a weak plan.
Write a ticket page a first-time felter understands
Your page should let someone picture the actual lesson. They need to know the starting ability, the project, the public session length, what's included and what they take home. Explain that sharp felting needles are used under instruction, rather than expecting buyers to infer that from a photograph.
Show the tested beginner sample. Identify it as an instructor-made example and explain that individual shapes and progress will vary. A gallery of complex animals may demonstrate the teacher's skill, but it can also create the wrong expectation if the ticket buys a simple pear lesson. Keep the main visual and the written promise consistent.
The central offer could read like this:
"Learn the basics of needle felting while shaping a small wool pear in a guided adult beginner class. We'll show you how to use the supplied tools, build a firm shape and add surface colour, with help during practice. Your wool, project guide and take-home box are included. Needles, holders and working pads are loaned for the session. No felting experience is needed. Progress varies, and extra decoration depends on the time available."
Follow that with real booking information. Give the date, arrival time, public start and finish, venue address, access details and a contact for questions. State the adult age policy you've chosen and whether a support-person arrangement needs discussion. Explain cancellation, transfer and organiser-cancellation terms in a way that follows the requirements applying to your business and customers.
Don't hide the loan arrangement in a long terms page. If somebody leaves with unfinished work, they need to know they won't automatically have a needle and pad at home. Explain what continuing requires, what written guidance is included and whether suitable equipment is separately available. An optional purchase shouldn't become a surprise condition for getting value from the class.
Keep the initial ticket structure simple unless different options solve a real buyer need. A bring-your-own-wool discount can introduce untested fibres and several different learning problems. If you offer it later, specify accepted materials and the response to an unsuitable kit before booking. The saving should reflect what the class can actually accommodate.
Our guide to writing an event description helps connect practical detail with a clear invitation. For this workshop, the invitation is specific: guided time learning a new making process, with materials ready and help available. You don't need claims about guaranteed relaxation, artistic talent or therapeutic benefits to explain why that might appeal.
Build a running order that protects practice time
Three hours can disappear quickly when a demonstration leads to individual questions. Write the lesson with time for observing practice, repeating a step, taking a break and collecting tools. Setup and clearing need their own paid time and venue access outside the public session.
Here's our invented evening plan, running from 6:00 pm to 9:00 pm:
6:00 pm to 6:10 pm: welcome, the project promise and how to request help.
6:10 pm to 6:30 pm: tool handling demonstration and closely observed practice.
6:30 pm to 6:50 pm: prepare the base form and check each learner's next step.
6:50 pm to 7:20 pm: build the body, with individual support during practice.
7:20 pm to 7:30 pm: break after tools are put into their agreed safe positions.
7:30 pm to 8:05 pm: continue shaping and introduce the covering colour when ready.
8:05 pm to 8:30 pm: refine the body, with optional decoration for those ready.
8:30 pm to 8:45 pm: inspect work and explain the next steps for finished and unfinished pieces.
8:45 pm to 9:00 pm: collect loan tools, pack projects and check take-home information.
The final period is part of delivery. Don't spend it trying to squeeze in another technique and then collect sharp tools while everyone is leaving. The instructor and assistant need enough attention to complete the return process and answer any question about continuing safely.
Rehearse the handovers. If the instructor is showing the covering stage, what does the assistant do with someone still firming the base? The answer might be to repeat the agreed earlier instruction and delay the decoration. It shouldn't be to push the learner into a step they aren't ready for because the timetable says so.
If several learners encounter the same problem, stop and explain it again. Ask everyone to park tools before watching another demonstration. Show the specific change, then observe practice. Remove an optional detail before reducing the time needed to understand the main process.
Plan for late arrivals too. Someone who misses the handling demonstration shouldn't simply pick up a needle and copy a neighbour. Decide whether staff can provide the missed introduction without leaving the rest of the group unsupported, and communicate your late-arrival policy before booking. A workable limit is kinder than a rushed exception you cannot supervise.
Agree what happens before and after the class
The instructor agreement should describe more than the hours spent in front of buyers. Include preparation, rehearsal, materials decisions, sample making, teaching, clearing and any promised follow-up. Agree who can change the project and how you handle instructor unavailability before either problem becomes urgent.
Check the source of the project guide and illustrations. If the instructor created them, agree what your business may print, distribute and reuse on another date. A kit you've purchased or a tutorial you can read online doesn't automatically give you permission to reproduce its text or pictures for a paid group.
The UK government's guidance on using somebody else's intellectual property explains obtaining permission or rights. The applicable rules and exceptions depend on jurisdiction and use. For this class, use original or appropriately licensed material, and resolve uncertainty before printing packs or recording the lesson. Don't treat a free download as a blanket commercial licence.
Send a practical pre-event message. Remind people of the arrival time, entrance, lesson scope and loan equipment. Invite any unresolved access questions early enough to discuss them properly. The message should reduce uncertainty, rather than introduce a new requirement that wasn't on the ticket page.
Loopyah's attendee email tools distinguish updates about an event people hold tickets for from promotions, and handle the relevant audience and opt-outs. Use an event update for the arrangements buyers need for this class. An invitation to a later workshop is a separate promotion. You still need to write accurate information and make realistic promises about the lesson.
For our example, the agreed follow-up is one message with the project guide, equipment information and answers to common questions collected by a stated deadline. Its preparation is included in the instructor fee. There's no promise of unlimited personal troubleshooting. If you offer further tuition, explain its scope and price separately.
Review the first class before you repeat it
After the workshop, ask people what they can do without help and where they still feel unsure. Enjoyment matters, but it doesn't tell you whether the core lesson worked. A person can have a pleasant evening and still be unable to judge when their wool is ready for the next stage.
Compare those answers with what the teachers observed. Where did help requests gather? Was the problem the demonstration, the project shape, the material or an instruction people couldn't interpret? Change the part responsible. Adding more written pages won't solve a viewpoint problem, and buying a different needle won't fix a promise that's too ambitious.
Review equipment before it goes back into storage. Account for loan tools, record damage and isolate anything needing attention. Check the room and follow the agreed handback process. Count usable wool and unopened packs separately from scraps and consumed materials so purchasing for another date starts with an accurate stock record.
Then close the accounts using actual retained income, refunds, invoices and paid hours. Our full eight-person example leaves $80 only when the stated costs and assumptions hold. If preparation took longer or extra support was required, include that work in the result. A sold-out date can reveal a price problem as clearly as an empty room.
You might repeat the same beginner class for a new audience, simplify the project or develop a separate follow-on for people who can already form a stable shape. Choose based on what the first session taught you. A request for a more detailed animal is useful interest, but it needs another tested lesson and budget before it becomes the next ticket.
Before you open another date, read the revised description with the instructor and assistant. Can you deliver the stated project, handling support and take-home arrangement at that price? Confirm the changes in the lesson and cost sheet first. Then the next group can book an offer you understand well enough to deliver.

Author: By the Loopyah Content Team
The Loopyah Content Team shares expert insights, practical guides, and industry updates to help event organizers create unforgettable experiences and stay ahead in the event planning world.