· 27 min read
How to run a paid jewellery-making workshop
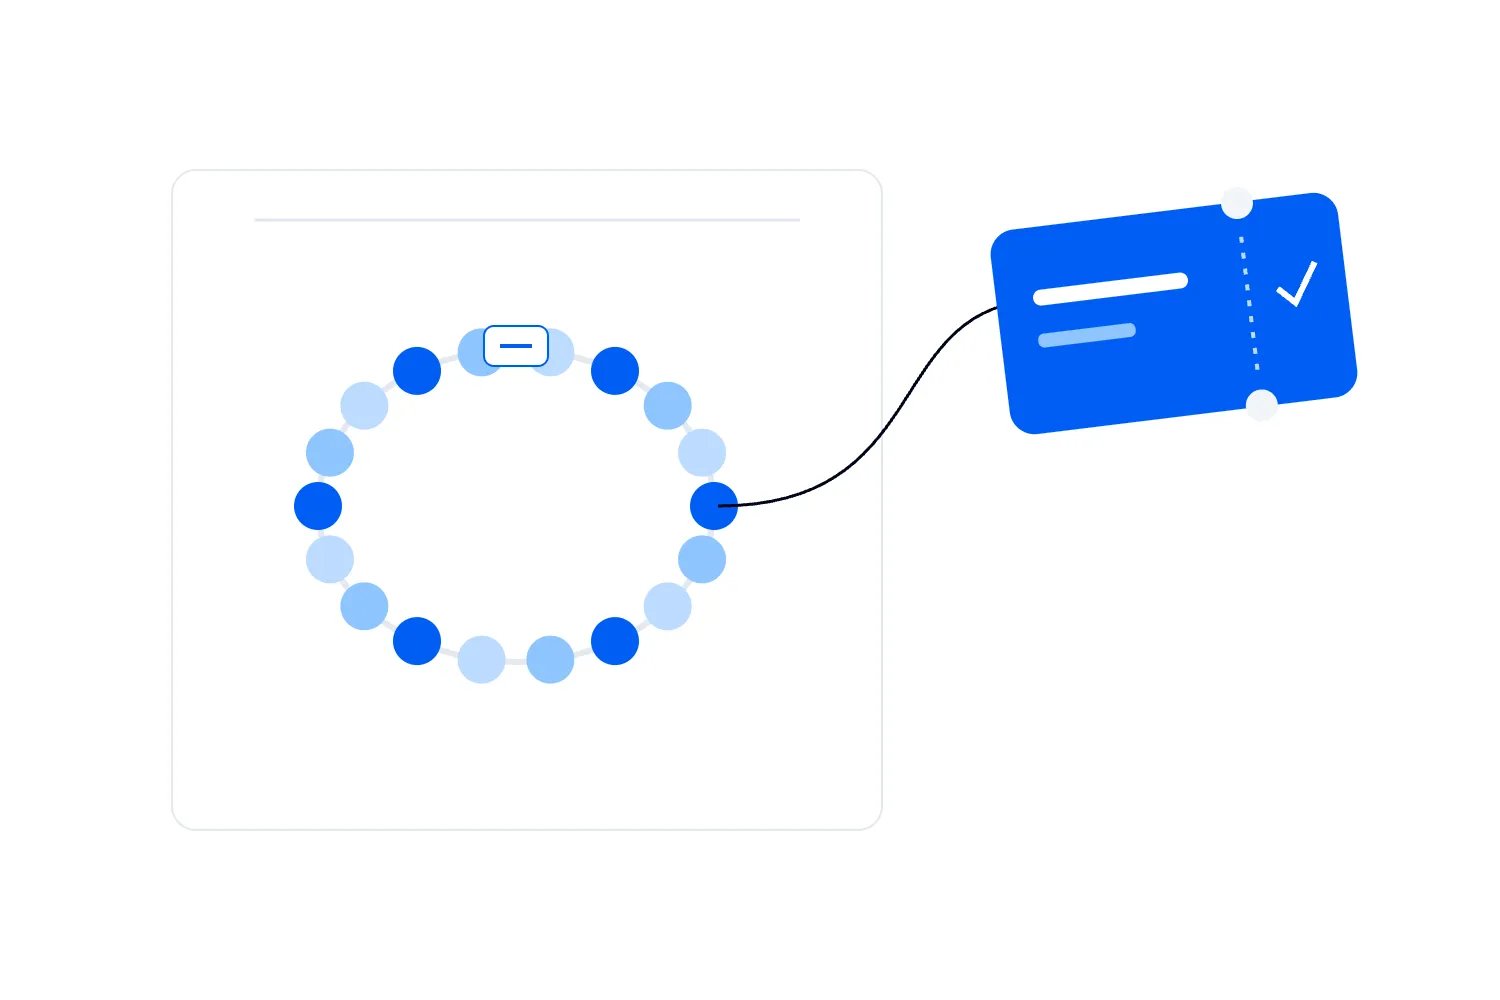
Someone has bought a ticket, chosen their beads and spent most of the afternoon making a bracelet. Then the clasp won't close. Your tutor is helping someone else, the room booking ends in ten minutes, and the customer is wondering whether they can actually wear what they've made.
That's the part you need to plan before you sell a paid jewellery-making workshop. Choose a project beginners can complete with the tools, materials and help you can provide. Test the whole session with someone who hasn't made it before, price the finishing and preparation work, and explain exactly what leaves with the attendee.
A beautiful sample helps sell the class. The operating plan has to get everyone from loose components to a checked piece without turning the last half-hour into a queue for the instructor.
We'll work through an illustrative beginner bracelet workshop with twelve paid places. Each attendee makes one bracelet from a prepared selection, uses supplied tools and receives help with fitting and closure. The example uses assembly without soldering, casting or resin. All costs, quantities and timings below are invented planning assumptions in USD, not supplier prices or teaching standards. A qualified tutor still needs to choose and assess the actual project.
Choose one finished result you can teach properly
The first thing you want to do is make the offer small enough to test. "Make jewellery" could mean stringing beads, shaping wire, soldering silver or assembling bought components. Those experiences require different skills and equipment. They also create very different expectations about how much of the finished piece the attendee makes.
For our class, the promise is one adjustable beaded bracelet using supplied components, with a demonstration, practice materials and individual help. Buyers choose from a limited range of colours. They don't design a new fastening system, bring unidentified materials or learn metalworking during the same afternoon.
That still leaves plenty of creative choice. Someone can arrange a restrained pattern, make a bright colour sequence or choose a gift for another person. The tutor teaches the same core construction, so those choices don't require twelve separate lessons.
Make a sample using exactly the materials you intend to supply. Then make another using the simplest design a beginner could reasonably finish. Show both when you explain the event. If the only photograph is the tutor's intricate exhibition piece, buyers may arrive expecting a level of detail you never budgeted time to teach.
Say which components are supplied ready-made. If attendees assemble a bracelet from bought beads and clasps, describe that honestly. If the tutor completes a technical step, name that step before purchase. Customers can enjoy a guided assembly class without being told they're fabricating every component from raw material.
Decide whether the session is about an object, a technique or an introduction to a craft. An object-led offer needs time to finish that object. A technique-led session may produce practice samples instead. You can sell either, but switching between them after someone books is a substantial change to what they expected.
Our guide to organising a paid workshop covers the wider booking and delivery plan. Here, keep returning to the jewellery-specific question. Can a new participant complete the actual joins, sizing and finishing with the support available, rather than merely understand the demonstration?
Rehearse with a beginner before setting the ticket limit
Ask a person unfamiliar with the project to follow the lesson using the proposed kit. Don't choose someone who already makes jewellery and can quietly correct missing instructions. You want to see where a paying beginner will hesitate.
Start with the unopened kit and include the mundane steps. They need to identify the parts, choose a design, measure, practise a fastening and understand what to keep. Time spent untangling a strand or looking for a dropped component is part of the session, even though it doesn't appear in the tutor's demonstration.
Watch their hands and ask what they're trying to do when they stop. They may know which tool you named but not recognise it on the table. They may copy a movement from the opposite direction. A neat printed photograph can conceal the very join they need to understand.
Let the tutor revise the lesson after the trial. Perhaps the participant needs a larger practice component before working on the real bracelet. Perhaps the colour choice takes longer than the assembly. Perhaps the clasp should be demonstrated again immediately before everyone uses it. These are changes to the paid experience, not failures by the learner.
Record the assistance the participant needed. A project that takes a tutor a short time alone may require repeated individual checks across a group. Decide which questions the assistant can answer and which require the tutor. Counting two adults in the room tells you little if only one can help with the critical step.
Then test more than one participant working at once. You need to know whether the lesson works when questions arrive together. If everyone reaches the same difficult join at the same time, the tutor may need a second demonstration or smaller teaching groups. Don't set the ticket limit from the number of chairs available and hope the teaching catches up.
Twelve places is our example's chosen limit, subject to a suitable room, kit and successful rehearsal. It isn't a recommended tutor-to-attendee ratio. A different technique, group or accessibility arrangement may require a smaller class or additional qualified support.
Keep a short rehearsal record with the project version, materials used, points of confusion, assistance required and changes agreed. If you replace a clasp or stringing material, repeat the relevant test. Small purchasing changes can alter the skill the class needs to learn.
Buy materials you can describe and trace
A box of attractive components is only useful when you know what you can promise about it. Ask suppliers for the material description, intended use, relevant compliance information and any handling instructions. Keep the product references with your order, so a repeat purchase doesn't become a guess based on a photograph.
For jewellery supplied in Great Britain, Anglesey's trading standards guidance explains restrictions affecting nickel, lead and cadmium. It also tells businesses that aren't the manufacturer or importer to check compliance with their supplier. The applicable requirements depend on the product and where you operate. A workshop label doesn't settle those questions for you.
Avoid broad claims such as "hypoallergenic" because a packet looks professional or a supplier uses the word casually. Obtain evidence for the specific claim and material. If someone asks whether a component is suitable for their sensitivity and you can't establish that, say what you know and what you can't confirm. Don't turn a sales conversation into an unsupported assurance.
Keep the distinction between appearance and composition clear. Silver-coloured components aren't necessarily silver. Gold plating doesn't mean solid gold. In the UK, the British Hallmarking Council's guidance for businesses supplying precious-metal items points to the rules on descriptions, exemptions and hallmarking. Check your particular offer before advertising precious metals, rather than copying a material name from a marketplace listing.
For the beginner example, choose a small component range the tutor has tested together. Record which clasp fits which cord or wire, which parts need a particular tool, and which alternatives can replace them without changing the lesson. A substitute that looks similar can still make the join harder to teach.
Prepare the quantity needed for the advertised project, then a separate allowance for practice and replacements. In our invented inventory, twelve attendee kits sit beside two complete replacement kits and one demonstration kit. That's fifteen kits prepared, with only twelve paid places available. The reserve supports delivery; it doesn't create extra tickets.
Separate shared stock from personal allocations. If each attendee can choose a limited number of accent beads, show that limit before they begin. Don't put the whole premium stock on the table and explain an extra charge after someone has built their design around it.
Set up the bench around the actual making
Think about the work surface before the room's atmosphere. Participants need to see small components, keep their own arrangement intact and reach tools without disturbing someone else's project. The tutor needs to approach a workspace and demonstrate a correction without everyone having to stand up.
Use a trial layout with the real trays, mats, tools and packaging. Leave room for hands to work as well as for the pieces themselves. A table that fits six place settings for refreshments may be awkward once six people spread out a bracelet design and put their bags underneath.
Choose a way to keep loose components contained. Test whether the surface makes pale beads difficult to see, whether parts roll away and whether the tray is easy to reach from the intended working position. Keep food and drinks away from the making area according to your assessed setup, with a separate place for breaks.
Check the demonstration from the least convenient seat. Tiny hand movements are easy to miss. A close-up camera and screen might help, but rehearse the view, lighting and orientation. If the screen fails, you need a workable small-group demonstration, not an instructor holding a clasp higher in the air.
The W3C's accessible event guidance recommends asking about access requirements and providing information in different forms. For this class, that means considering the route to the bench, seating, lighting, instructions and the activity itself. Ask what would help someone participate. Don't assume that attendance in the room means the fine-motor task is accessible to them.
An agreed adaptation could involve a different grip, larger practice pieces, more visible instructions or help at a specific stage. The tutor needs to assess whether the change remains suitable for the technique. Discuss it before the event where possible, without asking attendees to disclose medical details to the whole table.
Our event accessibility checklist helps with the wider arrival and venue questions. Keep those arrangements connected to the class plan. An accessible entrance doesn't resolve a demonstration nobody can see or a workstation someone can't use.
Also confirm setup, cleaning and pack-down time with the venue. Count tools before and after the event, check the floor for dropped sharp components, and agree waste handling. The last attendee leaving doesn't mean the room is ready to hand back.
Give shared tools a workable booking plan
Sharing can make sense for a tool used briefly at one stage. It makes less sense for the tool everyone needs throughout the exercise. Write down when each tool is needed, who may use it and whether someone must supervise that use.
For our illustrative class, each participant has the basic tools the tutor has specified for ongoing work. A single specialist finishing station is shared for one tutor-controlled operation. That distinction matters. The shared station doesn't replace the tools people need to continue making at their own places.
Suppose the trial shows that each visit to this station takes four minutes, including the check, operation and reset. Twelve visits require forty-eight minutes of station time. If the programme gives you a sixty-minute window, twelve minutes remain for delays. These are invented timings to demonstrate the calculation, not a safe operating specification.
Now consider what happens if each visit actually takes six minutes. The same twelve visits need seventy-two minutes, longer than the planned window. You need a different project, more time or another properly equipped and supervised station. Telling the tutor to move faster doesn't change the arithmetic.
Stagger visits while participants work on tasks that don't depend on that station. Give the assistant a simple list of who is ready and who has completed the check. Don't ask people to queue beside the tutor with half-finished pieces. They can remain at their own workspaces until called.
Allow for a second visit when the work genuinely needs it. Our forty-eight-minute calculation assumes one visit per attendee. If the trial produces repeat visits, use those results in the plan. The spare minutes aren't automatically enough for a whole extra round.
The same thinking applies to cleaning or resetting shared equipment. Time for that work belongs inside the station calculation. Keep its supplies ready and follow the actual equipment and material instructions. A nominally free tool is unavailable while it is being reset or checked.
Waiting is worth taking seriously without pretending a general survey predicts your class. In Loopyah's Event Attendee Insights Report, 285 of 500 US respondents selected long lines or waiting times as an event frustration, while 184 selected poor sound or visibility. The survey was fielded through Pollfish on 11 November 2025 and allowed multiple answers. It covers events generally, not jewellery workshops, and doesn't measure the effect of adding tools.
| Label | Respondents |
|---|---|
| Waiting times | 57 |
| Sound or visibility | 36.8 |
Use that evidence as a reason to check the experience. Your rehearsal and observation still need to establish where waiting actually happens in this workshop.
Keep the technique within the venue and team's competence
A beginner assembly class is a different operation from a class using heat, chemicals, powered polishing or casting. If you add a technique, revisit the venue, equipment, supervision, insurance and emergency arrangements. Don't treat it as a small creative upgrade because it appears in the same jewellery category.
The tutor should identify the hazards of the exact tools and materials, including cutting, sharp ends and anything used during cleaning. The venue needs to know what work will take place. Confirm that its permission and your insurance cover the actual activity, audience and division of responsibilities.
In Great Britain, HSE's guidance on assessing hazardous substances starts with identifying the substances and processes involved, who could be exposed and how exposure is controlled. Labels and safety data sheets help inform the assessment. They aren't a complete class plan by themselves.
If you run soldering, assess the actual solder, flux and process with competent help. HSE's soldering guidance on rosin-based flux fumes describes a specific occupational hazard. It doesn't mean every jewellery soldering process uses rosin, and an open window isn't a universal answer to process risks. Choose controls appropriate to the real task and applicable local requirements.
For our no-solder example, keep that boundary intact. The assistant shouldn't improvise a heated repair in a side room because a component has failed. Use the agreed replacement or recovery plan. A technique excluded from the lesson should remain excluded when the class gets busy.
Agree what happens if a tool is damaged, a component spills or someone needs first aid. Name the person who stops the activity and the person who contacts the venue. Keep routes and emergency access clear. Store personal belongings where they won't obstruct work or movement.
HSE's event management guidance, for Great Britain, stresses coordination, competent staff and monitoring during the event. Apply the practical lesson here. A plan written before doors open still needs someone checking that the arrangement works once people start making.
Set the audience age and supervision arrangements before selling. This article's example is an adult class. A children's workshop needs its own suitability, safeguarding, supervision and small-parts assessment. Don't extend the advertised audience on the day because a buyer arrives with a child and an unused chair looks available.
Price preparation, replacements and finishing
Start the budget with the whole delivery job. The tutor's fee may cover teaching but exclude preparing kits, testing substitutions, writing instructions or finishing items afterwards. Agree those tasks before comparing quotes. Otherwise the cheapest quote can become the most expensive way to fulfil the advertised result.
Here is an invented twelve-place class budget in USD. Fixed costs are $260 for tutor preparation and delivery, $140 for the room including setup and pack-down, $90 for the assistant, $60 for organiser preparation, $50 for promotion and $60 for demonstration materials, replacement stock, tool use and other fixed delivery supplies. That totals $660.
Each paid attendee adds $14 for their individual components and packaging. Assume the operator retains $80 from each ticket after applicable taxes and selling charges. The amount available towards the fixed costs is therefore $66 per paid attendee. The buyer's displayed price must account for your actual tax and fee arrangement; $80 here describes retained revenue, not a universal checkout price.
Ten paid attendees contribute $660, exactly covering those fixed costs. Eight contribute $528, leaving a $132 loss. A full twelve-person class contributes $792, leaving $132 before any costs omitted from this deliberately simplified example. Break-even at ten requires selling about 83.3% of the twelve places.
That result is quite tight. Add a $100 finishing commitment after the event and fixed costs become $760. You now need twelve full-price paid attendees to cover them, rounding up because you can't sell part of a place. At twelve, the remaining surplus is only $32. The promise to finish work later has a real price even when you don't charge the customer separately.
Discounts need the same calculation. If four early buyers leave you $70 each after selling charges and taxes, each contributes $56 after their $14 kit. Those four contribute $224. Seven later buyers contributing $66 each bring the total contribution to $686. You need eleven paid attendees to cover the original $660 fixed cost, rather than ten, and twelve attendees leave $92.
Our paid workshop pricing guide explains the wider choices. For this class, the immediate decision is whether the offer can support enough revenue without relying on every seat selling or on unconfirmed retail purchases afterwards.
Keep cash payments separate from the profit calculation. The room may require a deposit before you receive ticket proceeds, and suppliers may require payment when you order. Build a payment calendar using the actual due dates. A deposit that forms part of the room's $140 total is counted once in costs, even though you pay it in stages.
Buying a large packet also uses cash differently from consuming part of it. Record what you paid, what this session used and what usable stock remains. Don't hide the first purchase from your cash plan, or charge the full same packet to every later class as though you bought it again.
Write the ticket page around the choices buyers actually have
Tell buyers what they'll make, how much they make themselves and what support is included. Add the project image, session length, audience level, tutor's relevant experience and material description. Explain shared equipment and any essential exclusions before the payment stage.
For our example, the core offer could read like this. "Make one adjustable beaded bracelet in a beginner class for adults. Choose from the prepared colour selection, practise the closure and assemble your piece with individual guidance. Tools and the standard kit are included. This is an assembly workshop using supplied components, with no soldering or metal casting."
That paragraph isn't the whole event page. You still need the address, arrival information, start and finish times, access details, final price and terms. If someone wants to make an item for another person, explain how sizing works and what information they should bring. Don't promise a perfect surprise fit without a workable method.
Be specific about premium options. If an upgrade changes only the bead selection, say that it doesn't add teaching time or a second project. Reserve the actual stock against the purchase or a clearly explained allocation process. Having enough standard kits doesn't mean you have enough premium components for everyone who might want them.
For a first run, I'd keep one standard project and a limited included selection. Every extra option adds purchasing and teaching decisions. Add a premium material later when the tutor has tested it, the supplier information is clear and you know how its availability will be controlled.
Loopyah's ticket-selling tools support ticket types and quantities, with confirmation emails linking buyers to QR tickets. Use that booking record for the places you're selling. You still need to prepare the right components and teach the project; a ticket quantity doesn't establish that an alternative material is suitable.
State the position on accompanying people. A non-making guest still needs space, and someone helping an attendee may affect the workstation arrangement. Discuss access support individually rather than treating all companions as an extra social ticket. Confirm the setup with the venue and tutor before accepting additional occupants.
Include an easy route for questions about materials, access and prerequisites. Keep the public page accurate when an answer reveals a general omission. If several buyers ask whether tools go home with them, add a plain sentence. In our example, the bracelet and packaging leave with the attendee; the workshop tools stay with the operator.
Promote the process as well as the finished bracelet
The finished piece attracts attention, but a buyer also needs to picture themselves making it. Show the actual project at a few stages and explain what the tutor helps with. A short demonstration can make the class feel approachable without suggesting the entire bracelet takes as little time as the clip.
Use photographs of the sample you will teach and identify them as samples. If you share attendee work later, get appropriate permission and explain what support was provided. Don't quietly use a professional tutor's piece as proof of a beginner's likely outcome.
Address practical objections in the copy. Someone may like the result but worry they have no experience, poor coordination or nobody to attend with. Explain the starting level and how help works. Where suitability depends on an individual conversation, invite that conversation instead of promising the class suits everyone.
Choose partners whose audience has a reason to buy the session. A local maker shop, arts venue or independent retailer may have relevant customers. Agree who handles enquiries, whether anyone receives a commission and whether that cost is included in your budget. A partner sharing the post doesn't automatically transfer customer support to them.
Avoid promoting a broad mix of jewellery techniques simply to produce more attractive content. If the ticket buys a bracelet assembly class, don't lead with a video of molten metal or a complex stone setting. The footage should explain the experience someone can actually book.
Give your sales review a date tied to commitments. Check bookings before the final material order and before a cancellation charge changes. Compare the sales position with the minimum paid attendance your budget needs. A dozen people saving the post isn't the same as a dozen paid places.
If you have to change the session, explain the actual change to buyers. A different colour assortment may be manageable within a described range. Replacing precious-metal work with costume-jewellery assembly is a different offer. Use your communicated terms and applicable consumer requirements to decide what options to give customers, rather than assuming any craft activity will do.
After purchase, separate useful preparation information from promotional messages. Loopyah's attendee email tools let you contact ticket buyers through your event audience. Send the confirmed project details, arrival instructions and anything they genuinely need to prepare. Keep follow-up marketing within the permissions and rules that apply to your audience.
Protect finishing time in the programme
The most tempting cut is often the least helpful one. A tutor gives a longer introduction, colour selection overruns and the group starts late, so you take time away from checking the finished pieces. That's exactly when a customer discovers the bracelet is uncomfortable or the fastening still needs attention.
Work backwards from a checked item and an orderly departure. Our invented three-hour programme runs from 1 pm to 4 pm. It allows fifteen minutes for welcome and the safety briefing, twenty for demonstration and practice, twenty for design and sizing, fifty for assembly, ten for a break, forty-five for finishing and fit checks, and twenty for packaging and departure. Those blocks total 180 minutes.
The shared station's sixty-minute availability runs from 2:40 pm to 3:40 pm, overlapping the end of assembly, the break and finishing. The operator must schedule visits so each person still gets their break. Twelve four-minute visits consume forty-eight minutes; the unallocated twelve minutes provide some flexibility. The programme is illustrative and needs rehearsal with the real project.
Explain that arrangement to attendees before they need the station. The assistant records readiness and calls the next person while others continue appropriate work. The tutor decides whether a piece is ready for that operation. Don't let a booking list pressure someone into presenting work that isn't ready.
Use clear stopping points. Before assembly, everyone should understand their chosen size and design. Before final closure, the tutor checks the point at which changes become harder. Before packaging, the attendee knows how to use the fastening and what care information goes with the piece.
These checks are teaching moments, too. Ask attendees to show the tutor what they've done rather than asking whether everyone is fine. Someone who has been quietly copying their neighbour may need help with the same step and be reluctant to interrupt.
Keep an optional extension for confident participants that doesn't take the tutor away from the promised result. They could plan a second colour arrangement on paper or practise a taught movement with spare practice materials. Don't start a second item from stock already reserved for replacements unless the offer and budget provide for it.
Our event run-of-show guide can help assign the practical cues. In the staff version, name who brings packaging, who manages the station list and who checks the room handback. Attendees need a simple schedule; the team needs the jobs behind it.
Decide what happens when a piece isn't finished
An unfinished piece is foreseeable. A component may fail, someone may need more help than the trial suggested, or a participant may change their design late. Write a recovery plan before those situations become a conversation at the door.
Start by separating an incomplete learning task from a faulty supplied component. Someone who wants more time to experiment needs a different response from someone whose clasp breaks during the advertised activity. Record what happened and offer an appropriate solution under the terms and legal requirements that apply. Don't use a blanket "handmade items vary" statement to avoid a genuine delivery problem.
For our example, the tutor first checks whether the piece can be completed within the remaining supported time using the agreed method. If it can't, the operator records the work still required, the proposed remedy and who will contact the attendee. Only offer later completion if the tutor has agreed the work, the business can fund it and the customer understands the arrangement.
If you retain a piece, give it an identifier and a matching collection or delivery record. Keep contact details separately from anything displayed publicly. Record the components and condition when it is handed over, the work authorised and the agreed return method. A bag with a first name scribbled on it isn't enough when several similar bracelets remain behind.
State whether delivery is included and confirm a realistic completion date. Don't promise to post an item tomorrow before checking the tutor's availability, packaging and postage. Any additional payment needs to be explained and agreed rather than presented as the only route to receiving the promised result.
A take-home practice kit can be useful when the activity and materials are suitable for independent use. It isn't an automatic substitute for guided completion. The tutor needs to decide whether instructions alone are appropriate and which tools or processes should remain supervised. Don't send someone away with an unfamiliar repair process simply because the venue booking has ended.
Protect the attendee's dignity during recovery. They don't need to explain their difficulty to the whole room or accept a tutor taking over every movement without asking. Explain what assistance you can provide and let them decide within the workable options. A finished bracelet matters, but so does whether they still feel they made it.
Before arrivals, give the assistant a packing list that can be checked without interpreting the lesson. For each place, name the kit version, tool allocation, practice materials and packaging. Put the replacement stock in its own labelled container. If a component is missing, the assistant should know whether it has an approved substitute or needs the tutor's decision. That prevents well-intended last-minute swaps from changing what someone is taught.
Check a transferred booking against the new attendee's needs, too. A friend taking over a ticket may have different access requirements or expect to choose a different material. Confirm the person attending has received the project description and preparation information. Don't assume the original buyer will pass on every detail, especially when they bought several places as gifts.
Keep late arrivals in the staff briefing. Decide how someone receives the essential introduction without leaving the rest of the group unsupported. The assistant can explain arrival arrangements, but only a suitably qualified person should cover the technical instruction assigned to them. If a missed step means someone cannot join the activity safely, explain the available options under the event's terms. Skipping the briefing to avoid an awkward conversation isn't a workable solution.
Write down the reset between consecutive classes. Collect used tools, check their condition, replenish individual kits and inspect shared surfaces before the next group arrives. Include time for the tutor to take a break. Selling another session immediately after the first creates another complete delivery commitment, including preparation and finishing, rather than simply another three hours of ticket revenue.
Close the accounts and improve the next class
Before the team leaves, count the tools, inspect the workspace and separate usable materials from damaged or uncertain stock. Record what went into attendee pieces, practice, demonstration and replacements. You need that distinction to order sensibly for the next session.
Settle outstanding work before announcing another date. Check that every retained item has an agreed owner, action and return arrangement. Send the promised care information and any resources the tutor agreed to provide. A sales email for the next class is a poor substitute for the instructions someone still needs for today's bracelet.
Ask questions that lead to a change. Where did people need help? Could they see the joins? Were the choices clear? Did the completed piece match what the ticket page showed? Our post-event survey guide can help you keep the request short, but use workshop-specific questions rather than collecting a satisfaction score alone.
Compare the rehearsal with what happened in the room. If the shared station took longer, record the reason. Perhaps the operation itself was fine and the tutor spent time correcting earlier assembly. Adding another tool won't fix an instruction that most participants misunderstood.
Review the actual financial result with the time it required. Include extra preparation, replacements, refunds and promised finishing. Record the cash still to leave your account, even if the class itself has ended. If you bought reusable tools, keep the full purchase in your cash record and use a consistent method for allocating their cost across sessions.
Repeat the beginner offer when you can deliver it consistently and there's evidence people will buy another date. An advanced workshop needs its own outcome, prerequisites and rehearsal. People enjoying this class doesn't establish demand for a more expensive technique or prove they have the skills it requires.
Before reopening sales, change the project sheet, kit list, ticket description and staff programme together. If the revised closure needs longer practice, the schedule should show that time. If premium components have disappeared from the supplier's range, remove the offer before accepting payment. Then make the sample again with the materials the next buyers will actually receive.

Author: By the Loopyah Content Team
The Loopyah Content Team shares expert insights, practical guides, and industry updates to help event organizers create unforgettable experiences and stay ahead in the event planning world.