· 27 min read
How to run a paid embroidery workshop
You've found a lovely embroidery design, priced some hoops and spotted a room you could hire for an evening. Now comes the harder question. Can someone who has never threaded an embroidery needle make meaningful progress on that design before the class ends?
That's where I'd start. To run a paid embroidery workshop, choose a small project, test it with beginners and prepare the fabric and kits before people arrive. Then set the ticket limit around the help your teaching team can actually provide. Price all that preparation into the ticket, including the time spent transferring designs and separating supplies.
The finished sample matters, but buyers are also paying to understand what they're doing. Someone who leaves with a modest piece they can continue independently has received something useful. Someone who leaves with a beautiful piece mostly stitched by the tutor may still be stuck when they pick up a needle at home.
This guide uses a fictional adult beginner workshop to work through the decisions. It has ten public places, a tutor and a teaching assistant, with a two-and-a-half-hour public session. Those are example choices to test, not recommended staffing ratios or a statement about safe capacity. All example costs are invented USD amounts.
We'll focus on hand embroidery on prepared fabric, rather than machine embroidery, counted cross stitch or decorating clothes brought from home. Those need different materials and teaching plans. If you're comparing craft formats, our paid knitting workshop guide covers that separate lesson.
Decide what a beginner should be able to do afterwards
Start with the learner's next attempt. Tomorrow, sitting at their own table, what should they understand well enough to do without you?
For our example, the answer is threading the supplied needle, starting and securing the thread using the tutor's chosen method, making running stitch and back stitch, and recognising when they've pulled the fabric out of shape. The project gives them somewhere to practise those skills. It doesn't need to introduce every stitch that makes embroidery interesting.
Write the starting ability just as clearly. This session assumes no embroidery experience. It also assumes that the participant can work with the agreed tools and teaching arrangement, with any adjustments discussed beforehand. Don't use "beginner" to mean someone who already knows how to hoop fabric, separate thread and read a stitch diagram. Those are steps you need to allow time to explain.
Ask the tutor to describe the lesson without specialist vocabulary. If they say participants will learn surface embroidery, explain that they're stitching a design onto the surface of fabric. If they mention tension, explain that you're talking about how tightly the fabric or thread is held. A buyer shouldn't need another lesson to understand the ticket description.
Choose whether this is mainly a taught class or an open stitching evening. A taught beginner class needs demonstrations, individual checks and enough quiet for people to hear instructions. An open stitching evening can give experienced people space and company while they work on their own projects. Both can be paid offers, but the support promise is different.
For the first version, I'd sell one clear beginner lesson. A room containing complete beginners, experienced stitchers seeking design feedback and people bringing repairs can leave the tutor trying to provide several services at once. Our guide to mixing abilities in a paid workshop explains when that arrangement can work. It requires deliberate planning, rather than a friendly sentence saying everyone is welcome.
Talk to a few intended buyers before confirming the offer. Ask what they want help with and show them the proposed project. Someone may want a calm evening trying a new craft. Someone else may want to personalise clothing. You can welcome the first person while explaining that this particular class won't teach garment embroidery. That clarity helps people choose a session they'll value.
Choose a project with a simple version that looks complete
An embroidery pattern can be small and still take a long time. Dense filled areas, tight lettering and repeated colour changes all add work that a photograph doesn't reveal. Choose by the movements a beginner must learn, then consider how the result looks.
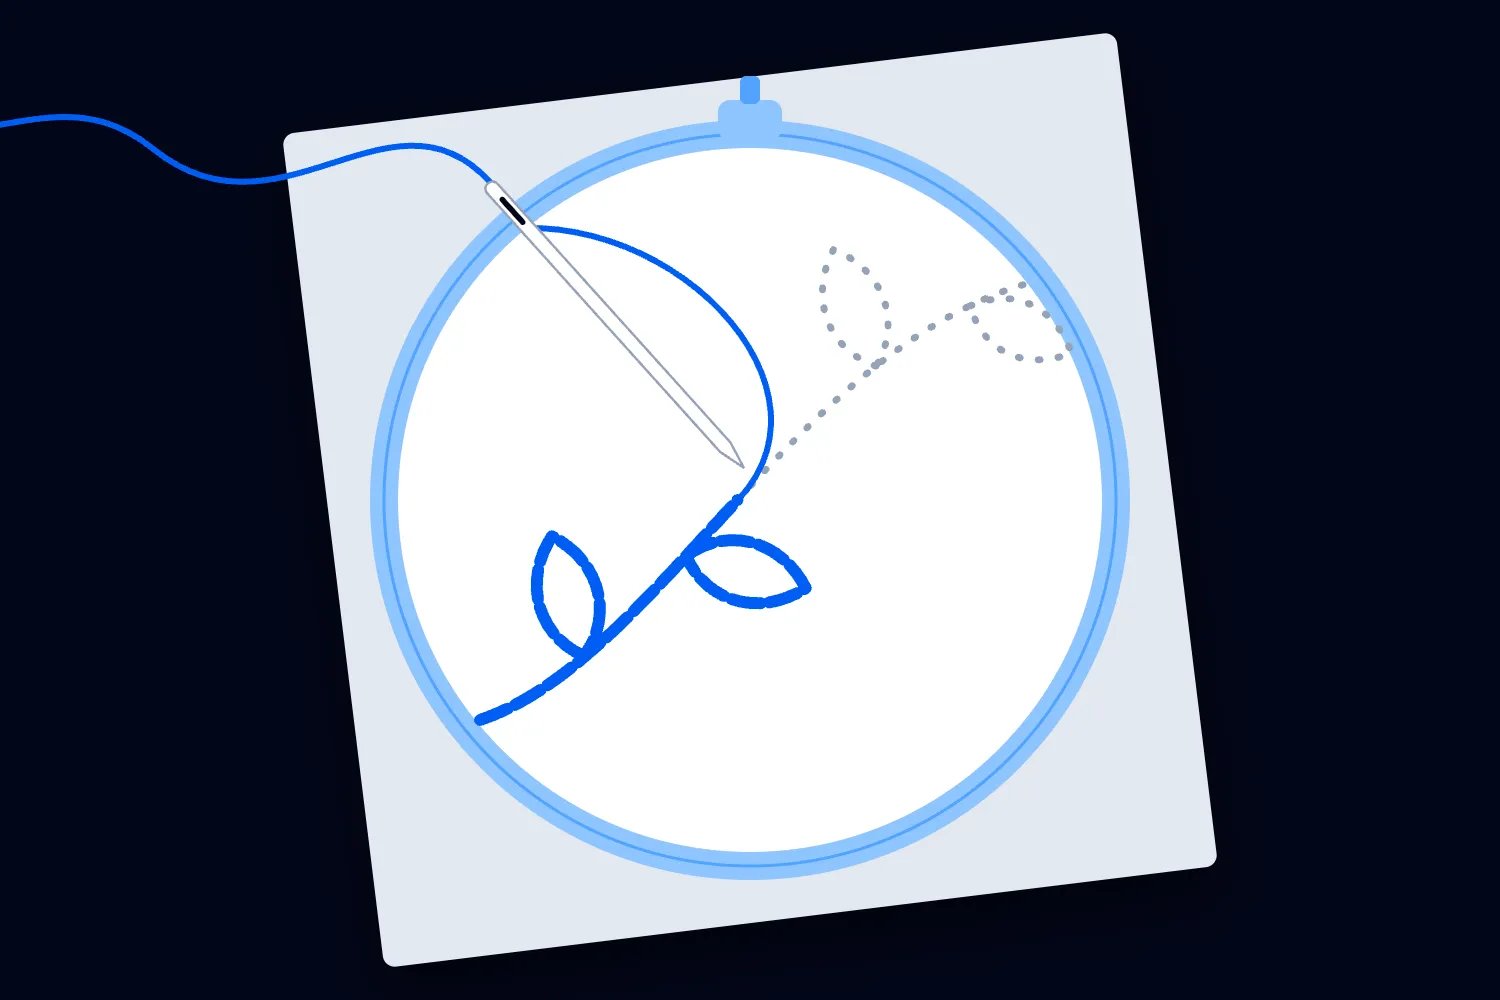
For our fictional class, the tutor creates an original outline of a small leafy stem. The simple version has a main line and a few open leaf outlines. A separate optional border lets faster learners keep practising. There are no densely filled shapes, lettering or compulsory decorative knots. The outline can look intentional without the border, so the slower learner doesn't feel they've made an incomplete version of everyone else's project.
Running stitch makes a line of separated stitches. The Royal School of Needlework's running stitch instructions show how the surface stitches and gaps form that line. Its back stitch instructions show the backward movement that joins stitches into a continuous line. These are useful references for checking your tutor's handout and giving learners an accurate place to revisit the movements.
The project doesn't need both stitches everywhere. The tutor might use a short practice line for running stitch and the main stem for back stitch. Show which parts belong to the core lesson and which are optional. Don't print a complicated outline and announce halfway through that most of it was only there for confident participants.
Prepare an honest sample. Use the actual fabric, thread and hoop learners will receive, at the same design size. Photograph or display it as a tutor-made example. If it took an experienced stitcher several evenings, it cannot stand as an unexplained promise of what a first-time learner will complete during one class.
Decide what "finished" means for the advertised offer. Does it mean the stitched outline is complete? Does it include securing the back, removing transfer marks and presenting the piece in its hoop? Some marking methods need washing or drying afterwards. If those steps happen at home, the ticket page and lesson should say so.
I would avoid making an adult beginner's first project depend on perfect symmetry. A slightly uneven line can still be a satisfying learning sample. A design that only looks right when every tiny repeated shape matches may create more frustration than its attractive sales image suggests.
Rehearse the lesson with someone who needs it
Your tutor's stitching time tells you how long an experienced person takes. It doesn't tell you how long a beginner needs to find the needle's eye, turn the hoop over, undo a tangle or remember where the next stitch begins.
Run a small trial with people who match the starting ability. Give them the proposed kit and the instructions you intend to use. Explain that you're testing the workshop, then observe where they stop. Ask them to describe what they're trying to do before you correct it. That often reveals whether the problem is the movement, the explanation or the materials.
Record the difficult steps in ordinary words. "Thread kept splitting at the needle" gives you something to investigate. "Participants were slow" doesn't. A learner might be struggling because the needle and thread don't suit each other, because the camera hides the entry point, or because the instruction skips a movement the tutor now performs without thinking.
Include recovery in the trial. Let the tutor demonstrate what to do when a loop catches underneath or the line begins to pucker. The learner needs a workable correction, rather than an instruction to pull harder or start again every time. Check whether your handout helps after the live explanation has ended.
Also test the last part of the session. Can someone secure the thread and pack the piece safely while still understanding the next step? Does the finishing explanation arrive early enough for them to try it? If packing begins while the tutor is still introducing an essential skill, shorten the design or change the running order.
Use the trial to decide what you can promise about completion. You might reasonably aim for the simple outline to be finished while stating that individual progress varies. If several trial learners can't reach that point with the planned support, revise the offer. Calling the class relaxing won't make an overloaded project easier to teach.
Keep the revised version together. The sample, transfer template, kit list and lesson notes should describe the same project. A small late change to the sample can create a surprising amount of extra work if someone has already printed the old design onto every piece of fabric.
Prepare the fabric and transfers before class
For a first workshop, I'd give everyone prepared fabric with the same tested outline. Letting every participant choose a different design, trace it and start stitching can use much of the evening before anyone learns the advertised stitches.
DMC's fabric preparation guidance recommends testing the fabric and thread together, leaving enough fabric around the design and preparing fabric before stitching. It also notes that stretchy materials can pucker more easily. For this beginner offer, choose a stable fabric the tutor has tested rather than asking attendees to bring any T-shirt they own.
Test preparation on the actual batch you buy. Follow the fabric's care instructions, prepare it as required and check the result before cutting the class allocation. You need enough material outside the hoop for the learner to grip, adjust and finish the piece. The right allowance depends on your project and finishing method, so have the tutor confirm it on a physical sample.
Treat the transfer as part of the project, not a printing chore someone can improvise. A transfer puts the design guide onto the fabric. Your tutor might choose tracing with a suitable removable marker, a prepared transfer product or another method they know. Follow that product's instructions and test its removal on the complete combination of fabric and thread.
Do the removal test before promising that marks disappear. Heat, water and washing requirements differ between products, and a method that worked on a spare scrap may behave differently on the chosen fabric. Keep the instructions for the exact product with the workshop notes. Avoid mixing several marking methods in one batch unless the tutor has checked and labelled them.
Check every prepared piece before packing it. Is the outline centred where it should be? Is it the right way round? Are the lines clear enough to follow without dominating the finished stitching? If the fabric has a noticeable front and back, can the learner identify the working side? A faulty transfer creates a problem the tutor must solve while everyone else waits.
Prepare a few replacement pieces according to the needs found in rehearsal. A damaged fabric piece should not force someone to borrow the demonstration sample or abandon the project. Count these replacements in your budget and keep them separate from the public ticket allocation.
If you want learners to practise transferring a design, make that a deliberate teaching objective. It needs time, tools and permission to use the artwork. You may choose a later session for that skill. Preparing the outline in advance is an honest service when the ticket says the class focuses on stitching.
Pack complete kits and keep shared tools separate
Open one packed kit and teach the whole project using only what is inside, plus the shared tools you've listed. This simple test catches missing items before ten participants discover the same omission.
Our example take-home kit contains a small hoop, prepared project fabric, practice fabric, the selected thread, suitable embroidery needles in a secure holder, printed instructions and a bag. The tutor chooses the needle, fabric and thread together. Shared scissors and the demonstration equipment stay at the venue. The ticket says which items people keep.
DMC's stranded thread guide explains separating individual strands and recombining the number the design needs. The tutor should choose and record that number for the tested project, rather than leave beginners to guess from a bundle of thread. Demonstrate the preparation as part of the lesson. Have some prepared thread available so a person who gets stuck can still practise stitching while waiting for another explanation.
Measure supplies against the trial project. Include the thread consumed by practice, corrections and the optional exercise you actually offer. Don't base the whole allocation on the thread left in the tutor's perfect finished sample. Keep the colour identifiers and material information so you can replace a missing length accurately or answer a question after the class.
Limit colour choice to combinations you've tested. A choice between a few prepared palettes can feel personal without requiring the tutor to troubleshoot unfamiliar threads. Metallic, textured or very fine thread might be attractive for a future session. Adding it casually to this beginner kit changes the handling and possibly the pace of the lesson.
Our workshop materials guide covers when materials belong in the ticket price. For this offer, including one standard kit makes the preparation clearer. Beginners can arrive without trying to interpret a shopping list, and the tutor can demonstrate with the same materials everyone has in front of them.
Count ready kits rather than individual supplies. Ten hoops and ten fabric pieces don't make ten complete kits if two needle holders are missing. Give one person responsibility for checking the packed contents against the current list. Keep tutor samples, spare supplies and participant packs clearly separate.
Agree any alternative tools or materials privately before the session where possible. A hoop stand, a different needle or clearer printed instructions may help someone participate, but the tutor needs to test the arrangement and understand what support they can give. Ask about the practical adjustment without requiring someone to explain personal medical details to the room.
Make the teaching visible and the help available
Embroidery demonstrations involve tiny movements. A tutor can explain perfectly while their own hand hides the point where the needle enters the fabric. Check the view from a learner's chair with the actual demonstration setup.
You might bring a small group close for a demonstration, use a document camera or repeat the movement at each table. Choose the method that works in your room and rehearsal. A screen adds little if the camera is out of focus or shows a mirror image nobody has explained. Test the backup too, so a failed connection doesn't remove the main teaching method.
Prepare a larger demonstration sample if it makes the thread path easier to see, while explaining how it relates to the smaller learner project. Show the front and back. Beginners need to understand where the thread has gone underneath, especially when a neat surface hides a loop that will catch the next stitch.
In our ten-place example, the tutor leads the lesson and the assistant supports the agreed techniques during practice. Both rehearse with the same kit. The assistant knows when to repeat an explanation and when to ask the tutor to check something. Their role includes learning support, so replacing them with someone who only manages bookings would change the service.
Give people a quiet way to request help. They can put their hoop down safely and signal the team. Notice who is waiting and offer a useful next action where appropriate. A participant shouldn't have to interrupt a confident neighbour to receive the teaching included in their ticket.
Ask before taking someone's work. Explain what you see, show the next movement and let them try it. Occasionally the tutor may need to undo a stubborn tangle, with the learner's agreement. That intervention shouldn't become the main way you keep the project moving. The objective is that participants understand the stitches they are making.
Set the class size after observing support needs. How many people needed help at the same time? Could the assistant reach them without interrupting the demonstration? Did a learner wait so long that they stopped trying? Those answers may justify fewer tickets even when the room has spare chairs. Extra sales aren't useful if you can't deliver the lesson people paid for.
Prepare explanations for the mistakes you saw in rehearsal
Keep a short troubleshooting sheet for the teaching team. It should describe the visible problem, the first thing to check and the action the tutor has tested. Write it after the trial so it answers difficulties your materials and project actually produced.
For example, a learner may complain that the needle won't pass through the fabric comfortably. The assistant should check the agreed needle and thread combination, where the learner is trying to insert it and whether something has caught. They shouldn't immediately tell the person to apply more force. A damaged needle or an unsuitable substitute is a different problem from misunderstanding the stitch.
If the fabric gathers around the stitching, ask the learner to pause and show how they're pulling the thread. The tutor can check the hoop and demonstrate the intended movement on a spare sample. The correction may require undoing some stitches, so agree that with the learner and explain what they'll try differently. Pulling the fabric back into position without explaining the cause leaves them likely to repeat it.
When a thread tangles underneath, show people how to stop and inspect the back before continuing. Let the tutor decide whether it can be loosened, needs careful undoing or needs a new length. Keep a practice piece available if the repair takes longer, so the participant can still follow the next demonstration. Don't make their ability to continue depend on a hurried repair nobody understands.
Give the same attention to instructions that seem obvious to you. "Come up ahead of the previous stitch" needs a clear view of the fabric and a demonstration of what "ahead" means in that line. Ask the learner to point to the next position before stitching if it helps. A repeated sentence won't fix an explanation they can't connect to the work.
Keep this sheet short enough for the assistant to use during class. It isn't a replacement for a capable teacher, and it doesn't need to become another booklet for buyers. Its purpose is that the team gives compatible help while the tutor remains available for problems outside the rehearsed lesson.
If several people hit the same difficulty, pause for another group demonstration. If one person needs a correction, give them individual help while the others continue. Agree that choice between the tutor and assistant so neither starts a separate explanation over the other.
Check the room as a working space
Visit at the time of day you'll teach. Sit in each planned position and hold the fabric as a learner would. Can you distinguish the transfer line from the thread? Does your head cast a shadow over the hoop? Decorative lighting that makes a venue attractive can be poor lighting for close work.
Check the tables, chairs and movement between them. Learners need room for their hoop, instructions and supplies, with a safe place for bags. The tutor needs to reach individual places. Allow for any support people and venue staff when confirming the overall arrangement, rather than counting only public tickets.
Great Britain's Health and Safety Executive's event management guidance covers competent staff, proportionate supervision, risk information and monitoring. Apply the relevant local requirements to your own workshop and agree responsibilities with the venue. A small seated class still needs workable emergency arrangements and a known person to contact about the building.
Have the tutor plan how needles and scissors are issued, parked, collected and carried home. Needles shouldn't disappear into loose bags, chair cushions or piles of fabric. Provide the secure storage your chosen tools need and a procedure for a lost or damaged needle. Ask the venue how an incident or first-aid request should be handled.
Keep drinks away from the working area when a spill could cause harm or damage. If refreshments are part of the ticket, plan where people put their tools before taking a break. Avoid giving the tutor responsibility for serving hot drinks during individual teaching time unless that work is staffed and rehearsed.
Discuss access to the activity as well as entry to the building. Someone may need a different demonstration viewpoint, more contrast in the instructions or a particular seating position. Describe the venue accurately and provide a contact for questions. Confirm adjustments with the tutor before making a promise you haven't tested.
This example is for adults. A children's or family session needs its own assessment of tools, supervision, safeguarding and local requirements. Don't add a child ticket to the adult class simply because a buyer asks. You'd be changing who the lesson serves and the support it needs.
Price the preparation as well as the public session
A kit can look inexpensive while the work behind it takes hours. Someone has to source the fabric, prepare and transfer the design, cut and organise thread, check every pack and answer booking questions. Pay for that work in the budget before deciding the session is profitable.
The US Small Business Administration's business planning guidance explains the distinction between fixed and variable costs and the break-even calculation. For a workshop, separate costs that stay the same for the planned session from costs incurred for each participant. Include a realistic share of the business expenses that support the event.
Here is our invented USD example. These are calculation assumptions, not supplier prices, wage guidance or a recommendation for your ticket price.
Tutor preparation, teaching and agreed follow-up: $180.
Teaching assistant preparation and delivery: $90.
Venue hire including setup and clearing: $100.
Organiser administration, transfers and kit packing: $80.
Promotion, equipment use, spare supplies and allocated business overhead: $50.
These costs total $500. Each attendee's kit and participant consumables cost another $12. The amount retained from a full-price paid booking is $72 after the assumed payment charges and sales taxes. Your public ticket price needs its own calculation of those deductions. Costs here include any nonrecoverable transaction taxes, and the result is before financing costs and business income tax.
Each paid attendee leaves $60 towards the $500 session costs because $72 minus $12 is $60. Eight paid bookings leave a $20 loss. Nine leave a $40 profit. Ten leave a $100 profit. Nine is therefore the first whole-number booking count that covers the stated costs, provided all the assumptions hold.
That's a narrow result for a ten-place room. It doesn't mean you should squeeze in two extra people. First ask whether the retained ticket income can reasonably increase, a confirmed cost can change, or the project can become easier to prepare without weakening the lesson. Our paid workshop pricing guide develops those choices further.
Look at preparation sensitivity. Suppose transfers and packing take two extra paid hours at an assumed $25 per hour. The extra $50 changes the nine-booking result from a $40 profit to a $10 loss. The full ten-place result falls from $100 to $50. This is why a successful rehearsal should time the preparation as well as the stitches.
A complimentary participant also changes the calculation. Nine paid people and one complimentary attendee bring in $648, while ten kits cost $120 and session costs remain $500. Profit is $28. That's a separate scenario from nine paid people attending alone, where nine kits cost $108 and profit is $40.
Keep the cash plan beside the profit calculation
You may buy kits before every place sells. In our example, buying ten $12 kits costs $120. If the venue also needs a $50 deposit before sales, the immediate outlay is $170. That deposit is part of the $100 hire charge already budgeted, so don't add it again when calculating profit.
At eight paid attendees, two unused kits remain. Assuming those packs stay intact and usable, the event consumes $96 of participant materials and makes the $20 loss calculated above. The business has still spent $120 buying stock. The extra $24 is held in two kits rather than available in the bank. Check the actual accounting treatment with your adviser, while keeping the practical cash distinction clear.
These examples assume retained bookings, no refunds and the stated costs. A refund after an attendee's kit has been prepared, or a supplier order that cannot be changed, needs its own calculation. Check when proceeds become available, when each supplier must be paid and what money must remain available for buyer obligations. A profitable final forecast doesn't automatically fund the next bill.
Build the running order around the moments people get stuck
Our fictional public session runs from 6:00 pm to 8:30 pm. Room access begins earlier for setup and continues afterwards for clearing. Staff time for both belongs in the costs we've already allowed.
Use this sequence as a starting point for rehearsal, then change it to match the lesson you've actually tested:
6:00 to 6:10: welcome, tool handling, the project and how to ask for help.
6:10 to 6:25: check the hoop, prepare thread and practise threading and starting.
6:25 to 6:40: demonstrate running stitch and practise on the separate fabric.
6:40 to 7:00: demonstrate back stitch and begin the main outline with individual checks.
7:00 to 7:10: break, with needles secured before people leave their places.
7:10 to 7:50: supported stitching on the simple design, with the border available as an optional extension.
7:50 to 8:10: demonstrate securing thread and finishing, then let participants try.
8:10 to 8:25: check each person's next step, explain care and any transfer removal still needed.
8:25 to 8:30: secure needles, pack kits and close the session.
The public time totals 150 minutes. Demonstrations and guided practice are included in those blocks, so the whole session isn't uninterrupted stitching. Make that distinction when deciding whether the project fits.
If everyone needs another explanation of back stitch, use the optional border time. Keep the core teaching and final checks. If only one learner needs help, the assistant can support them while the tutor keeps the agreed activity moving. Decide that handover during rehearsal so neither person waits for the other to notice.
A late arrival may have missed tool handling or the starting method. Arrange who welcomes them and what can reasonably be repeated. Don't leave the whole group without teaching support while the assistant spends the rest of the evening recreating the opening lesson. Publish an honest late-arrival policy and apply it consistently with the terms and local obligations that apply to your event.
Describe the ticket so buyers know what they're making
Show the actual project and tell people what they can keep. An appealing photograph of detailed floral lettering may attract attention, but it will disappoint someone who arrives to find that the lesson teaches a simple outline. The promotion and the table should describe the same purchase.
Our example offer could read like this:
"Try hand embroidery in a small adult beginner class. You'll practise running stitch and back stitch on a simple leafy design, with demonstrations and help while you work. Your ticket includes prepared fabric, a hoop, thread, needles in a holder and instructions to keep. Scissors are shared during the session. We aim to complete the simple outline, and you'll learn how to continue if you need more time. No embroidery experience or supplies needed."
That paragraph still needs your real venue, times, price, access information and booking terms. It gives the buyer a concrete starting point without promising identical results. Our guide to writing an event description can help you turn those details into a complete page.
Say whether people can attend alone, how much conversation to expect and whether drinks are included. You can offer a friendly class without requiring introductions that interrupt practice. Avoid medical claims about relaxation or suggesting that this session treats a condition. Tell buyers what happens rather than predicting how every person will feel.
Set a booking decision date around supplier commitments. If you need nine paid bookings to cover costs, check progress while you can still act on the venue and staffing agreements. Compare the cost and obligations of running with low sales against cancelling under the terms already provided. Removing the assistant or replacing the project after sale can change the lesson buyers chose.
Before the event, repeat the practical information. Loopyah's attendee email tools can send event updates to ticket holders, while promotions use the recorded marketing preferences. Use the update to confirm arrival, included supplies and anything participants need to know. You still decide the wording and ensure the people attending receive it, including anyone whose ticket a friend bought.
Agree pattern rights and a useful end to the support
Confirm where the design and handout come from before you reproduce them. A pattern being free to download doesn't establish that you can print copies for a paid class or send it to another tutor for repeat sessions.
The UK government's copyright guidance explains permission, licences and exceptions for protected work. It also notes that licences can limit particular uses. Check the terms for the exact design, instructions and images you intend to use in your jurisdiction. Don't assume that describing a paid commercial workshop as teaching settles the question.
For our original leafy outline, the organiser and tutor agree in writing how the template, instructions and sample photographs can be used. That includes transfers for the advertised class, take-home handouts and any repeat dates. Agree separately whether you can record the demonstration or give the material to a replacement teacher. Those practical permissions make the next session easier to plan.
Finish the class by asking each learner to show the next action they would take. Someone with half an outline may know exactly how to continue. Someone whose outline is complete may still need help starting a fresh thread. Check the skill, rather than judge the lesson only by the amount of stitching visible.
Give a bounded follow-up that your budget can support. Our example includes the printed instructions and one group reminder answering common questions sent by a stated deadline. It doesn't include unlimited private troubleshooting. Tell people how to find the promised resource and explain any remaining care or transfer-removal step for their actual materials.
An invitation to another class is a separate promotion. Respect applicable marketing preferences, and don't make access to the instructions they already bought depend on buying again. If you offer a follow-on session, name the starting skills and new project so people can judge whether they're ready.
Decide what to change before opening the next date
Review the teaching with the tutor and assistant while the details are fresh. Note where learners asked for help, which explanation needed repeating and whether anyone waited without a useful task. Record material problems separately. Changing the thread won't solve an unclear demonstration, and adding a handout won't repair a transfer that nobody could see.
Ask learners what they can now do and where they still need help. "Could you start another length of thread using your instructions?" gives you more to work with than a general question about whether they enjoyed the evening. Our guide to measuring workshop learning explains how to make that review practical without turning the class into an exam.
Close the accounts using actual working time, invoices and retained sales. Compare the assumed preparation with what transfers and packing really took. Count unused kits, replacement fabric and shared tools before deciding what another date costs. If the assistant answered follow-up questions outside their agreed hours, resolve that work and include it properly next time.
Keep a short record you can use when planning again:
The simple project learners reached and the skills they could repeat.
The steps that needed individual help and how long people waited.
The kit or transfer changes the tutor recommends.
The actual preparation, delivery and follow-up hours.
The retained ticket income, consumed materials, remaining stock and final result.
Then make a specific decision. You might keep the project and improve the demonstration, reduce the public places, raise the price or offer the same beginner class again to a new group. If learners struggled with the core outline, don't add a more impressive design to make the next listing look fresh. Get the tested lesson, promised support and full cost to agree before you take the next booking.

Author: By the Loopyah Content Team
The Loopyah Content Team shares expert insights, practical guides, and industry updates to help event organizers create unforgettable experiences and stay ahead in the event planning world.