· 27 min read
In-Person Checkout: Tap to Pay for Event Organizers
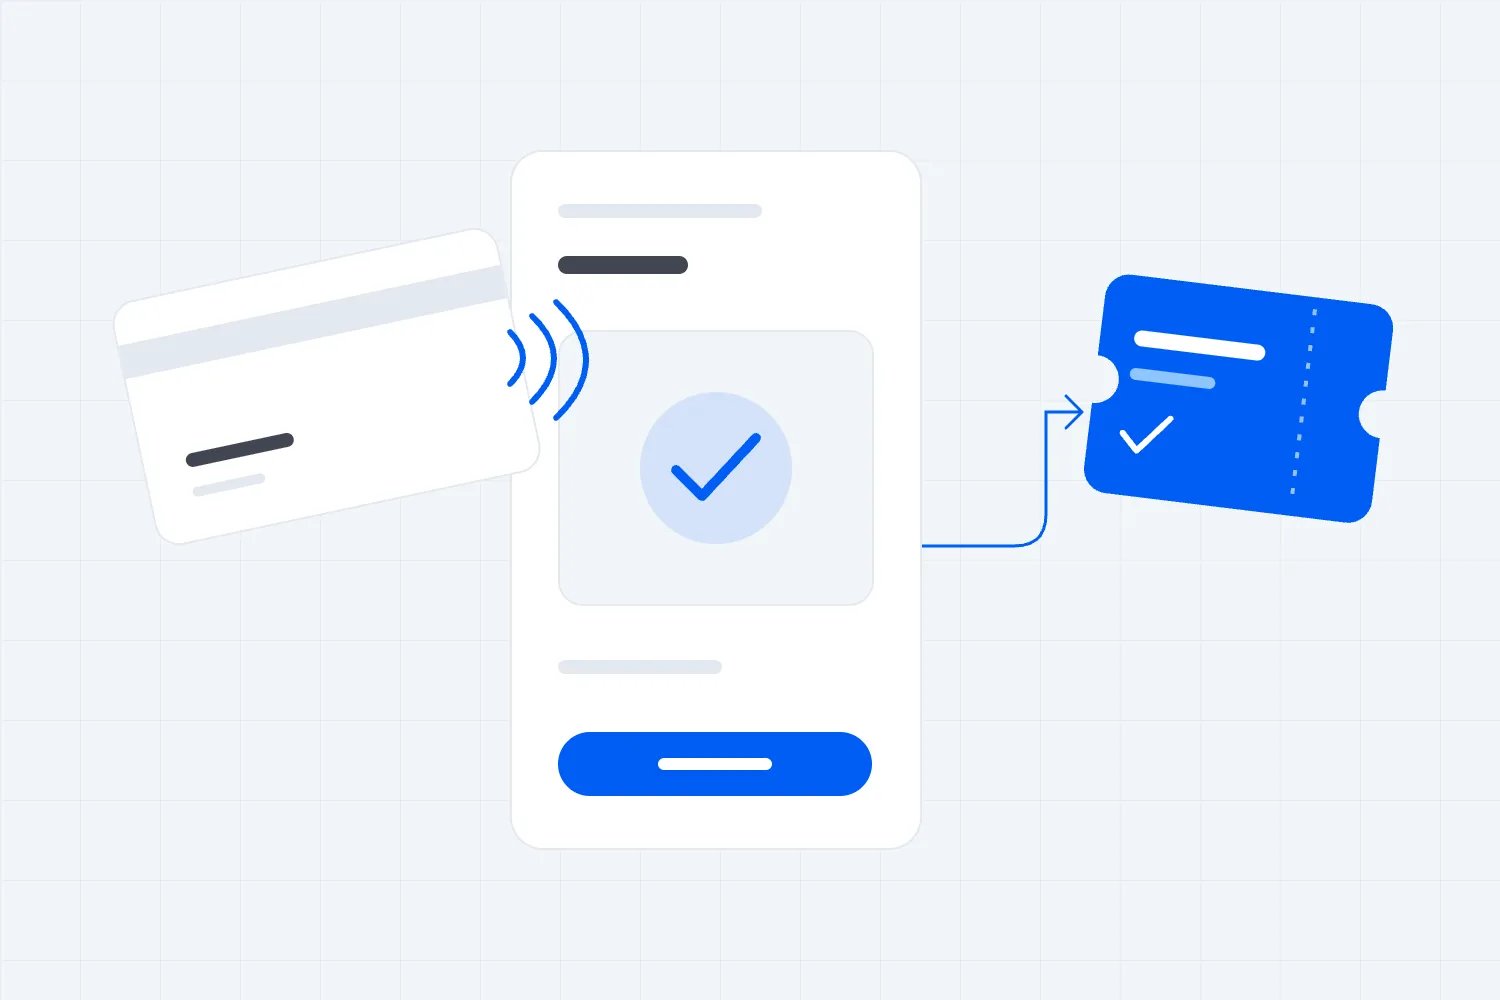
You're running a paid event, the doors have opened, and someone wants to buy a ticket while the merch queue starts building. Sending both buyers to the same fixed payment terminal can turn a perfectly good sales opportunity into a wait. Loopyah's In-Person Checkout lets your team take contactless payments on a compatible phone, so you can put a checkout point where the buying happens.
This post originally introduced the feature as In-Venue Checkout. In the app and our current help guide, you'll find it under In-person Checkout. Buyers tap a contactless card or phone to pay. For ticket sales at the door, the ticket is issued instantly. You can also use Tap to Pay for merch, drinks and extras on a compatible iPhone or Android phone.
The useful question is where it improves your event's operation. A phone can remove the need for an extra card reader, but you'll still need a clear offer, a prepared team and a way to handle a payment that doesn't complete. This guide walks through the current setup, the decisions to make before opening, and how to judge whether another mobile checkout point is worth the cost.
What In-Person Checkout does today
The current In-Person Checkout guide describes a simple door sale: open the event in the Loopyah mobile app, choose In-person Checkout, and let the attendee tap their card or phone. The ticket is issued instantly. That means you can plan a walk-up purchase as part of the event's ticket operation, rather than asking the buyer to find a separate payment desk and then return with proof.
For merchandise and refreshments, our ticketing solution also describes taking payments for merch, drinks and extras from an iPhone or Android phone. Keep the workflow appropriate to what you're selling. A paid ticket needs a valid ticket and an admission process; a shirt needs the correct size handed over; a drink needs the usual venue service checks. Taking the payment is one part of fulfilling the sale.
Use this to plan the sale and the team running it:
Sell tickets at the door through the Loopyah mobile app, with tickets issued instantly after payment.
Accept a buyer's contactless card or phone using a compatible phone rather than a separate card reader.
Use Tap to Pay for merch, drinks and extras, as described on Loopyah's current ticketing page.
Keep staff access appropriate to their responsibilities and test the exact sale they will handle before the event opens.
On iPhone, Tap to Pay uses the phone's contactless payment capability through a supported app. That's different from showing a QR code that sends the buyer to an online checkout. The buyer taps their card or wallet against the seller's phone and follows the payment prompts. Availability still depends on the supported device, software, payment setup and country; owning a phone doesn't automatically make it ready to take payments.
Apple's official explanation of the underlying iPhone technology is available here.
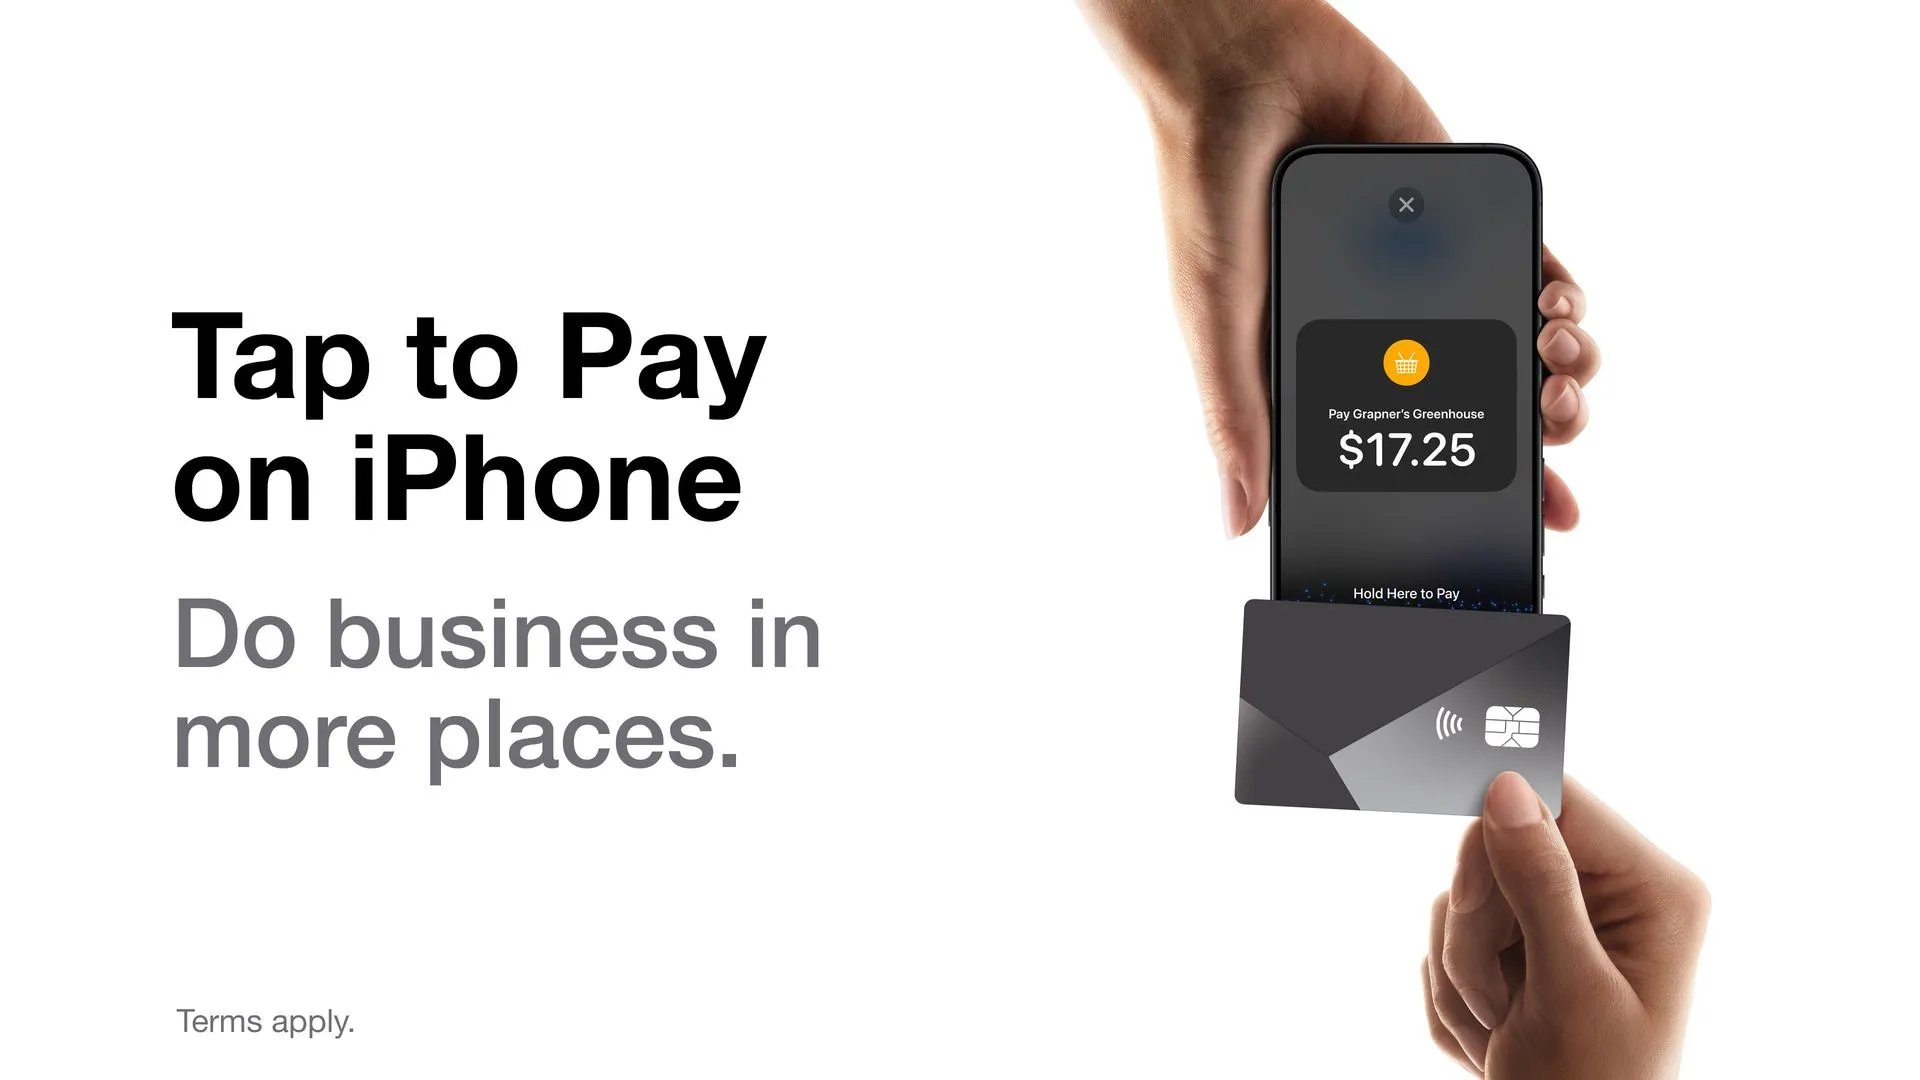
You can use In-Person Checkout with compatible iPhone and Android phones. Check the actual phones your team will use through your current Loopyah setup before assigning them to a shift. Confirm the operating system as well as the model, and check tablet compatibility separately. If you plan to use personal devices, confirm availability with each staff member early enough to arrange an alternative.
Why Tap to Pay matters for event organizers
Find out what is slowing the queue
Watch a queue before deciding that payment is the problem. At a busy entrance, the hold-up might be a ticket search, a question about accessibility, a bag check or a walk-up buyer choosing between ticket types. At merch, it might be someone looking for the right size. An extra phone helps when people are waiting to pay. It does much less when everyone is waiting for the same person to find stock.
There's a useful distinction in Loopyah's Event Attendee Insights Report 2025/2026. Among 500 US respondents surveyed through Pollfish on 11 November 2025, 285 selected long lines or waiting times as a frustration, while 313 selected overcrowding and 279 selected expensive food and drinks. Respondents could choose up to three answers. These are experiences people reported, rather than measured effects of a payment method.
| Label | Share of 500 respondents (%) |
|---|---|
| Overcrowding | 62.6 |
| Long lines or waiting times | 57 |
| Expensive food and drinks | 55.8 |
| Poor sound or visibility | 36.8 |
| Safety concerns | 14 |
| Communication or info | 11 |
Source: Loopyah Event Attendee Insights Report 2025/2026, question 16. All 500 US respondents, fielded 11 November 2025 through Pollfish; unweighted shares calculated from response counts. "Communication or info" means "Poor communication / unclear info" in the survey. Up to three answers were allowed, so the percentages don't add to 100%. The sample includes 69 respondents who reported attending no live events in the previous 12 months. The chart describes the full sample's answers about event frustrations; it doesn't identify payment queues or predict a reduction from Tap to Pay.
That matters when you're spending money to improve the night. You could make payment easier and still disappoint guests with unclear pricing or a cramped collection area. Start by finding the part of the sale that actually makes them wait, then put the phone and the staff member where they can help.
Visa's March 2025 announcement describes Tap to Phone adoption across sellers. It provides background on the payment technology, rather than a measure of event queue times or Loopyah performance. The announcement is available here.
Plan the phone as working equipment
A separate card reader is another device to obtain, charge, store and hand over. Using a compatible phone can remove that piece of equipment from the shift. It can also make a temporary selling point more practical when you don't want to install a permanent register for a short rush.
But plan the phone as working equipment. A staff member may need it for calls, messages or another event task, and a low battery doesn't care that a queue has formed. Agree which devices are allocated to checkout, where charging happens and who takes over during breaks. Have the devices signed in and tested before people arrive.
Think about the physical setup too. A phone held at an awkward angle across a crowded table is harder to use than one presented clearly at the buyer's side. Keep the total visible and follow the app's instructions for where the buyer taps. Protect the phone from the conditions at that station, whether that's spilled drinks, direct sun or a temporary outdoor stall. Moving to phones changes the equipment you manage; it doesn't remove the job of looking after it.
Allocate tested phones to the shifts and selling points that need them.
Confirm a charging plan and a named person who can replace a device.
Check the actual selling location, including connectivity, lighting and where the buyer stands.
Work out whether another selling point pays
Someone who wants a shirt after a set may buy it if the queue moves comfortably. They may leave if buying means missing the next act. Bringing payment closer can help you serve that buyer, but don't budget for a guaranteed increase in spending. The offer, price, stock, staff and time available all affect what you sell.
The first thing you want to do is work out what an additional completed sale leaves you. For merchandise, that means allowing for the item itself, applicable selling and payment costs, any artist or venue share, and the staff needed to serve it. For a ticket, consider the costs and obligations that additional admission creates. Gross sales alone won't tell you whether adding another seller pays off.
Before assigning extra staff, compare their added cost with the amount those extra sales could leave after the relevant costs. Use your own prices and contracts. If you need a large number of extra sales to cover the shift, check whether that many people are actually waiting to buy. You don't need a complicated model to reject a plan that depends on an implausible rush.
Also check whether you have moved sales rather than added them. A new selling point might take business from the original desk while increasing labour. That may still be worthwhile if it improves guest access or prevents crowding, but record that reason. You should be able to explain the decision without calling every sale at the new station incremental revenue.
When you test the change, keep the offer steady where possible. Changing the shirt design, discount and staffing at the same time makes it difficult to tell what helped. Start with a specific problem, such as buyers leaving an overloaded merch queue, and see whether the new arrangement improves it without creating a collection problem elsewhere.
Check the cost of the sale before setting the price
A phone without a separate reader can look like an easy saving, but compare the whole arrangement you need for the event. Confirm the applicable in-person payment fees for your account and the type of sale. Ask which charges apply to a refund or a disputed payment, and how the payment reaches the business receiving it. Use the current terms for that workflow; an advertised ticketing price isn't automatically the price for every merchandise transaction.
Include costs outside the app. You may need to allocate a phone, pay a seller for a longer shift or give a venue or artist a share of the sale. For a small run of merchandise, those costs can matter more than the equipment saving. Equally, if an existing trained seller can serve buyers at a better location, the extra cost may be modest. Work from the arrangement you will actually run.
Decide how to present the final amount to the buyer before opening. If staff have to explain a price difference between the sign and the checkout on every purchase, you have added a delay that another payment device won't remove. Check the price on the sign against what the app displays in the rehearsal. Resolve any applicable charges and conditions before asking staff to defend them during the show.
Keep the agreement with a partner clear enough for the person doing settlement afterwards. Specify which sales belong to which business, which costs are deducted and how exceptions are handled. A seller can take a payment correctly while the organizer and vendor still disagree about who receives what. Putting that understanding in place before the event protects the working relationship as well as the accounts.
Match the checkout to the venue's responsibilities
Before opening a new selling point, speak with the venue lead about where it can operate. A location that looks convenient on a floor plan may interfere with an entrance, a service route or the space guests need to move. Check it in the room, with the equipment in place. If a queue forms there, consider where the last person will stand and whether another guest can get past comfortably.
For drinks or any other controlled sale, the responsible venue team should establish who may sell, what checks apply and where service is allowed. A contactless payment method doesn't answer those questions. Train sellers for the goods they will handle and use the venue's approved process for a buyer who cannot be served. Don't make someone take payment before the relevant checks are complete.
It also helps to decide what each person will stop doing when they become a seller. A door worker answering booking questions may look available between arrivals, then be needed urgently when the next group reaches the entrance. A stock runner accepting payments may leave nobody replenishing the table. Assigning two responsibilities can work, but say which takes priority and who covers the other one.
You can test that arrangement during the briefing. Ask the person who would be pulled away to describe what happens next in their original role. If the answer is that everyone waits until they return, you haven't added capacity; you've transferred the queue. Change the cover or the timing before relying on that person as your extra checkout point.
Know which records answer your question
Keep your expectations specific when you review the data. A payment record, a ticket record, a stock count and an entry scan answer different questions. An approved payment tells you the purchase completed; it doesn't, by itself, tell you that a shirt was collected or an attendee entered the room. Check which reports your current checkout provides before relying on them during the show.
For the event lead, the useful habit is to connect a visible problem with the information needed to resolve it. If sales are stopping because the app isn't completing payments, investigate that with the person responsible for checkout. If buyers are paying but waiting for merchandise, ask the stock team what is missing. A general sales total won't distinguish those situations.
Agree who can make operational changes during the show. Sellers should know whom to contact when the price looks wrong, a sale is uncertain or an item has run out. The event lead should know who can move staff without leaving another service point uncovered. That short chain of responsibility is more useful in a rush than asking everyone to interpret every dashboard.
How to plan checkout for different event formats
The examples below are planning scenarios, rather than customer case studies or measured results. They show how the same payment capability can support different operations. Use the one closest to your event, then work through the sale all the way to what the buyer receives.
Music events: serve the post-set merch rush
Say you're running a ticketed music event with merchandise near the exit from the main room. The demand arrives together after a set. People can see the shirts, but choosing a size, paying and collecting all happen in the same narrow space. Adding another person with a phone might help, provided the team can also prepare the items buyers want.
Walk through a purchase with your merch lead before opening. Where does the buyer see sizes and prices? Who confirms that the size is available? When does the seller ask them to tap? Who hands over the item after the app confirms payment? Those questions expose the part that needs attention. If staff are searching unopened boxes for every order, another payment device won't fix it.
You could assign one person to help buyers choose and retrieve stock while another takes payment. During a quieter period, one trained seller might handle both. Choose the arrangement that fits the table, the number of people waiting and the margin on what you're selling. Avoid turning a simple purchase into several handovers just because you have spare staff.
If you add a temporary station, give it a clear selection that your team can actually fulfil there. Buyers shouldn't pay in one place and then discover that collection means joining the original queue. Mark what is available, update that information when it changes, and keep the route out of the selling area clear. You are trying to make the complete purchase easier, including leaving with the right item.
Put sizes and final prices where buyers can read them before reaching the seller.
Agree how availability is checked and when an item is handed over.
Keep payment, stock collection and the route back to the event easy to follow.
Conferences: separate walk-up sales from check-in
At a paid conference, people who already have tickets arrive alongside walk-up buyers and attendees who need help finding their booking. If everyone joins one line, a straightforward QR scan can wait behind a longer conversation about buying a ticket. In-Person Checkout gives you a way to handle a walk-up sale, but the layout should make the distinction obvious.
Use signs and an available team member to direct people to the right place. Someone who has paid should reach check-in. Someone who wants to buy should reach a seller who can explain the available ticket and complete the payment. Someone with a booking problem needs help without feeling pushed out of the queue. Depending on your scale, these may be separate desks or clearly defined positions along one desk.
Loopyah's guide says a ticket bought through In-Person Checkout is issued instantly. Have the team rehearse what happens next: how the attendee locates the ticket, where it is checked, and how they receive the badge or other admission material your event uses. Don't turn a successful payment into a second explanation the buyer has to negotiate.
For premium sessions or upgrades, confirm the actual booking and access workflow before selling the offer. Accepting money is different from changing what someone is entitled to enter. Establish who checks remaining places, what proof the attendee receives, and how the session team recognizes that entitlement. Only offer what your current setup can issue and your staff can honour reliably.
Distinguish walk-up purchases, existing-ticket check-in and booking assistance.
Rehearse the path from an approved ticket payment to admission.
Confirm capacity and access arrangements before offering any paid extra.
Pop-ups: make the seller and collection point clear
For a commercial pop-up within a paid event, a mobile seller can reduce the distance between a buyer and checkout. That doesn't mean every member of staff should wander through the crowd taking payments. Choose a visible selling area where buyers can understand who is selling, what the final price is and where the goods come from.
If an external vendor is involved, agree which business is making the sale and receiving the payment. A venue hiring out space, an organizer selling its own merchandise and a trader selling its own stock have different responsibilities. The fact that they are all inside the same event doesn't settle their commercial arrangement. Confirm the account, the receipt identity, any revenue share and the person who handles customer questions.
Keep a supervisor available when the selling point opens. A new location may reveal problems that a desk test missed: signage hidden by the queue, a phone screen that's hard to read outdoors, or buyers unable to reach the counter comfortably. Fix the practical issue while the queue is manageable. A phone gives you some flexibility in where payment happens; use that flexibility to make the space work for guests and staff.
Payment security and the way your team works
Apple explains in its Tap to Pay on iPhone security guide that payment data is encrypted and handled through the Secure Element. That describes Apple's iPhone technology. It isn't a reason to assume the same implementation on every Android device or to describe an entire event operation as certified simply because it takes contactless payments.
The PCI Security Standards Council's Mobile Payments on COTS standard addresses payment acceptance on ordinary commercial mobile devices. Its guidance encourages merchants and their payment providers to use the Council's listings when selecting a suitable listed solution. Ask your payment provider for documentation covering the setup you will use at the event.
For your team, focus on how the device and account are used. Staff should follow the approved app workflow and use the access assigned to them. They shouldn't copy card details into notes, photograph a card or ask a buyer to send payment information to a personal account when a transaction fails. Escalate the problem through the event's agreed support process.
Explain the buyer-facing process in ordinary words. Show the amount, let the buyer follow the on-screen directions, and wait for the app to confirm the result. If the status is unclear, stop and check before asking them to pay again. A buyer's concern about a duplicate payment deserves a proper answer even when there is a line behind them.
Keep the checkout area usable for people who need more time or assistance. Ask how you can help rather than assuming they can hold a phone, reach over a barrier or read a small screen in bright light. Apple's Tap to Pay interface guidance describes the payment presentation. Your team still decides how to position the device and talk someone through the purchase in the actual venue.
At handover, make sure the next seller knows which phone and account they should use and whether an unresolved transaction needs a supervisor. At the end of a shift, follow your access and device-return arrangements. These are ordinary operating habits, but they matter when temporary staff, personal phones and busy selling points are involved.
Use the supported app and the staff member's appropriate event access.
Keep card information out of personal messages, notes and photographs.
Resolve an uncertain payment status before starting another charge.
Brief the team on what to do when a payment is uncertain before the first buyer arrives.
Tap to Pay questions
What is Tap to Pay for events?
It lets an event seller accept a contactless card or mobile-wallet payment using a compatible phone. In Loopyah, the current feature is called In-person Checkout. The help guide describes using it for ticket purchases at the door, and the current ticketing page also describes merch, drinks and extras. It gives you a way to place payment at an appropriate selling point without adding a separate reader.
Can I accept contactless payments without a card reader?
Yes, with a compatible phone and a supported payment setup. Loopyah's current pages describe iPhone and Android support. Check the device and account you will actually use before announcing it as an available payment option. A buyer's ability to pay with a wallet online doesn't establish that every staff device can accept an in-person tap.
Is Tap to Pay secure for my guests?
Apple documents encryption and Secure Element processing for Tap to Pay on iPhone. Your payment provider can explain the security requirements of the setup you're using. Staff should still follow the app's instructions, protect their account access and escalate unusual payment behaviour. When a buyer asks about an uncertain payment, check its status through the app or your supervisor before telling them what happens next.
Which phones can I use with In-Person Checkout?
Use a phone supported by the current Loopyah app and payment setup in your country. Confirm the model, software and account during preparation, then test the exact devices assigned to the event. Verify compatibility before buying equipment, including any proposed tablet. If a device fails the test, arrange another supported device before including it in the staffing plan.
Can I take payments when connectivity drops?
Ask Loopyah which payment functions remain available if connectivity drops, and plan for the answer before show day. Test at the actual venue and agree what staff should do if the app cannot confirm a payment. Don't treat a buyer's tap, a pending status or a screenshot as a completed sale without checking the approved workflow.
What happens if a guest wants a refund?
Check the current process for the particular purchase, and tell staff who can handle it. A ticket refund policy and a return request for merchandise are different operational questions. You shouldn't assume that a ticket's self-service refund settings govern everything sold at the event. Keep enough purchase information to route the question to the responsible person, and verify the transaction before taking action.
Measure the operation you actually ran
Start with a decision you need to make. Should another seller join the merch table after the main set? Should walk-up buyers use a different desk? Are guests returning because they can't find the ticket they just bought? Each question calls for different evidence. Use the records available in your setup and direct observation of the selling point together.
Loopyah's sales tracking guide explains its event sales views. Use the relevant information to understand the ticket business, while checking the reporting available for the particular in-person workflow you plan to run. Don't assume that a ticket-sales view includes stock tracking, a map of buyer locations or staff-by-staff performance for every type of sale.
During the event, a supervisor can note where buyers wait and what they are waiting for without asking sellers to stop serving. Record the time and the specific issue: payment awaiting a result, a price question, a search for stock, or a buyer redirected to another desk. Short, concrete observations are easier to act on than a general report that the checkout is slow.
Afterwards, compare what you observed with the sales and staffing records you have. Include the event schedule. A quiet station during the headline act may be perfectly normal, while a busy station at the end may be serving demand that was always going to arrive then. Comparing those periods as though the payment device caused the difference will lead you to the wrong conclusion.
Ask staff what interrupted them, and check unresolved customer questions. A seller may have completed plenty of transactions but spent the whole shift correcting unclear signs. A new phone may have been unused because nobody told buyers about the additional checkout. Those details give you something practical to improve before the next show.
If you're comparing events, account for changes in attendance, what you sold and the time people had to buy. A larger crowd can produce more sales even when service is worse. Keep your conclusion proportionate: you might establish that the additional station reduced visible waiting at a particular rush, while still lacking enough information to claim that it increased total spending.
Compare completed purchases with the staff and selling time used to serve them.
Review payment problems separately from stock, admission and customer-service problems.
Check the amount left after relevant costs before expanding a temporary selling point.
Choose one change for the next event and make sure the team understands it.
Your checkout plan also depends on the wider sales plan. Our guide to ticket pricing strategies can help you decide what you're charging. For the work before doors open, see how to sell more tickets for an event.
If you are reviewing the rest of your promotion setup, our guide to essential event marketing tools covers the wider marketing workflow.
How to set up In-Person Checkout in Loopyah
Follow the current app guide, then rehearse the full buyer journey. Don't leave account setup and device checks until the first walk-up buyer is in front of you. The published steps for ticket sales are:
Download the Loopyah mobile app from the App Store or Google Play.
Open the event page and tap More options.
Select In-person Checkout.
Follow the current setup and payment prompts shown in the app.
Let the attendee tap their card or phone to pay. The guide says the ticket is issued instantly.
Before the doors open
Check the event and offer on each device. A seller working several dates needs to know they're taking payment for the right show. Confirm the ticket options or goods the shift is meant to sell, the displayed price and the process for anything that becomes unavailable. Where you have a separate admission or collection team, involve them in the rehearsal.
Next, test in the place where the sale will happen. An empty venue check can't reproduce every condition of a full room, but it can reveal a bad location, a sign that nobody can read or a device that isn't ready. Confirm connectivity with the venue and identify who can respond if it becomes unreliable. Keep your fallback within the payment methods and procedures that are actually supported for your event.
Use a short staff briefing that covers the normal purchase and the exceptions. The seller should be able to explain what the buyer is paying for, show the total, recognize the confirmed result and tell the buyer what happens next. Then rehearse an unsuccessful attempt, an uncertain status and a request for help. These moments create pressure during a rush, so work through the wording while there's time.
You might tell staff: "If payment is confirmed, complete the handover for that purchase. If the result is uncertain, ask the supervisor to check it before trying again." Adapt that instruction to the current app and the event's procedure. A clear instruction is easier to follow than telling temporary staff to use their judgment about whether someone has probably paid.
Consider the buyer who doesn't have the payment method your station accepts. Decide which supported alternative or service point you can offer, and communicate that before they reach the front of the queue. Your signs should describe the options you have, without suggesting that every card, wallet or device will always work. Let people ask for assistance without having to explain their circumstances to a queue.
During the shift
Keep someone responsible for checkout who can answer questions and authorize the appropriate next step. Sellers should know how to reach them, especially if a mobile station is away from the main desk. If that person leaves for a break, tell the team who is covering. A contact name in an old briefing isn't much help if that person is now handling a production problem elsewhere.
When a queue forms, look at what the next few buyers need before moving staff. If they are ready to pay and goods are ready to hand over, another prepared seller may help. If the delay is a stock search, send someone who can retrieve the items. At the entrance, avoid moving a check-in worker to sales if it simply creates a longer line of people who already bought tickets.
Keep price changes and unavailable offers consistent across signs and staff instructions. A buyer shouldn't reach the phone with one price in mind and discover another total. If something changes during the show, make sure the people explaining the offer know before they make another sale. Where an offer has conditions, say them before taking payment, when the buyer can still decide.
After the final sale
Give staff time to hand over unresolved matters before they leave. Note the purchase or issue through your approved process, what the buyer was told, and who is responsible for the next action. Don't turn a rushed end-of-shift conversation into a customer question that nobody owns the next morning.
Reconcile the available payment and sales records with your event's process, including refunds or corrections that need attention. For goods, involve the person responsible for stock and any vendor settlement. For tickets, confirm the event's normal close-out steps. These jobs are related, but a payment total alone doesn't complete either one.
Finally, make a decision about the next event while the details are fresh. Keep the station if it served a clear need at a sensible cost. Change its location or staffing if the purchase stalled elsewhere. If it added work without improving service or leaving enough money after costs, use the phone where it can solve a more useful problem next time.
If you're planning ticketing and the rest of the event together, our event software overview explains the wider platform. Start with the checkout workflow your team can rehearse and run confidently.
Launch Your Next EventFor your next event, choose the selling point where payment is causing a real delay. Prepare the phone and the person using it, then follow one purchase from the buyer's first question to their ticket or goods. Once that works comfortably, decide whether another checkout point would help. That gives you a practical reason to expand, backed by what your team can actually deliver.

Author: By the Loopyah Content Team
The Loopyah Content Team shares expert insights, practical guides, and industry updates to help event organizers create unforgettable experiences and stay ahead in the event planning world.