· 28 min read
How to run a paid beginner electronics workshop
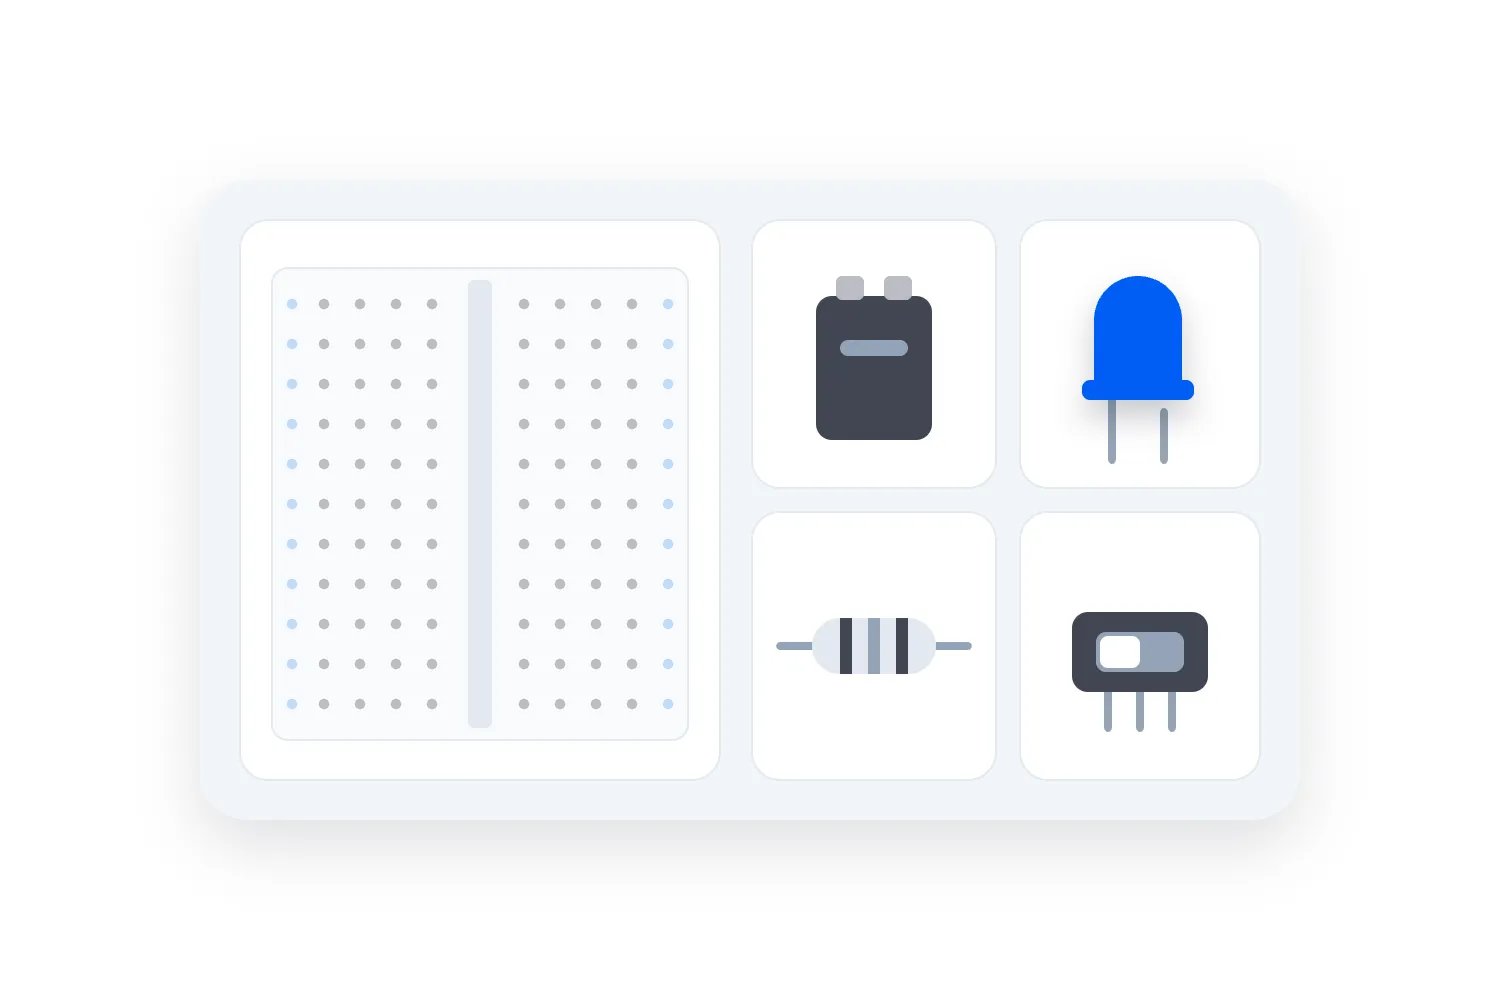
You've got a room, an instructor and a project that looks simple enough. Put a few components on a board, connect the battery and watch the light come on. Then you try it with a beginner. They put the right part in the wrong hole, the light stays off, and suddenly your three-hour workshop needs a lot more individual help than you expected.
That's the part to organise before you sell tickets. Choose a small circuit people can build and explain, prepare the components so they match the instructions, and rehearse what happens when several learners need help together. Price the support that takes. A cheap kit doesn't make a cheap class if your instructor spends the afternoon repairing everyone's work.
For a first paid beginner electronics workshop, I'd start without soldering. A breadboard, the board that lets you connect components by pushing their legs into holes, gives learners room to make changes and try again. You can teach a useful first lesson without adding hot tools to every table. If soldering is the skill you're selling, plan a separate offer around that skill and its supervision requirements.
We'll use an invented adult workshop throughout this guide. Eight people attend a three-hour session, each building a battery-powered light with a switch on a solderless breadboard. They practise finding a loose connection, explain how their circuit works and take the kit home. The class size, timings and USD budget are planning examples, not tested capacity recommendations, supplier quotes or market rates.
Choose a result a beginner can recognise
Start with what someone can do at the end. "Understand electronics" leaves you with an almost unlimited lesson. "Build a small light, explain the route through the circuit and find a broken connection" gives the instructor something they can teach and check within the time you've sold.
Our example uses a light-emitting diode, usually called an LED, a suitable resistor, prepared connecting wires, a switch and an enclosed battery holder. The resistor limits current through the LED. The instructor selects a compatible set of parts and power source, using the manufacturers' information, then validates the complete project. The organiser's job is to buy that specified combination, rather than substitute whatever looks similar online.
Adafruit's introduction to LEDs and resistors explains why an LED's direction matters and why it needs a suitable current-limiting resistor. That's enough technical context to understand an important purchasing decision. Different-looking components aren't necessarily interchangeable, even when they fit the same holes.
Choose a project with a visible result and a small number of assembly decisions. Beginners should be able to tell whether the light changes when they operate the switch. A project that needs software installation, wireless pairing and an online account gives you several additional ways to lose teaching time before you reach the circuit itself.
Those can all be valid workshop subjects. They just need to be deliberate. If your intended buyer wants to program a small controller, include programming and price the device support. Our beginner coding workshop guide covers that separate preparation problem. For this first electronics session, leaving laptops out keeps the lesson focused on physical connections.
Define the finished object honestly. A breadboard circuit is a learning assembly with exposed components and removable wires. It isn't a certified household product, a durable bedside lamp or something you should advertise for unsupervised use by young children. Show buyers the kind of project they'll make and explain what they can sensibly do with it afterwards.
Make completion mean more than copying. The learner should be able to disconnect the power, identify a connection from the instructions, make an approved change and show what happened. You don't need a formal examination. You do need a way to distinguish someone who followed a picture from someone who can repeat the basic action at home.
Decide whether soldering belongs in this ticket
Soldering joins components using heated solder. It's a valuable skill, but it changes the room, equipment, teaching and health arrangements. Don't add it because a permanent object sounds more impressive on the event page. Add it when learning that process is part of the result people are paying for.
The Health and Safety Executive's guidance for solderers, for Great Britain, identifies rosin-based solder flux fume as a cause of occupational asthma and describes exposure controls, including extraction. Check the materials and controls with someone competent to assess the actual activity. A small fan on a table doesn't establish that your proposed setup is suitable.
For our example, there is no soldering, including no casual demonstration in the corner. All connections use the selected breadboard and prepared parts. That keeps the advertised experience consistent with the equipment and staff plan. A buyer isn't unexpectedly asked to use a hot tool halfway through a session sold as a simple introduction.
If you choose a soldering workshop, work backwards from the supervised practice each person receives. Count suitable stations, allow time for instruction and assessment before use, and decide who can watch learners while another instructor explains a joint. Include appropriate work surfaces, tool stands, extraction, materials, cleaning and emergency arrangements in the operating cost.
You may find that a smaller class at a higher price is the workable offer. That's a useful finding. The wrong response is to buy fewer stations, sell the same number of tickets and hope people are happy watching. Shared equipment can work, but the ticket needs to describe sharing, and the schedule needs to give each learner the promised practice.
Keep the beginner session within clear equipment boundaries. Our class doesn't open mains-powered appliances, repair chargers, build battery packs or let participants bring unknown equipment for diagnosis. Those jobs create different technical and safety responsibilities. A curious attendee can still ask a question without turning their household repair into an unplanned activity.
Write those boundaries into the instructor brief and the buyer information. If someone arrives expecting to fix a broken amplifier, you should be able to explain what this session covers before they spread parts across the table. Better still, make the offer clear enough that they can choose the right event before paying.
Rehearse the difficult parts with someone who is new
An expert can assemble the example circuit quickly because they already know which holes are connected, which way the LED goes and what a loose wire looks like. Their build time doesn't tell you how long the lesson takes. Test the instructions with an adult who resembles your intended buyer.
Pay for this rehearsal as preparation. Use a kit from the batch you plan to teach with, the actual handout and the proposed table layout. Ask the tester to explain what they think each instruction means. Don't quietly point to the correct hole and then record that they completed the step independently.
Watch for the first uncertainty. Perhaps the picture shows a board turned sideways, the resistor label uses a term you haven't introduced, or a switch has more legs than the learner expects. Fix the instruction and repeat that part. Another paragraph of theory won't help someone who can't match the object in their hand to the object on the page.
Record the time spent receiving help as well as the time spent assembling. For an illustrative rehearsal, suppose four learners need four minutes of individual help during the same exercise. One available helper needs sixteen minutes to work through those requests, before walking between places or dealing with anything else. That isn't a prediction of failure rates. It's a useful way to expose a queue your running order might otherwise ignore.
Now ask what the other learners do during that wait. Can they check an earlier connection against their worksheet? Is there an approved independent task? Does the instructor need to pause because the next demonstration depends on everyone reaching the same point? Your response should preserve participation without asking beginners to make unapproved electrical changes while help is busy.
With several testers, try a shared problem too. Give them an instruction with an ambiguous board orientation and see whether the assistant notices the same mistake appearing around the room. When several people misunderstand the same step, correcting the instruction for everyone may be better than repeating private explanations at every seat.
Keep the core project small enough that the rehearsal includes the ending. The learner needs time to demonstrate the switch, describe a connection, pack the kit and understand the take-home instructions. If those steps don't fit, remove an optional extension. Don't assume that your first paying class will somehow move faster than the test.
Turn the component list into kits you can trust
Once the instructor has approved the project, make a purchasing list that another person can follow. Include exact component references, quantities, board type, battery holder, approved batteries, switch and wire types. Record which substitutions need the instructor's approval. A supplier changing the switch can change both the instructions and the troubleshooting plan.
Order early enough to inspect the delivery and replace a problem batch. Check the actual items against the list before packing. If the instructions show one board layout but the shipment contains another, correct the materials and repeat the relevant checks. Don't leave the assistant to explain a substitution individually as people arrive.
Adafruit's breadboard guide explains the internal connections and notes that some power rails are split. Rails are the long connected rows used to distribute power. Have the instructor check the supplied boards rather than assume that a coloured line proves a continuous connection. Your worksheet should match the actual board.
Prepare one numbered tray per learner. Our example needs eight attendee kits and two complete spare kits. Keep the spares at the support table so a helper can replace a suspect item promptly. Two spares are a chosen provision for this fictional session, not evidence that a particular proportion of electronics kits will fail.
Use labels that help a beginner find the next part. A component code from the supplier may be useful in your stock record but incomprehensible on the table. Match the tray labels to the lesson, and include the manufacturer's identification where the instructor needs it. Keep original packaging and specifications available to staff.
Test the components by the instructor's agreed method, then check the packed kit against its list. A working demonstration circuit doesn't prove that every battery holder, wire or board in the delivery works. Nor does checking one component prove the whole assembled exercise is correct. Separate the batch inspection, component checks and complete project test.
Avoid unnecessary cutting and stripping during the first lesson. If preparing wires isn't a learning objective, supply suitable prepared wires. That removes another tool, another explanation and another source of variation. If wire preparation is part of a different class, include the tools, instruction, handling and cleanup it needs.
Keep a short kit record with enough detail to trace a problem. For this workshop, it could contain the following fields:
Kit number and the person who packed it.
Approved project and instruction version.
Component references and quantities, including the specified battery arrangement.
Date of the component checks and the staff member responsible.
Any approved substitution and the matching instruction change.
Missing, replaced or quarantined items before the next use.
Suppose a delivery contains a switch with a different pin arrangement. The purchasing assistant marks the difference and holds those kits back. The instructor either rejects the substitute or approves it after checking the revised circuit and instructions. Only then does packing resume. That small process prevents a purchasing decision becoming eight unexplained assembly problems during paid teaching time.
Make a final count before loading the vehicle. Eight assembled bags on a shelf can still be missing the same item. Assign someone to check the packing, keep the master list with the instructor's kit and carry the current instructions. A spare battery holder in a different box is only useful if the assistant knows where it is.
Give each learner a working place and an understandable view
Seat the class around the work they will do. Everyone needs enough table space for their tray, worksheet and circuit, with room for a helper to approach. A room advertised for twenty seated guests might be uncomfortable for eight people spreading small components out while someone teaches.
Test the demonstration view from the actual seats. A tiny component held between fingers disappears at a distance. A suitable overhead camera can help, but you still need clear spoken explanations and a way for learners to inspect their own instructions. Practise connecting the camera and display before the paid session.
Use consistent orientation. Put a visible reference mark on the demonstration board and use the same orientation in the worksheet. When the instructor says "the upper row," everyone should know which way the board faces. If the live view is mirrored or rotated, fix that before learners begin copying the wrong relationship.
W3C's accessible event checklist recommends planning participation support and making suitable materials available. For a practical class, ask about the actual activity as well as the route into the venue. Discuss what would help someone handle components, read instructions, follow a demonstration or take breaks, then agree the arrangement privately.
Don't make colour the only identifier. Label components and connection points in words or numbers, explain positions aloud and provide readable materials. Someone who can't distinguish a wire's colour should still have another way to follow the lesson. Test adaptations with the person using them rather than assuming an enlarged worksheet settles everything.
Plan how support changes the work. A participant may want a stabilising holder, more time or assistance positioning a component. Agree which actions they want to do themselves and how the helper will assist. Selling a hands-on class means taking participation seriously, including when it looks different for different learners.
Keep drinks and food away from the component area, provide a separate place for bags and confirm the venue's emergency arrangements. Check the lighting at table height, not just the brightness of the room from the doorway. You need to see small parts without creating glare that makes the instructions difficult to read.
Our example is for adults. A children's electronics workshop needs its own age-appropriate project, supervision, safeguarding, consent and collection plan. Don't copy the adult event page, lower the age and assume the same staffing works. Decide what that separate offer requires before putting it on sale.
Agree the power and tool rules before the first connection
Have the instructor approve the exact power source and the way it connects to the circuit. For our example, learners use the specified enclosed holder and ordinary replaceable batteries, with no loose lithium cells, charging activity or mains connection to their projects. Batteries still need suitable handling and protection against incorrect connections.
The Health and Safety Executive's electrical safety questions explain that inspection and testing should reflect the equipment and its risks. That guidance applies in Great Britain. Agree the relevant checks for your location and setup with the responsible person, including any display, chargers or tools used by staff. A battery-powered lesson doesn't remove the venue's other electrical equipment.
Before learners connect power, ask them to stop and let a competent member of the teaching team check the assembly. Explain that they disconnect power before moving components. Give them a plain instruction for anything unexpected, such as heat, smell or a damaged holder. Stop using the item and call the instructor rather than trying random changes.
Keep diagnostic tools under the teaching plan. A multimeter measures electrical quantities and can help an instructor find a fault. It can also be confusing when the leads are in the wrong sockets or the wrong function is selected. In this first workshop, staff perform the diagnostic measurements. A separate measurement lesson would need time to teach and supervise that skill.
Show the assistant which items they can replace and which problems need the lead instructor. A loose approved jumper wire is different from a battery holder that becomes hot. The assistant shouldn't improvise a repair to keep the timetable moving. Put suspect equipment aside and use the agreed replacement or stop the activity.
Protect time for the first power check. If all eight people finish assembling together, the team needs a way to check each circuit without a rushed crowd forming around the demonstration table. Keep learners at their places and let staff circulate. Use the rehearsal to see whether the time you've allowed is realistic.
These are operating decisions to settle with a competent instructor, venue and any relevant adviser. The organiser doesn't need to become an electronics engineer. You do need to know who approved the setup, who checks it on the day and what happens when a condition changes.
Teach troubleshooting without taking over the project
The first light that doesn't come on is part of the lesson. What matters is whether the learner gets a useful explanation and a way to continue. An instructor silently rewiring the whole board may finish the object while leaving the person no clearer about what happened.
Prepare a short sequence of checks that matches the approved circuit. Start with the power disconnected. Ask the learner to compare the assembly with the current step, identify the intended connection and explain what they expect it to do. Staff can then check the relevant part and reconnect power only under the agreed procedure.
Use ordinary descriptions before technical names. "These two legs are in holes that are already connected inside the board" is easier to act on than announcing that someone has created the wrong circuit configuration. Once they understand the relationship, the instructor can introduce the term that helps them describe it.
Prepare a few deliberate, harmless teaching faults in separate demonstration assemblies. An unplugged approved wire is enough to practise following a connection. Don't create live shorts, remove protective components or encourage learners to cause damaging faults for entertainment. The instructor should select and rehearse every demonstration.
Keep a known-working example at the support table. Staff can use approved replacement parts to distinguish an assembly mistake from a faulty component. Replace one suspect item at a time where appropriate and record what resolved the problem. Swapping everything can get the light on without telling you whether the original kit or the instructions need changing.
Tell learners how to ask for help without crowding the instructor. A simple numbered card or an agreed raised-hand system can work. The assistant checks the queue while the lead teacher keeps the room informed. Don't promise instant individual attention when one person is responsible for several waiting learners.
Give confident participants an extension that doesn't change the common circuit or power arrangements. They might label the route through their circuit or explain the switch to a partner. Keep physical modifications within the approved lesson. A faster learner shouldn't accidentally turn the class into several different projects requiring new parts and private tuition.
Agree when to drop the optional exercise. If several people are still completing the core build, drop the optional exercise and help them finish the promised result. Tell the room what changes. That is easier to defend than racing through extra material while paid beginners remain unable to operate their first circuit.
Calculate the price around teaching capacity
You now have a tested project, a kit list and a staffing plan. Use those to calculate the minimum income the session needs. Don't start with the cheapest local workshop and then squeeze preparation into whatever remains. You may be selling a different level of individual support and a different take-home kit.
Here is an invented first-session budget in USD. Allow $360 for the instructor, including agreed preparation, rehearsal, teaching and follow-up. Allow $240 for the assistant's procurement checks, packing, classroom support and reset. Venue and equipment access costs $180, including the tables, display, overhead camera, staff diagnostic tools and instructor's reusable demonstration kit used in this example. Promotion costs $80 and organiser administration $100. Add an $80 recovery provision. These fixed allowances total $1,040.
The recovery provision funds two complete $25 spare kits and another $30 for approved replacement supplies or related costs. That is a budgeting choice, not a predicted failure rate. Keep the spare kits separate from the attendee kits. We charge their purchase to this first-session budget even if they remain usable afterwards. The allowance is included once in the fixed total, so you don't add those spare purchases again below.
Each attendee receives a $25 kit, including packing materials and supplier delivery. The assistant's packing labour is already in the fixed allowance. Assume each full-price ticket leaves $165 after the ticket-related deductions you've allowed for. That retained amount is invented for the example. Work out your actual public price, fees, applicable taxes and other deductions separately.
Each paid place then contributes $140 towards the fixed costs. Six paid places contribute $840 and leave a $200 loss. Seven contribute $980 and leave a $60 loss. Eight contribute $1,120 and leave $80 after the fixed allowances. Under these assumptions, you need eight paid places to cover the planned session.
That's a small surplus. Another $100 of staff time takes the eight-person result to a $20 loss. If you keep eight attendees but give one place away, seven tickets leave $1,155, eight attendee kits cost $200 and the fixed allowances remain $1,040. The result is an $85 loss. A complimentary learner still uses a kit and teaching capacity.
Use those alternatives separately. They aren't additional costs to stack together unless you actually make both decisions. Likewise, the full recovery allowance is already included. Reconcile actual spending afterwards, but don't spend the planned $80 surplus before you know whether extra assistance or replacements have used it.
Our paid workshop pricing guide develops the wider price decision. Here, the difficult question is whether eight people can receive the support you've sold. If rehearsal says six is the workable teaching limit, change the price, project or costs. Adding seats to rescue the spreadsheet can create a class you can't deliver.
Check the cash commitment and materials terms
A profitable plan can still require money before ticket receipts are available. List the orders and deposits by their actual payment dates. In our example, buying eight attendee kits and two spares costs $250. A $90 venue deposit, included in the $180 venue allowance, plus $80 promotion brings those early payments to $420.
That $420 is part of the costs already described, not an extra cost to add to the budget. You need to fund it at the time it's due. Check the supplier's delivery date, return conditions and how long any refund would take. Don't assume all unsold kits can be returned because the components are unopened.
There's a distinction between kits used in a class and kits bought for it. The six-person result above charges six attendee kits to the session. If you bought all eight in advance and keep the two unused kits, another $50 remains tied up in stock. You must fund that purchase even though the six-person operating calculation charges only the kits issued to learners.
Record that stock honestly. It may be useful for the next class, but it hasn't paid a bill or become ticket income. Check its condition and whether the next project will use the same parts. Repeatedly ordering a new kit design can leave you holding material you never recover through sales.
Tell buyers what the ticket includes. For this example, every paid place includes the specified take-home kit and use of the classroom tools. There is no compulsory purchase at the table. Our guide to workshop materials charges explains the broader choice between including materials and charging separately. Whichever you choose, disclose the complete required purchase before booking.
Set a sales decision date before the commitments you can still change become due. Calculate the cost of proceeding and the cost of cancellation using your actual agreements, including payments that won't be returned. Don't treat a smaller class as cheaper when you've already paid for the room, staff and full kit order.
If you're deliberately funding a first-session test, put a limit on that investment and name what you want to learn. You might be testing whether adults will pay for individual support with a complete kit. A future advanced class is possible income, not a reason to describe this session's loss as profit.
Write the event page for a nervous first-time learner
The buyer needs enough detail to judge whether the session suits them. They may be interested in electronics and still worry about being the only person who has never held a component. Explain the starting point, the project and the help available without making the learning sound effortless.
A useful opening description for our example would say: "Build a small battery-powered light in a guided adult beginner workshop. You'll connect prepared components on a solderless breadboard, practise checking a connection and take your kit home. No electronics or coding experience is needed. We supply the project materials, and staff check the circuit before you connect power."
Then add the practical limits. Explain that there is no soldering, no appliance repair and no programming in this session. State whether learners work individually or share, what stays at the venue and what goes home. Buyers shouldn't need to infer those details from a photograph of the instructor's tools.
Loopyah's ticket-selling tools let you set ticket types and quantities. Use the booking quantities that fit the tested teaching plan. An early release at a different price doesn't create extra equipment or assistance, so account for every release within the same planned total.
Give the remaining information in a form people can scan:
The intended audience, minimum age and any skills assumed.
Teaching hours, arrival time, venue location and access contact.
The project, take-home contents and any equipment participants must bring.
How individual help works and whether any activities involve shared equipment.
The complete price, cancellation arrangements and what happens if you change the session.
The scope and end date of any help offered after the workshop.
Use an image of the actual beginner result when you have one, clearly identified as an example. Don't sell the session with a sophisticated finished device that no attendee will make. The instructor's professional work can establish their knowledge, but it doesn't replace an accurate picture of the experience you're selling.
Make the contact for questions easy to find. If several people ask whether they need a laptop, put the answer before the booking decision. Repeated uncertainty is useful feedback about your description. You can fix it before paying to send more people to the same unclear page.
Show what the paid teaching adds
Free electronics instructions are easy to find. You don't need to pretend your circuit is a secret to explain the ticket's value. The buyer gets a checked set of parts, a planned lesson, help with assembly and a chance to practise finding a problem while someone can explain it. Show those parts of the experience in your promotion.
Ask the instructor to demonstrate a simple teaching moment. They could show an unpowered board, explain which holes are connected and describe how they would help a learner check a wire. Keep the demonstration within the approved setup. A fast montage of finished lights may look lively, but it doesn't tell a nervous adult whether they'll be able to follow the teaching.
Start with people who fit the project. An adult-learning venue, local maker community or the instructor's existing audience may help you reach curious beginners. Give any partner the actual prerequisites and take-home promise. If they describe the session as appliance repair or programming, correct that description before their audience starts booking.
Watch the questions and the bookings together. Interest from people who want advanced soldering isn't evidence that this beginner class has the right offer. You might discover a different future audience, but don't change the project after buyers have paid without assessing and communicating the consequences. For this date, make the explanation clearer and judge sales against the budget and decision date you've already set.
Protect the build, the break and the final check
Our illustrative workshop runs from 10 am to 1 pm. Staff setup, arrivals and clearing the venue happen outside those teaching hours and are included in the relevant work and venue allowances. Rehearse this running order with your actual instructor and project rather than treating it as a standard schedule.
10:00 to 10:15: welcome, explain the finished result and demonstrate the power and help rules.
10:15 to 10:35: identify the prepared components and practise recognising the breadboard connections.
10:35 to 11:10: assemble the first stage with power disconnected and check each learner's progress.
11:10 to 11:25: take a break with projects disconnected and components contained.
11:25 to 12:00: finish the approved circuit, complete staff checks and test the light and switch.
12:00 to 12:25: practise the approved troubleshooting exercise and finish unresolved core work.
12:25 to 12:45: let each learner explain and demonstrate the promised result.
12:45 to 13:00: disconnect, pack the kit and explain the take-home instructions and follow-up.
That is 180 minutes, including a fifteen-minute break. The ending has protected time because a working circuit loose in a bag isn't a satisfactory handover. Learners need to know what to disconnect, how to contain the parts and how to repeat the exercise using the written instructions.
Agree who handles a late arrival. They may need the opening explanation before touching the project, so provide a defined route to join safely without asking the lead instructor to restart the class. If someone misses too much to participate meaningfully, apply the event terms and explain the options you can actually provide.
Give the assistant responsibility for tracking unresolved help requests. A learner who stops asking can be finished, quietly confused or embarrassed about needing more help. Ask to see the current step rather than judging by whether the table looks busy. If several people are stuck, slow the common exercise and remove optional content.
If equipment or staffing fails, assess whether the promised experience remains possible. A spare kit may solve an isolated fault. It doesn't replace an absent competent instructor or make an unsuitable room acceptable. Explain a material change to attendees and use the arrangements relevant to your event and buyers.
Make the take-home kit usable, then decide what to repeat
Check each learner's result before packing. Ask them to demonstrate the switch, identify the approved power connection and explain what they will do before changing components. Keep the discussion encouraging and practical. You're checking whether the lesson has achieved its promise, not trying to catch someone out.
Supply the current component list, assembly instructions, expected result and the agreed troubleshooting sequence. Include the power and storage instructions approved by the instructor, and identify any tools or parts that aren't supplied. Don't send learners home with a link to a much more complicated project and assume it explains today's kit.
Define follow-up tightly enough that someone can deliver it. The instructor might answer questions about the supplied exercise for a stated period. That doesn't include repairing unrelated equipment, designing a new circuit or supporting every component a learner later buys. Put those limits in the offer before purchase and repeat them in the resource message.
Keep a record of the problems that change your next session. Note a missing component, a confusing instruction, a recurring loose connection or a demonstration that took longer than planned. Don't turn every learner's mistake into a personal record. You usually need to know what to improve in the kit and lesson, rather than keep an account of who struggled.
Reconcile the money with the work. Count paid tickets, discounts, refunds, kits issued, usable stock remaining and actual staff time. Separate the spare items you bought from the parts consumed. In our example, an $80 planned surplus leaves little room for unpaid preparation to hide. If the instructor spent longer than agreed, address the scope and payment before announcing another date.
Then choose the next improvement from the evidence. A better worksheet might remove a repeated explanation. More assistant time might be necessary even if the kits cost very little. A higher price might be justified by the support buyers value, but you still need to test whether the intended audience will pay it.
Before you open sales, let a genuine beginner use a kit from your actual batch and work through the whole session. Watch the points where they wait for help, protect time for those explanations and calculate the price again. You're ready to sell when the teaching plan, kit order and budget describe the same workshop.

Author: By the Loopyah Content Team
The Loopyah Content Team shares expert insights, practical guides, and industry updates to help event organizers create unforgettable experiences and stay ahead in the event planning world.