· 28 min read
Guide to Creating a Facebook Event: Everything You Need To Know
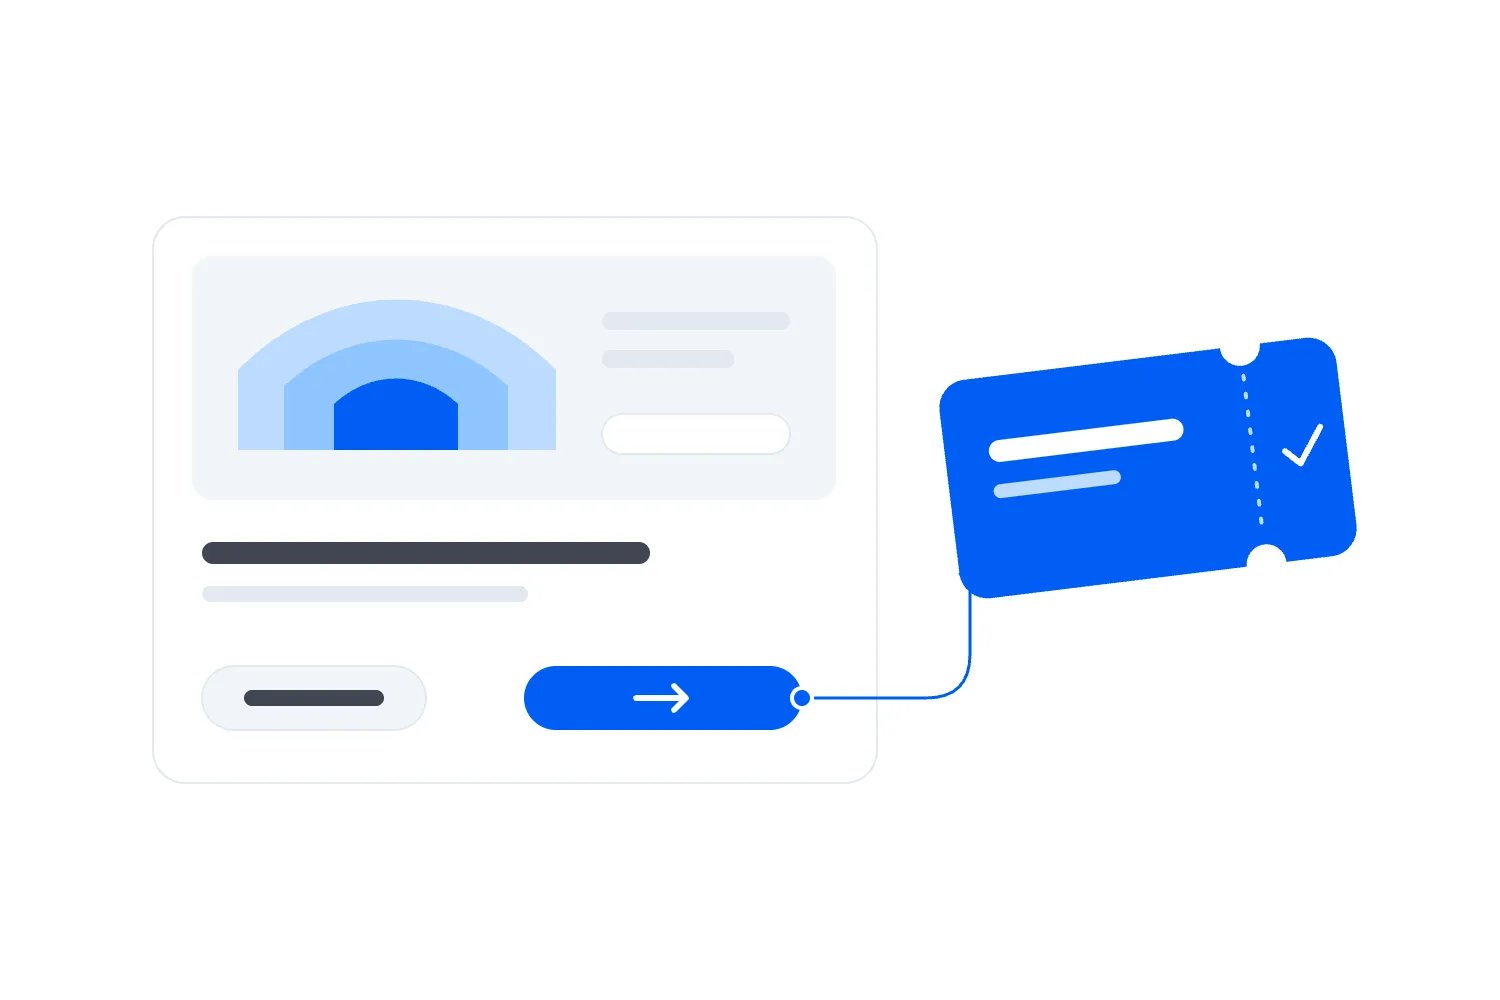
To create a Facebook event for your event business, switch into the Facebook Page that will host it, open Events, select Create new event, and add your date, location, description, cover and ticket link. Check the public preview before publishing. Facebook's labels vary between desktop and mobile, but the important decisions are the same: who hosts it, what you're selling, and where someone completes their purchase.
If you're running a paid show, workshop or festival, the event page has a specific job. It should help someone understand the experience and get to the right tickets. An "Interested" response can be useful, but it doesn't reserve a seat, collect payment or tell your door team who has bought admission.
This guide walks you through the setup, the details worth checking before launch, and the promotion work that follows. We'll also cover the problems that tend to appear later, including missing creation controls, co-host requests, wrong map pins and an event that attracts responses without selling enough tickets.
For historical context, Pew Research Center's 2024 report documents Facebook's broad use among US adults. Broad platform use alone doesn't show whether your customers use Facebook Events, so judge this channel against your own audience and ticket sales.
Why use Facebook Events for a paid event?
Facebook can be worth using when your audience already looks there for local events or shares plans with friends. That is a reason to test it against your sales, rather than assume that every event needs the same marketing mix.
In Loopyah's Event Attendee Insights survey, 264 of 500 US respondents selected Facebook among the platforms that most influenced their decision to attend events. The question allowed up to three selections. The chart compares the five most-selected answers using raw respondent shares, so its bars do not add to 100%.
| Label | Respondents (%) |
|---|---|
| 52.8 | |
| Google Search | 40.6 |
| YouTube | 39.2 |
| 37.6 | |
| TikTok | 30.6 |
Source: Loopyah Event Attendee Insights Report, Q17. Pollfish surveyed 500 people in the US on November 11, 2025. These are unweighted selections about influence, not measured ticket sales, a Facebook Events usage rate or a prediction for your audience. The sample includes people with different attendance habits, including some who reported no live events in the previous year.
The useful question for your event is whether Facebook helps people make a decision they then complete at checkout. A comedy club might use the discussion to answer questions about seating. A paid food festival might explain what admission covers before someone assumes tastings are included. Both can use an event page, but the reason someone hesitates will be different.
There's also a practical advantage to having one event link that your venue, performers and customers can share. It reduces the chance of several separate announcements circulating with different times or old ticket prices. You still need to keep that information current. Facebook controls distribution, and a post on the event page is no guarantee that everyone who responded will see it.
How to create an event on Facebook
Step 1: Switch into the right Page and open Events
The first thing you want to do is confirm which Page should appear as the host. For an ongoing event business, that will usually be your event brand or venue Page. Starting from a staff member's personal profile can create confusion when that person stops managing the show or when a partner tries to find the official listing.
On desktop, use the profile selector to switch into the relevant Page. Look for Events in the navigation, sometimes under See more or More, then choose Create new event or Create event. On mobile, start with the Page/profile selector in the Facebook menu, confirm your identity, then look for Events and the creation control. Follow the fields shown in your account; Facebook does not present an identical layout to every Page.
This is different from Meta Events Manager, the advertising tool used for website and app activity data. Opening that tool won't create the public listing your customers need.
Before filling anything in, check that the Page name and image are the ones you intended. If a teammate is preparing the listing, have them confirm their Page access first. Someone who can view a Page or work on one business task may still be unable to create or edit its events.
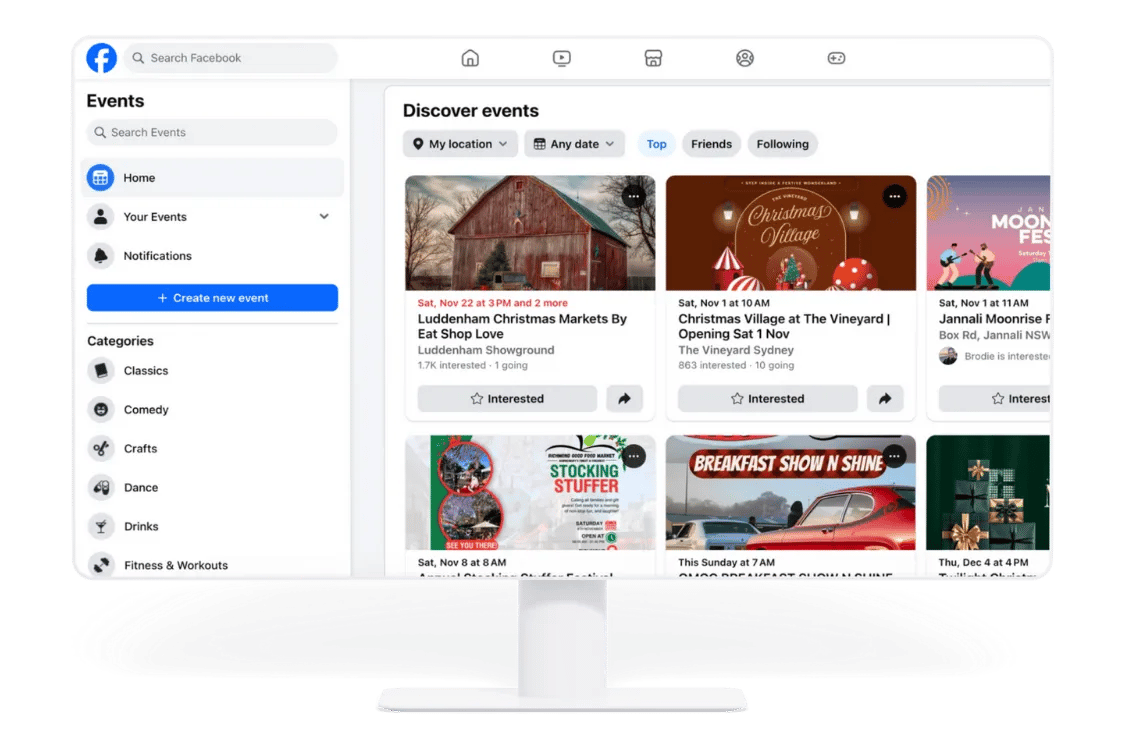
The screenshot above illustrates where an Events control can appear. Treat it as an example of the navigation, rather than a promise that your account will look the same.
If the creation button is missing, work through the likely cause before making a duplicate listing. Confirm that you switched into the correct Page, look in the expanded navigation, and try the current Facebook app or desktop site. Ask the person who manages Page access to check your permissions. If the control still isn't available, use Facebook's event creation help for the options associated with your account.
Keep the ticket page ready while you resolve the Facebook issue. Your event business can continue to share its ticket link through email, your website and partners. Creating several unofficial Facebook events to get around a missing control usually creates more cleanup work, because buyers then have to guess which listing contains the current information.
Step 2: Choose an in-person or virtual event
Choose the in-person or virtual option that matches what the ticket buys. The labels may say Online or Virtual. For an in-person event, the buyer needs a venue. For a virtual event, they need an explanation of how they will get access, whether the session is live, and what happens after they pay.
Be especially clear with hybrid events. A listing that says "live workshop" can mean being in the room or watching a stream. If you're selling both, name the formats in the description and make sure the ticket choices use the same language. Someone who buys online access should not arrive expecting a reserved seat at the venue.
You can promote an online event on Facebook while delivering it through another service. That doesn't mean Facebook handles your paid access. Keep a private attendee joining link separate from the public promotion link if access depends on buying a ticket. Explain when and how the buyer receives it, and test that process with someone outside your organizing account.
If you're planning to broadcast on Facebook Live, check the live options and eligibility available to your Page before promising that delivery method. A rehearsal should test sound, permissions and the viewer's joining experience. It should also establish who posts an update if the stream fails, so the person running the broadcast isn't simultaneously trying to answer every comment.
Step 3: Add the name, date and time
Use a name that helps a stranger recognize the event. Your regular audience may know the name of your monthly night, but someone seeing a friend's share needs more context. "Harbour Sessions: Live Jazz at North Hall" tells them more than "Volume Seven." If the city matters because the same brand tours, include it where it can be seen without opening the full description.
Avoid loading the title with every performer, sponsor, discount and hashtag. The title has to survive small cards and shared previews. Keep the defining act or experience in the first part, then put supporting information in the description. Check the preview rather than treating an arbitrary character count as a guarantee that nothing will be shortened.
Set the date, start time and end time against the booking you have confirmed with the venue or presenters. Then distinguish doors from the start of the performance. "Doors 7pm, show 8pm" answers a different question from a single 7pm start time. It also helps your team write consistent ticket confirmations.
For online events, include the relevant time zone in plain language and test how Facebook displays the time to a viewer elsewhere. Be careful around daylight saving changes. The same local time can correspond to a different time for an overseas buyer after clocks change.
Recurring dates need an extra check. If each occurrence has different performers, inventory or prices, a single broad listing can leave people unsure what they are buying. Decide whether the recurring format offered by your account describes the actual experience clearly. If it doesn't, separate dated listings may be easier to manage and easier for customers to understand.
Step 4: Set the location or joining details
Choose the actual venue and inspect the map pin. Similar business names, an old address or a pin on the wrong side of a large site can all look plausible during setup. Open the location as a customer would and compare it with the entrance your ticket holders should use.
For a theatre or conference venue, name the room. For a festival with several entrances, explain which entrance accepts the ticket being sold. If the public address points to a loading bay, add a clear arrival instruction. You don't need to turn the event description into a transport manual, but someone should be able to tell whether they can get there and arrive on time.
Accessibility details help people make that decision too. Confirm the relevant facts with the venue, such as step-free access, accessible seating arrangements and who can answer a specific access question. Avoid calling a venue "fully accessible" without knowing what that means for the people who will attend. State what you can confirm and provide a contact for anything still unresolved.
For a virtual session, describe the viewer's route after buying. Do they receive a separate email? Will they need an account with the delivery service? Is there a replay, and is it included in the same ticket? Answer those questions before purchase. A public Facebook response should never be presented as proof that someone has paid for a private session.
Check that the ticket page gives the same instructions. If one page says the link arrives immediately and another says it arrives on the morning of the event, buyers have a reasonable reason to contact you. Fixing that contradiction before launch is easier than replying to everyone individually later.
Step 5: Write the description and add co-hosts
Write the opening of the description for the person who has never heard of you. Explain what happens, who it is for and what admission includes. Then make the buying action clear. A description that lists performers but never says whether the ticket includes seating, food or equipment leaves buyers to fill in the gaps themselves.
For a paid tasting event, for example, you might write: "Join a guided introduction to regional wines at North Hall. Your ticket includes the hosted session and the tastings listed below. Food is sold separately. Buy admission using the ticket link; marking Going on Facebook does not reserve a place." This is an illustrative description, not a claim about a real event.
Follow that opening with the details that change a purchase decision: the programme, age restrictions, session duration, access arrangements, and any important conditions. Keep the language consistent with checkout. If the ticket page says general admission, don't promise a reserved table in the Facebook copy.
Add a category if your creation flow offers one, choosing the closest accurate description. Add genuine co-hosts where that option is available, such as the venue or the partner actually producing the event. Confirm any invitation or acceptance steps with them and inspect the live host list afterward. Sending a request doesn't establish that their audience has seen the event.
Agree on responsibilities separately. One partner can answer venue questions while another confirms performer details, but someone should own changes to the date, ticket link and cancellation information. A co-host badge isn't a substitute for agreeing who will do that work.
Add simple campaign labels to your ticket link so you can distinguish visits from the Facebook event from visits from a paid ad or email. These labels are usually called UTM parameters. Google's campaign URL guidance explains how they identify traffic in Analytics.
Use one consistent source, such as facebook, and a medium that describes whether the link is organic social or paid social. Use the same campaign name for the same event. You can use a content label to distinguish the event description from a particular feed post. Keep customer names, email addresses and other personal information out of the link.
Test the final URL, including its labels, on a phone. It should land on the right event and preserve the labels through any redirects. Then check the reports available in your actual ticketing and analytics setup. A tagged visit doesn't automatically establish a completed purchase, and it doesn't by itself connect Facebook response data to your customer records.
Step 6: Upload and preview the cover
Upload a cover that makes the experience recognizable in a small preview. A clear performer image, a useful view of the setting or a legible event graphic can work. The choice should help someone identify this event when a friend shares it. A crowded poster with sponsor logos and tiny programme details usually struggles at that size.
Use the crop and preview shown by your current creation flow to check the file. Keep essential lettering and faces away from the edges, then inspect the result on both a phone and desktop. Event previews can crop the same upload differently, so a dimension written in a guide can't guarantee that every detail remains visible.
If the date is part of the artwork, remember to replace that file when the date changes. Updating the event's time field won't repair the old date embedded in the image. The same problem occurs when an early price remains on the cover after that ticket release closes.
Keep the full sales information in the event text as well. Someone who can't read a small date on a cover still needs to understand when the event happens. If your account offers a video option, preview it before relying on it; otherwise use video in event updates or posts instead of assuming a video cover is supported.
Step 7: Connect the ticket link and test checkout
For a paid event, set up the ticket page before you send people from Facebook. Check that the available ticket types, quantities, prices and sales dates match the description. If there's a dedicated ticket-link field in your event editor, use it and test the resulting button. Also make the purchase requirement clear in the description so someone who only sees that text knows what to do.
Your Facebook responses and your ticket inventory are different records. A person can mark Going without buying, buy several tickets without responding, or share a ticket link with someone who never visits the Facebook page. Plan capacity from valid admissions in your ticketing system, with the relevant guest allocations included. Don't add Facebook responses to paid tickets as if they were separate confirmed guests.
Try the buying route yourself on a phone, starting inside Facebook. Does the event open correctly? Can you find the ticket type you expected? Are the total cost and conditions clear before payment? Check what the buyer receives afterward and whether your staff can recognize that admission at the door. If you use a test or live order, follow your own process for handling it so it doesn't distort inventory.
Loopyah's ticketing tools let you manage ticket types, promo codes and event sales, with a checkout link you can share. That gives Facebook visitors a route to an actual purchase. It doesn't turn a Facebook response into a ticket or automatically import that person's details.
Once someone buys, send the joining and arrival details to the contact associated with their order. Loopyah's email attendees feature supports ticket-holder communications and separately handles promotional audiences. Facebook respondents don't automatically become Loopyah contacts, and marking Going doesn't give you their email address or marketing permission.
Step 8: Check privacy and public information
Check visibility before you publish. Meta's event privacy guidance says that events hosted by a Facebook Page are public and that an event's privacy setting cannot be changed after creation. The privacy choices available to a personal profile or group should not be confused with the options for your business Page.
For a publicly advertised paid show, a public listing will usually match what you're trying to do. That doesn't mean every operational detail belongs there. Keep private joining credentials, staff contact numbers and information intended only for ticket holders out of the public description.
If your event requires controlled admission, enforce it through the ticket or registration process you actually use. A public Facebook listing can promote a paid session while the joining link is sent to valid ticket holders separately. The public listing explains the offer; your admission system decides who has access.
If you've created the wrong kind of listing, stop promoting it while you decide how to correct it. A replacement may be necessary because privacy can't simply be switched later. Make any correction visible wherever the original link was shared, and tell confirmed buyers directly when the change affects them. Deleting a listing without explanation can leave customers wondering whether the event itself was cancelled.
Step 9: Publish and verify the live listing
Before publishing, compare the Facebook listing with the ticket page and the venue booking. Read the date and time aloud, open the map, and follow the ticket link. Ask a teammate who didn't write the listing to explain what the price includes and how they would enter the event. Any disagreement is a useful final edit.
After publishing, copy the live link and inspect it from a normal viewer's perspective, using another account or a teammate where appropriate. The editor can show controls and information that a customer won't see. Check how the title and cover appear in a shared preview as well as on the full event page.
Share the event through the channels where people already expect to hear from you. Ask partners for a specific action and date, rather than assuming a co-host request also commits them to promotion. Send the venue an approved description and the current link. Give a performer the details they need to tell their audience which show they're appearing at.
Make the first updates useful. Explain an important ticket inclusion, introduce the programme, or answer an arrival question. Posting comments simply to make the page look busy creates work without resolving a customer's uncertainty. The same applies to urgency. Announce a deadline when it is real, and only describe tickets as nearly sold out when the available inventory supports it.
If your team uses Hootsuite, its instructions explain creating ad campaigns through Hootsuite.
Connect Facebook promotion with the email messages your audience expects. For a practical plan around the event and the buyer's needs, read our event email marketing strategy.
If you plan several ticket releases, our ticket pricing strategies guide explains the decisions behind them. Make sure Facebook copy changes when a release ends, rather than continuing to advertise a price customers can no longer buy.
How to promote the event without mistaking activity for sales
Build the campaign around the decisions people still need to make. Early on, that may mean explaining the event to people who don't know it. Later, someone may already want to come but need to confirm the price, the start time or whether their friend can join them. Repeating the same announcement throughout the campaign doesn't answer those different questions.
For a ticketed workshop, the first update could show the finished work participants will learn to produce. The next could explain the equipment included, and another could introduce the instructor's relevant experience. Those posts do useful sales work because they help someone judge the session. "Don't miss out" repeated with a new background colour tells them very little.
Coordinate partners and your own channels
Start with the channels where you already have a relevant audience, including your event brand's Page, your venue's audience and customers who have agreed to receive marketing. Keep the date and buying link consistent across the materials you send them. A partner shouldn't need to guess whether an old graphic or the new description is correct.
Adapt the reason for attending to the audience. A venue can explain its atmosphere and arrival arrangements. An instructor can explain who the session suits. You can keep one accurate event listing while letting each partner talk about the part they know best.
Local groups can be useful when their members are interested in the subject, but read the rules before sharing. Group membership isn't permission to post repeated sales messages. A group event is also a different creation route from a Page event. Meta's guide to creating events in Facebook groups describes the group-specific controls and notes that admins can restrict event posts.
Decide what a paid promotion should achieve
Before spending, write down what would make the campaign worthwhile. If you're selling admission, connect the review to paid orders and the money available after delivery costs. A campaign that buys inexpensive event responses can still leave you short of the ticket revenue you need.
Boosting a post may be convenient, but convenience doesn't establish that the available goal matches your sales problem. Review the objectives and reporting available in your ad account, and verify the purchase measurement your checkout supports before relying on a purchase figure. If your setup only measures clicks or responses, describe those results honestly.
Keep an initial test small enough that you can learn without using the budget required for the rest of the campaign. Compare the audience reached, the message shown, visits to the ticket page and recorded orders. There is no universal daily budget or reliable response-to-purchase rate that makes this decision for every event.
Read the gap between responses and purchases
Imagine an event that is getting plenty of Interested responses while ticket sales remain slow. The first thing to check is whether those people can understand the offer and complete the buying route. A missing link, an unexpected fee or a vague ticket inclusion is worth investigating before increasing spend.
If visits are low, review whether your updates make the ticket action visible and whether the people seeing them are likely buyers. If visits are healthy but orders are weak, inspect the ticket page and consider what the comments are telling you. A question about reserved seating may reveal an uncertainty you haven't answered in the listing.
Don't assume that everyone who failed to buy needs a discount. Some may be outside the area, unavailable on the date or only browsing. If the obstacle is unclear information, reducing the price doesn't resolve it. Make one useful change, record when it happened, and compare what follows with the same point in your sales cycle where you have relevant history.
Keep the discussion useful as the date approaches
Choose who checks questions and who covers when that person is unavailable. Respond with the actual detail requested. When several people ask the same question, update the description as well as replying, so the next buyer doesn't have to search through comments.
Remove or report obvious ticket scams under the controls available to you. Tell buyers which link is official and how to contact your team about an order. Avoid asking someone to post their order number, email address or payment details publicly to prove they need help.
If plans change, edit the relevant fields, add a clear update and contact ticket holders through the communication method connected to their orders. A Facebook post alone isn't a reliable way to reach every buyer. For a serious disruption, explain what changed, what customers should do and when you'll provide the next confirmed information.
Plan announcements around when customers need the information and when your team can act on the response. Our event marketing timeline helps you organize those dates around the event, instead of following a fixed launch window that may not suit your sales cycle.
Common setup problems and what to check
You published under the wrong host
Open the live listing and confirm who appears as the host before spending more time on promotion. Check which identity you used to create it and which controls are available now. Don't assume adding your business as a co-host transfers ownership or makes the original creator irrelevant.
If your team decides a replacement is necessary, agree who creates it and how the original link will be handled. Update your website, partner messages and scheduled posts as well as the Facebook announcement. Buyers who already paid need a direct explanation if the change affects their access or where they should find updates.
A partner isn't showing as a co-host
Confirm that you invited the intended Page or person and that they checked their own available invitation controls. Look at the saved event after any acceptance step. Account type, event type and permissions can affect what appears, so don't keep sending the same request without checking which part failed.
A partner can still share the official event link while you resolve the badge. Decide separately whether they need management access. Someone who only agreed to announce your event may not need permission to edit its details.
The ticket link opens the wrong event
Check the exact URL in the event field, description and any scheduled posts. A reused campaign template can retain last month's ticket link even after you've changed the title and cover. Open it on a phone inside Facebook, then inspect the event name, date and available ticket types at the destination.
If your campaign link redirects, confirm that the redirect still points to the current event. Short links are convenient only while someone is responsible for where they go. After correcting the destination, inspect the live page again rather than assuming the editor saved every change.
You're sold out but the listing still says tickets are available
Check the inventory before making the announcement. A sold-out ticket type is different from a sold-out event, especially when several sessions or admission levels are available. Explain precisely which option is unavailable and what valid options remain.
Update any old prices or availability statements in the description and artwork. Keep the official ticket page accurate and use its supported handling for any further availability. Don't send buyers to strangers in the comments because the normal allocation has sold out. Your team should be able to explain the official route without endorsing an unverified resale offer.
The date or venue has changed
Confirm the new arrangement before editing the public listing. Then update Facebook, ticketing information, your own site and the messages your partners are using. Contact affected ticket holders through their order details and explain the options available under the event's terms and applicable requirements.
Keep a record of what your team communicated and when. If an old graphic remains in circulation, a clear current update gives your staff something specific to point to. The work is complete when customers can understand the new arrangement, not merely when one date field has changed.
Three examples of better event descriptions
These are illustrative situations, not customer case studies or measured campaign results. They show how the listing changes when the buyer's decision changes.
For a paid night market, the likely misunderstanding is what admission covers. A clear description distinguishes entry from the food and drinks purchased inside. It names the opening hours, explains any timed entry and says whether children need a ticket. Vendor spotlights can then show what visitors can buy without accidentally suggesting those purchases are included in admission.
For a professional breakfast, a list of prominent speakers may attract attention while leaving the commercial reason to attend unclear. Explain the topic they will discuss and who the session is useful for. State whether breakfast is included, when the discussion starts and when the event ends. Someone fitting it around work needs to know if they can attend the useful part without missing a meeting afterward.
For a paid hybrid workshop, the important distinction is the ticket format. Explain what in-room participants receive and what online participants receive. If materials are only supplied at the venue, say so before purchase. If a replay is included, state who receives it and how access works. An online buyer should not discover after checkout that they need equipment they don't own.
Across these examples, Facebook handles the public listing and conversation while the ticket page records what someone actually purchases. The two pages should agree closely enough that a buyer doesn't have to contact you to work out which one is right.
Your Facebook event launch checklist
The correct business Page appears as host, and the team has checked its management access.
The event format matches the tickets, including any separate in-person and online options.
The date, doors time, programme time, time zone and venue match the confirmed arrangements.
The map pin and arrival instructions lead customers to the correct entrance.
The description explains what admission includes, what costs extra and any important restrictions.
The cover remains readable in the previews you've checked, with a current date and price if shown.
The live ticket link opens the correct event on a phone, and the buying route has been tested.
Partners know which link to share, and a team member owns questions and later corrections.
The team knows how it will contact ticket holders if the arrangements change.
Campaign reporting distinguishes event responses, visits, orders and tickets sold.
Frequently asked questions
Does Facebook work for a younger audience?
Your own audience is the useful starting point. Check where recent customers found you, which channels lead to ticket-page visits, and which visits become orders. A broad age stereotype won't tell you whether Facebook works for a particular music scene, workshop topic or venue.
If you already use another channel successfully, share the same accurate event and ticket information there. You don't need to force every customer through Facebook before they buy. Let the event page help the people who use it, and keep a direct route to tickets for everyone else.
Should I create separate events for a multi-city tour?
Usually, a separate listing for each city and date is clearer when buyers have different venues or ticket inventories. Someone responding to a show in one city shouldn't have to sort through updates for every other stop to find their arrival details.
Use consistent naming and artwork so the series is recognizable, then check each ticket link separately. If several dates genuinely share a venue and admission structure, review the recurring-event options available to your Page. Choose the structure that makes the ticket being sold unambiguous, rather than the one that saves the most setup clicks.
Can I sell tickets directly on Facebook?
Check the ticket options available in your account and market before promising an in-Facebook purchase. For a straightforward external setup, add your live ticket URL in the available ticket field and description, then inspect what a customer sees after the event is published.
If you sell through Loopyah, the buyer completes the purchase through your Loopyah checkout. Facebook's Interested or Going button remains separate. Tell customers clearly that paid admission requires a ticket, and plan your capacity and entry process from the valid admissions in your ticketing records.
Check the buying experience before you promote
Start by making the listing accurate enough that someone can decide whether to buy without sending a message. Then test the complete route yourself, from a shared Facebook preview through checkout and the confirmation that follows.
Once it's live, use questions, visits and paid orders to decide what needs attention. You may need clearer admission details, a different partner announcement or a better explanation of the experience. Keep the event page current while the campaign runs, and make sure your confirmed buyers receive the information they need to attend.
For the wider decisions about your offer, distribution and sales campaign, read our guide to how to sell more tickets and apply the parts that match the problem you see in your own event's sales.
Start selling tickets with LoopyahFor background on how US adults use social media, see Pew Research Center (2024). For campaigns managed through Hootsuite, see its guidance on creating Facebook and Instagram ad campaigns.

Author: By the Loopyah Content Team
The Loopyah Content Team shares expert insights, practical guides, and industry updates to help event organizers create unforgettable experiences and stay ahead in the event planning world.